Car care & driving
How to Use a Jump Starter Booster to Start Your Engine in Freezing Weather
Autopapyrus
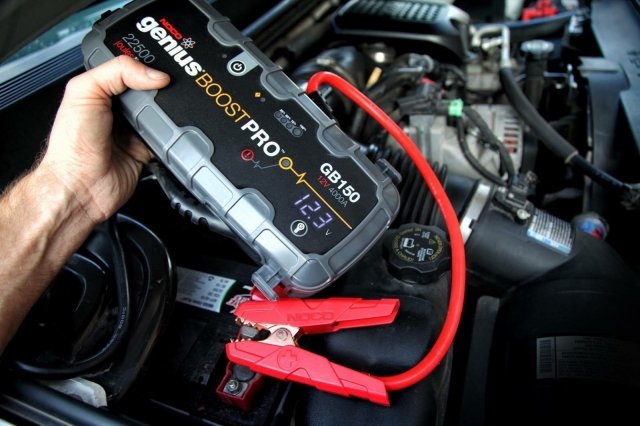
It's hard to surprise an experienced driver with a compact jump starter battery pack, and these units have become much cheaper lately. But there's a catch. Car battery terminals come in many shapes and sizes, so a jump starter doesn't always connect well to the battery, and the starter motor may fail to turn over. Let's look at the problem and make a small "upgrade" to the jump starter so it does its job properly.
Now imagine the jump starter is a cheap, no-name unit with just barely enough power. Add a car battery that's completely dead and a bitterly cold morning. On top of that, the already tiny contact area can be cut in half if the manufacturer didn't bother to connect the two jaws of the clamp electrically.
It's also very hard to attach the clamp to the battery terminals in a way that increases the contact area, because everything is full of sharp edges and angles. And the positive terminal is sometimes covered by a protective cap.
Next, buy a length of wire in two colors, black and red, about one meter (3 ft) of each. You won't need that much, but it's usually sold by the meter. The wire should have a cross-section of 6 mm² (about 10 AWG).
Now solder two pieces of this thick cable, one black and one red, each 20-30 cm (8-12 in) long, to the EC5 connector, matching the polarity marked on it. Fit bolt-type ring terminals on the free ends of the wires.
If you use ordinary nuts, it's easier to leave the cable under the hood, secured firmly with cable ties so it stays put.
You can also use wing nuts. Then you can keep the cable in the glove box or the trunk and attach it to the battery only when needed.
Either way, you now have a simple and reliable way to connect a jump starter to your car battery at any moment, without the awkward clamps that waste the very energy you need.
If you do the work carefully, this "upgrade" won't affect your car's electrical safety or its warranty. You aren't modifying the vehicle's electrical system, and you can still use the jump starter the old way (for example, to help start someone else's car) with its original clamps and cables. But now, connecting to your own car's battery will be faster and more effective, and the engine should start on the first try.
What's the problem?
Everyone knows a jump starter is a portable battery whose job is to deliver a starting charge to the starter motor. For that, the contact between the jump starter's clamp and the terminal of the car's battery has to be very solid. The trouble is that the clamp can't provide enough contact area. A car battery terminal offers 300-400 mm² (about 0.5-0.6 sq in), while the clamp touches it over only a few square millimeters. The current the portable battery can deliver simply can't get through such a small contact patch. Energy is lost at the contact point, and the crankshaft stays put, even though the jump starter holds enough charge for 3-4 starts.Now imagine the jump starter is a cheap, no-name unit with just barely enough power. Add a car battery that's completely dead and a bitterly cold morning. On top of that, the already tiny contact area can be cut in half if the manufacturer didn't bother to connect the two jaws of the clamp electrically.
It's also very hard to attach the clamp to the battery terminals in a way that increases the contact area, because everything is full of sharp edges and angles. And the positive terminal is sometimes covered by a protective cap.
What can you do?
We suggest building a simple and very useful accessory yourself. It lets your jump starter reliably start the engine no matter what kind of battery terminals your car has. It will get the most out of the jump starter and eliminate the energy loss caused by insufficient contact area.Let's get started!
Almost all jump starters on the market use the same EC5 power connector, which is where the clamp cable plugs in. If your portable battery has a different connector, the matching one is easy to buy separately, and it costs only a few dollars.Next, buy a length of wire in two colors, black and red, about one meter (3 ft) of each. You won't need that much, but it's usually sold by the meter. The wire should have a cross-section of 6 mm² (about 10 AWG).
Now solder two pieces of this thick cable, one black and one red, each 20-30 cm (8-12 in) long, to the EC5 connector, matching the polarity marked on it. Fit bolt-type ring terminals on the free ends of the wires.
This is what the finished cable should look like…
Using the ring terminals, bolt the cable you made to the car battery's terminals (and don't forget polarity!). The car's battery clamps usually have a pair of threaded studs for attaching accessories, typically M6 or M8.If you use ordinary nuts, it's easier to leave the cable under the hood, secured firmly with cable ties so it stays put.
You can also use wing nuts. Then you can keep the cable in the glove box or the trunk and attach it to the battery only when needed.
Either way, you now have a simple and reliable way to connect a jump starter to your car battery at any moment, without the awkward clamps that waste the very energy you need.
If you do the work carefully, this "upgrade" won't affect your car's electrical safety or its warranty. You aren't modifying the vehicle's electrical system, and you can still use the jump starter the old way (for example, to help start someone else's car) with its original clamps and cables. But now, connecting to your own car's battery will be faster and more effective, and the engine should start on the first try.
What next