Autopapyrus · FAW Vita 1.3 CA4GD1 (2007)
https://autopapyrus.com/catalog/faw/vita/guides/timing-belt-replacement/
https://autopapyrus.com/catalog/faw/vita/guides/timing-belt-replacement/
Compiled automatically from service literature and owner experience. Specs are for the typical configuration — check them against your exact car before you start.
FAW Vita 1.3 CA4GD1 (2007): Timing Belt Replacement
The 1.3 engine uses a belt-driven timing system. If the belt breaks, the valves bend, so replace the belt together with the pulley and water pump on schedule rather than after it fails. The approximate interval is 50-60 thousand km (factory belts often don't last even that long). The torque values below are approximate; check the exact figures against the manufacturer's specifications.
Key figures
- Crankshaft pulley bolt torque118 N·m (87 lb-ft), using a torque wrench in step 28; under-tightening is dangerous
- Camshaft pulley bolt59 N·m (44 lb-ft), step 17
- Tensioner pulley bolt37 N·m (27 lb-ft), step 24, after checking the marks
- Timing belt cover bolts7.8 N·m (69 lb-in), step 27; the covers are plastic, do not overtighten
- Spark plugs18 N·m (13 lb-ft), step 29
- Belt deflection5-6 mm at a force of about 20 N, step 25, tension check
Check these values against the manufacturer’s specification for your vehicle before you start.
Parts
9| № | Part | Alternatives |
|---|---|---|
| 01 | Timing belt for 1.3 engine (Toyota 8A-FE)Find on Amazon → | AlternativesGatesDaycoContitechINA |
| 02 | Timing belt tensioner pulley with springFind on Amazon → | AlternativesGatesDaycoContitechINA |
| 03 | Timing belt idler pulleyFind on Amazon → | AlternativesGatesDaycoContitechINA |
| 04 | Water pumpFind on Amazon → | |
| 05 | Water pump gasketFind on Amazon → | |
| 06 | Crankshaft oil sealFind on Amazon → | |
| 07 | Camshaft oil sealFind on Amazon → | |
| 08 | CoolantFind on Amazon → | |
| 09 | Accessory drive belt (alternator, power steering)Find on Amazon → | AlternativesGatesDaycoContitechINA |
Amazon links search by the part name; use Amazon's fit check for your car before ordering. We may earn a commission from qualifying purchases.
Tools
9- socket set and ratchet Amazon →
- long breaker bar Amazon →
- torque wrench (up to 120 N·m (89 lb-ft)) Amazon →
- hex or open-end wrench to hold the camshaft Amazon →
- crankshaft pulley puller (or two pry bars/screwdrivers for the timing sprocket) Amazon →
- marker or white paint Amazon →
- feeler gauge Amazon →
- coolant drain pan Amazon →
- jack stands Amazon →
Step by step
33 steps · 6 stagesStage 1 of 6 Preparation 4 steps
- Park the car on level ground, apply the parking brake, and place wheel chocks under the rear wheels. The engine must be cold.
- Disconnect the negative battery terminal.
- Drain the coolant if you are replacing the water pump (it sits behind the timing belt). Place a drain pan under the radiator and open the drain valve.
- Raise the front right wheel, remove it, and remove the engine undercover to reach the crankshaft pulley.
Stage 2 of 6 Access to the belt 7 steps
- Remove the accessory drive belt and the water pump pulley.
- Remove the spark plugs. This makes the engine easier to turn by hand.
- Remove the valve cover if you need to see the camshaft marks (on this engine family, the pulley mark is aligned with the mark on the camshaft bearing cap).
- Set cylinder No. 1 to TDC on the compression stroke: turn the crankshaft clockwise until the notch on the crankshaft pulley lines up with the "0" mark on the lower timing cover, and the hole (mark) on the camshaft pulley lines up with the mark on the bearing cap. If they don't line up, turn the engine one more full revolution (360°).
- Lock the crankshaft and remove the crankshaft pulley bolt (use a long breaker bar and socket; hold the crankshaft from turning with a special holding tool or a stopper through the clutch housing opening). Remove the pulley, using a puller if necessary.
- Remove the 9 bolts, then remove the wiring harness bracket and the timing belt covers.
- Remove the belt guide plate (the retaining washer on the crankshaft nose).
Stage 3 of 6 Removal 5 steps
- If you will reuse the belt, draw an arrow on it showing the direction of rotation and make marks on the belt and pulleys. This step is not needed for a new belt.
- Remove the tensioner pulley bolt, then remove the pulley and the tensioner spring. Remove the old belt.
- Remove the crankshaft timing sprocket (if it doesn't come off by hand, use two screwdrivers over a rag so you don't damage the block).
- Inspect the pulleys and covers for oil traces (a leaking seal means you should replace it now), tooth wear, and play in the pulley. Always replace the water pump: it often develops play.
- Water pump replacement: unscrew the pump fasteners, remove the pump, clean the mating surface, and install the new pump with a new gasket. Tighten the bolts in a crisscross pattern (torque per specification, usually low, 8-20 N·m (6-15 lb-ft)).
Stage 4 of 6 Installation 9 steps
- If you removed the camshaft pulley: place it on the dowel pin while holding the camshaft with a wrench on the hex, and tighten the bolt to 59 N·m (44 lb-ft). Do not use belt tension to hold the pulley.
- Install the crankshaft timing sprocket with the key in the keyway. Check that its mark lines up with the mark on the oil pump housing.
- Check the tensioner spring: free length is about 38.4 mm; at a length of 50.2 mm the force is about 35-39 N (3.6-4.0 kgf). If it doesn't match, replace it.
- Temporarily install the pulley with its bolt (do not tighten), fit the spring, push the pulley all the way to the left (away from the belt), and tighten the bolt.
- Fit the belt onto the pulleys, following the marks and the direction arrow (for a new belt, align the marks on the crankshaft and camshaft pulleys). Start with the crankshaft, then the idler pulley and the camshaft pulley.
- Loosen the tensioner pulley bolt. The spring will tension the belt by itself.
- Temporarily install the crankshaft pulley bolt and turn the crankshaft clockwise two full revolutions to TDC. Make sure the pulley marks line up again.
- Tighten the tensioner pulley bolt to 37 N·m (27 lb-ft). Remove the temporary crankshaft bolt.
- Check belt deflection on the span between the pulleys: 5-6 mm at a force of about 20 N (2 kg). If it's off, loosen the pulley again and adjust its position.
Stage 5 of 6 Reassembly 6 steps
- Install the belt guide plate with the cup side facing outward.
- Install the timing belt covers: the lower cover with three bolts, the upper and middle covers with six bolts, along with the harness bracket; torque 7.8 N·m (69 lb-in).
- Install the crankshaft pulley on the key, lock the crankshaft, and tighten the bolt to 118 N·m (87 lb-ft).
- Install the valve cover with a new gasket, the spark plugs (torque 18 N·m (13 lb-ft)), the water pump pulley, and the accessory drive belt, and adjust its tension.
- Refill with coolant and bleed the system to remove air pockets (run the engine warm with the expansion tank cap open, topping up as needed).
- Reconnect the battery, install the undercover and the wheel, and tighten the wheel bolts to specification.
Stage 6 of 6 Check 2 steps
- Start the engine, let it run, and check for leaks and unusual noises (squealing or clicking from the belt).
- After 100-200 km, check the coolant level and the condition of the drive belt.
Common mistakes and warnings
- This is a critical job: if the timing marks or belt tension are wrong, the valves will bend
- If you have no experience working on timing systems, leave it to a repair shop
- Do not turn the crankshaft counterclockwise, keep oil and coolant off the belt, and do not bend or kink the belt
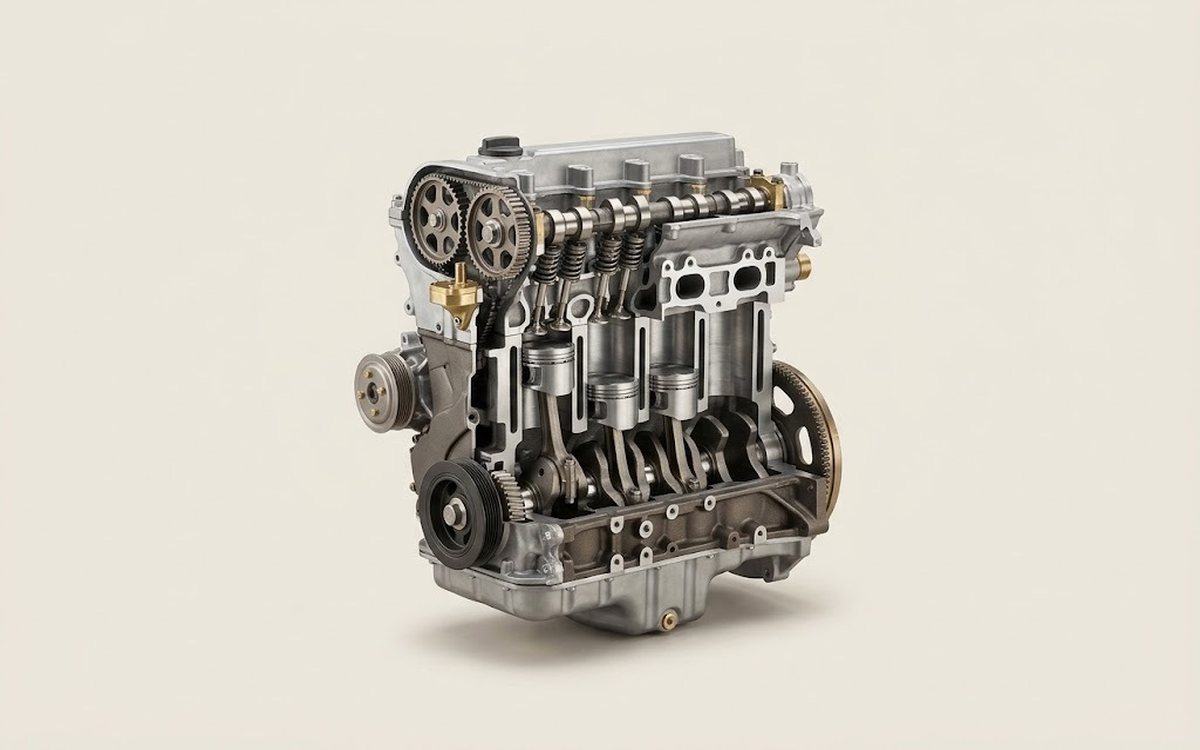 How it works · 3D
How a Car Engine Works
How the part you're working on actually works — in plain English, on a 3D model.
Open in 3D →