Autopapyrus · Lifan Solano II (Solano 620) 1.8 (2016)
https://autopapyrus.com/catalog/lifan/solano/guides/manual-transmission-diagnosis-and-repair/
https://autopapyrus.com/catalog/lifan/solano/guides/manual-transmission-diagnosis-and-repair/
Compiled automatically from service literature and owner experience. Specs are for the typical configuration — check them against your exact car before you start.
Lifan Solano II (Solano 620) 1.8 (2016): Manual Transmission Removal and Repair
The Lifan Solano II five-speed manual transmission is removed downward and to the side together with the axle shafts. It is most often disassembled because of bearing whine, grinding when shifting gears, leaking axle shaft seals and input shaft seal, or worn synchronizers. The torque values below are approximate, so check the exact values against the manufacturer's specifications. If the clutch disc is obviously worn along the way, replace it during the same job. This guide covers the manual transmission only; an automatic transmission and a CVT are designed differently.
Diagram: clutch disc seen from the gearbox side and which way it faces
Tap to enlarge
- 1Rivet: it holds the linings to the steel disc. Check that it has not loosened.
- 2Friction lining on the rim of the disc. If it is worn, replace the disc together with the pressure plate and release bearing.
- 3Retaining plate around the hub: a landmark when inspecting the disc.
- 4Hub splines: the gearbox input shaft goes onto them. Lightly coat them with heat-resistant spline grease.
- 5Hub protrusion: install the disc so it faces the gearbox. In the side view the protrusion runs from the flywheel toward the gearbox. Wrong installation causes crunching and damages the disc.
- 6Damper spring in the arc-shaped window of the disc: check it when inspecting the disc.
Parts
9| № | Part |
|---|---|
| 01 | Transmission shaft bearing setFind on Amazon → |
| 02 | Input shaft sealFind on Amazon → |
| 03 | Axle shaft sealsleft and rightFind on Amazon → |
| 04 | Shift rod seal with shift lever bootFind on Amazon → |
| 05 | Clutch kit (pressure plate, clutch disc, release bearing)Find on Amazon → |
| 06 | Transmission oil 75W-90 GL-4Find on Amazon → |
| 07 | Snap ringsFind on Amazon → |
| 08 | Synchronizer kitsif synchronizers are wornFind on Amazon → |
| 09 | Transmission gearsif worn, as determined by inspectionFind on Amazon → |
Amazon links search by the part name; use Amazon's fit check for your car before ordering. We may earn a commission from qualifying purchases.
Tools
13- Lift or pit with an engine support Amazon →
- transmission jack or transmission stand Amazon →
- socket and wrench set 10-19 mm and 22 mm Amazon →
- spline and socket bits for protection Amazon →
- pry bar Amazon →
- snap ring puller Amazon →
- bearing puller Amazon →
- press or bearing drivers Amazon →
- torque wrench Amazon →
- clutch disc alignment tool Amazon →
- fluid pump syringe for filling oil Amazon →
- sealant for the transmission mating surfaces Amazon →
- drain pan Amazon →
Step by step
41 steps · 6 stagesStage 1 of 6 Diagnosis and preparation 5 steps
- Identify the symptom: whine in neutral that goes away with the clutch pedal pressed means input shaft bearings; whine while driving that changes with the gear means output shaft bearings or gears; grinding when shifting means synchronizers or a clutch that is not fully disengaging; oil traces on the axle shafts mean seals.
- Check the simple causes before removal: the level and condition of the oil (metal shavings, metal dust on the plug), clutch pedal free play, the clutch master and slave cylinders, and the shift linkage rod and bushings.
- Put the car on a lift or over a pit, select neutral, and disconnect the negative battery terminal.
- Remove the skid plate (if fitted) and drain the transmission oil through the drain hole. Reinstall the plug after draining.
- Prepare a work area and containers: sort the transmission and bracket bolts by length and location, and photograph connectors and cables.
Stage 2 of 6 Removing the transmission from the car 12 steps
- Remove the battery and its tray, and the air filter with its ducts, if they block access to the upper transmission bolts.
- Disconnect the wires from the reverse light switch and other sensors on the transmission, release the connector locks, and free the harness from the clips.
- Disconnect the shift cables or rods from the levers on the transmission; note the position of the adjusting parts.
- Disconnect the hose and the clutch slave cylinder from the transmission: the slave cylinder can be removed by its two bolts and moved aside without opening the hydraulic system. If the cylinder cannot be removed without opening the system, plug the hose and bleed the clutch after assembly.
- Disconnect the speedometer cable or the speed sensor connector, if fitted.
- Remove the starter (two or three bolts) and move it aside together with its wires.
- Remove the front wheels, then unbolt the ball joints or tie rod ends and the sway bar links on both sides so the axle shafts can be pulled out. Pull the inner joints of the axle shafts out of the transmission (pry with a pry bar without damaging the seal) and tie the axle shafts up with wire.
- Remove the exhaust pipe if it runs near the transmission and blocks lowering.
- Support the engine from below with a jack and a wooden block under the oil pan, and unbolt the side engine mount or transmission mount (transmission cushion) on the transmission side.
- Support the transmission with a stand or transmission jack.
- Unbolt the transmission-to-engine bolts (around the perimeter of the bell housing; they are of different lengths, so remember their locations) and the transmission mount and rear mount fasteners.
- Move the transmission back until the input shaft clears the clutch disc splines, without letting it hang on the input shaft. Then carefully lower it and pull it out from under the car.
Stage 3 of 6 Disassembling the transmission 8 steps
- Clean the transmission on the outside, remove the clutch fork and release bearing from the guide sleeve, and inspect them.
- Remove the filler plug and remove the shift mechanism (the shifter with its lever); the transmission must be in neutral.
- Remove all the bolts around the perimeter of the rear half of the case and the reverse mechanism bolt; pry the case half off with a screwdriver or pry bar only at the designated places and remove it.
- Remove the reverse mechanism together with its shaft and gear.
- Remove the shift forks and rods, then the shafts (input and output) together as a single assembly, noting the position of each part.
- Disassemble the shafts on a clean bench, laying out the parts in the order of removal; remove the snap rings with a puller, and remove the synchronizers and gears without cocking them.
- Inspect for: tooth wear, chips on the synchronizer rings, wear of the synchronizer cone rings, gear play on the shaft, bearing condition (play, binding, pitting), and the condition of the differential.
- Replace all shaft and differential bearings, the input shaft seal, the axle shaft seals, the shift rod seal and the shift lever boot. Press old races out with a puller and press new ones in with a driver on the outer ring, without hitting the rolling elements.
Stage 4 of 6 Reassembling the transmission 5 steps
- Assemble the shafts in reverse order, lubricating the parts with transmission oil; use new snap rings where they were damaged during removal.
- Install the shaft assembly into the front half of the case, then the forks, rod and reverse mechanism.
- Apply a thin layer of sealant to the mating surfaces, join the case halves, and tighten the perimeter bolts in a crisscross pattern. The torque for the transmission case bolts is usually 20-30 N·m (15-22 lb-ft) (check the exact value against the manufacturer's specifications).
- Install the shift mechanism and check that all gears engage and the shafts turn by hand without binding.
- Press in the new axle shaft seals; if desired, apply a thin layer of sealant to the seating surface for better retention.
Stage 5 of 6 Clutch and transmission installation 6 steps
- Inspect the pressure plate, clutch disc and release bearing, and replace them if worn. The disc is installed with the protruding part of the hub facing the transmission; incorrect installation causes grinding and damages the disc.
- Center the disc with an alignment tool (or an old input shaft) and tighten the pressure plate bolts in a crisscross pattern. The clutch pressure plate bolt torque is 20-30 N·m (15-22 lb-ft) (per the manufacturer's specifications). Lightly lubricate the input shaft splines with high-temperature spline grease.
- Put the transmission back in place: raise it, align the dowels, and push it forward without letting it rest on the input shaft. Install the bell housing bolts and the mount bolts and tighten them with a torque wrench. Approximate values: bell housing bolts 40-70 N·m (30-52 lb-ft), transmission mount fasteners 40-80 N·m (30-59 lb-ft) (per the manufacturer's specifications).
- Install the starter, the clutch slave cylinder, the shift cables or rods, the wires and sensors, the exhaust, and the battery.
- Insert the axle shafts into the transmission until the snap rings click into place, then connect the ball joints, tie rod ends and sway bar links. Tighten the ball joint nuts to specification (guideline 50-90 N·m (37-66 lb-ft)).
- Install the wheels and tighten the lug nuts in a star (diagonal) pattern: guideline 100-120 N·m (74-89 lb-ft) (per the manufacturer's specifications).
Stage 6 of 6 Filling with oil and testing 5 steps
- Fill with 75W-90 GL-4 transmission oil using a syringe through the filler hole up to the lower edge of the hole; the transmission capacity is approximately 2-2.6 L (2.1-2.7 qt), so go by the level, not by the number. Tighten the plugs (guideline 25-40 N·m (18-30 lb-ft)).
- If the clutch hydraulics were opened, bleed them with DOT 4 brake fluid until the bubbles disappear, and check the pedal travel.
- Start the engine in neutral and listen for transmission noise, then, with the clutch pressed, engage all gears one after another, including reverse.
- Take a test drive of 10-15 km (6-9 miles): listen for whine and grinding, and check that the clutch works without slipping or jerking.
- After the drive, inspect the axle shaft seals and the input shaft seal for leaks, and top up the oil if necessary.
Common mistakes and warnings
- Working under a raised car with a supported engine is dangerous: secure the car on jack stands, and never work under a jack alone
- If you have no experience disassembling transmissions and supporting an engine, it is better to leave removal and disassembly to a repair shop
- A torque wrench is mandatory when tightening suspension, ball joint and wheel fasteners: your safety depends on them
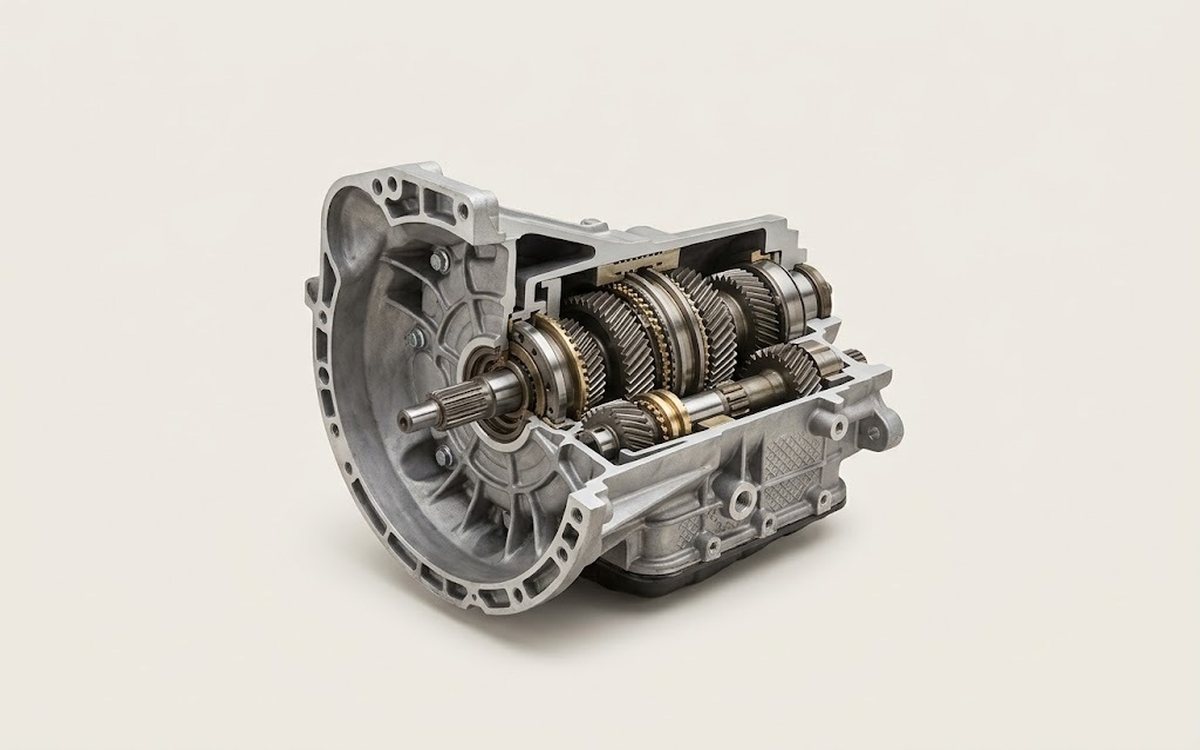 How it works · 3D
How a Manual Transmission Works
How the part you're working on actually works — in plain English, on a 3D model.
Open in 3D →