Autopapyrus · Nissan AD GA13DS/GA15DS (1997)
https://autopapyrus.com/catalog/nissan/ad/guides/manual-transmission-input-shaft-seal-replacement/
https://autopapyrus.com/catalog/nissan/ad/guides/manual-transmission-input-shaft-seal-replacement/
Compiled automatically from service literature and owner experience. Specs are for the typical configuration — check them against your exact car before you start.
Nissan AD GA13DS/GA15DS (1997): Manual Transmission Input Shaft Seal Replacement
The input shaft seal sits in the clutch housing or cover. A leak shows up as oil inside the bell housing and on the clutch disc, and the clutch may slip as a result. The seal can only be replaced with the transmission removed. This guide covers the front-wheel-drive AD with the five-speed manual; the procedure is different on the automatic. The torque values below are approximate, so check exact figures against the manufacturer's specification.
Diagram: where the input shaft seal sits in the bell housing and what comes off first
Tap to enlarge
- 1Clutch bell: the gearbox housing we look into with the box removed. Wipe the oil out.
- 2Release fork: curved lever around the bearing. Remove it together with the bearing.
- 3Release bearing: large ring over the seat. Remove it to reach the seal; fit a new one and lightly grease fork and bushing.
- 4Input shaft splines: inspect and lightly grease, do not overdo it.
- 5Input shaft seal: narrow ring around the shaft inside the seat. Pry it out with a hook, press the new one in straight with a drift.
- 6Drive shaft opening: the drive goes here. Plug it with a rag; replace drive seals too if leaking.
Parts
6| № | Part | Alternatives |
|---|---|---|
| 01 | Transmission input shaft sealFind on Amazon → | |
| 02 | Clutch release bearingFind on Amazon → | |
| 03 | Manual transmission fluid, 75W-90 GL-4Find on Amazon → | |
| 04 | Axle (drive shaft) sealsFind on Amazon → | AlternativesNOKCortecoNissan |
| 05 | Gasket or sealant for drain and fill plugsFind on Amazon → | |
| 06 | Input shaft spline greaseFind on Amazon → |
Amazon links search by the part name; use Amazon's fit check for your car before ordering. We may earn a commission from qualifying purchases.
Tools
10- Lift or inspection pit with reliable supports Amazon →
- transmission jack or engine support bar Amazon →
- socket and wrench set 10-19 mm Amazon →
- torque wrench Amazon →
- ball joint separator or pry bar Amazon →
- seal puller hook Amazon →
- seal driver sized to the seal bore Amazon →
- soft-face hammer Amazon →
- oil drain pan Amazon →
- spline grease Amazon →
Step by step
33 steps · 5 stagesStage 1 of 5 Preparation 6 steps
- Make sure the leak is really coming from the input shaft seal: oil in the bell housing, on the clutch cover and on the clutch disc, rather than from the rear main seal or the axle seals. Oil traces along the bottom of the bell housing and clutch slipping confirm the diagnosis.
- Park the car on level ground, set the parking brake, and loosen the front wheel nuts.
- Disconnect the negative battery terminal.
- Remove the air filter with its ducts and housing. You need clear access to the top of the transmission.
- Disconnect the shift and select cables or linkage, the fork with its lever, the reverse light switch connector, the clutch cable or hydraulic slave cylinder, and the speedometer cable or speed sensor connector. Note where the linkage goes or take photos.
- Disconnect the ground strap from the transmission and the starter wires, then remove the starter (bolts are usually 10-19 mm).
Stage 2 of 5 Transmission removal 8 steps
- Raise the car and remove the front wheels. Remove the engine undercover (skid plate), if fitted.
- Drain the transmission oil: remove the drain plug, let the oil drain out, then reinstall the plug.
- Disconnect the lower control arms from the steering knuckles (ball joint bolts) and pull the axles out of the transmission. Keep the CV boots intact; tie the axles up with wire and do not let them hang from the CV joint. Plug the openings in the transmission with plugs or a rag.
- Remove the exhaust pipe or front pipe in the area where it interferes with lowering the transmission, if it is in the way.
- Support the engine from above with a support bar or crossbar so it does not sag.
- Support the transmission with a transmission jack.
- Remove the left transmission mount (bracket and bushing) and unbolt the clutch housing from the engine. Mark the position of bolts of different lengths.
- Move the transmission back along the input shaft axis without loading the splines, then lower it down. Make sure the shaft does not catch on the clutch cover.
Stage 3 of 5 Seal replacement 8 steps
- Wipe the oil out of the bell housing. Remove the release fork and release bearing together with the guide sleeve, if it comes off.
- Inspect the input shaft: the splines and the seal journal. The seal's contact surface must be smooth, with no wear grooves or rust.
- Pry out the old seal with a hook or a thin-tipped screwdriver, taking care not to damage the seat. Note the seal's position and installation depth.
- Clean the seat of dirt and burrs and wipe it dry.
- Lubricate the sealing lip of the new seal with transmission oil. If specified for your model, apply a thin layer of sealant to the outer surface (optional). Drive the seal in evenly with the driver, without tilting, until it bottoms out or reaches the depth of the old seal.
- Install the new release bearing. Apply a thin layer of grease to the guide sleeve and fork, and a thin layer of spline grease to the input shaft splines (do not overdo it).
- If the axle seals in the transmission are also leaking, replace them now using the same driver.
- Inspect the clutch. Replace the pressure plate and disc if they are oily, worn, cracked or overheated. Oil cannot be washed out of the disc, so replace the disc if it is oil-soaked.
Stage 4 of 5 Transmission installation 7 steps
- Align the input shaft with the clutch disc splines. Bring the transmission in straight along the axis without tilting. The shaft must not push against the pressure plate and must not hang on the disc, or you will damage the splines.
- Check that it seats on the dowel pins, then tighten the clutch housing-to-engine bolts with a torque wrench. Torque is per specification; as a guide, 40-70 N·m (30-52 lb-ft). Put bolts of different lengths back in their original positions.
- Reinstall the left transmission mount with its bushing. Mount torque is per the manufacturer's specification; as a guide, 40-80 N·m (30-59 lb-ft).
- Install the starter, then connect the wires and the ground strap.
- Insert the axles into the transmission until they lock in with the retaining ring, and connect the control arms to the knuckles. Tighten the ball joints per specification; as a guide, 50-90 N·m (37-66 lb-ft). Install new cotter pins if needed, and replace any damaged retaining rings and cotter pins.
- Reinstall the clutch cable or hydraulics, shift linkage, connectors, speed sensor and exhaust pipe.
- Fill the transmission with oil to the lower edge of the fill hole. Capacity is per the manufacturer's specification for this transmission; as a guide, 2.5-3.5 L (2.6-3.7 qt). Determine the exact level by the fill hole.
Stage 5 of 5 Checking 4 steps
- Install the wheels and, after lowering the car to the ground, tighten the wheel nuts in a crisscross pattern. Wheel nut torque is per the manufacturer's specification; as a guide, 100-120 N·m (74-89 lb-ft).
- Reconnect the battery and the air filter. Check the clutch pedal for free play and full travel, and adjust the cable or bleed the hydraulic system if necessary.
- Start the engine and, in neutral, listen to the transmission and release bearing. Shift through all gears with the clutch pedal pressed and check for smooth operation.
- Take a test drive of 10-15 km. Check for oil leaks around the bell housing, plugs and axles, and top up the oil to the proper level if necessary.
Common mistakes and warnings
- Working under a raised car with the transmission removed is dangerous: use reliable stands, not just a jack, and secure the engine with a support bar
- If you lack experience, have a repair shop remove and install the transmission
- Do not let oil get on the clutch disc and pressure plate, or the clutch will slip
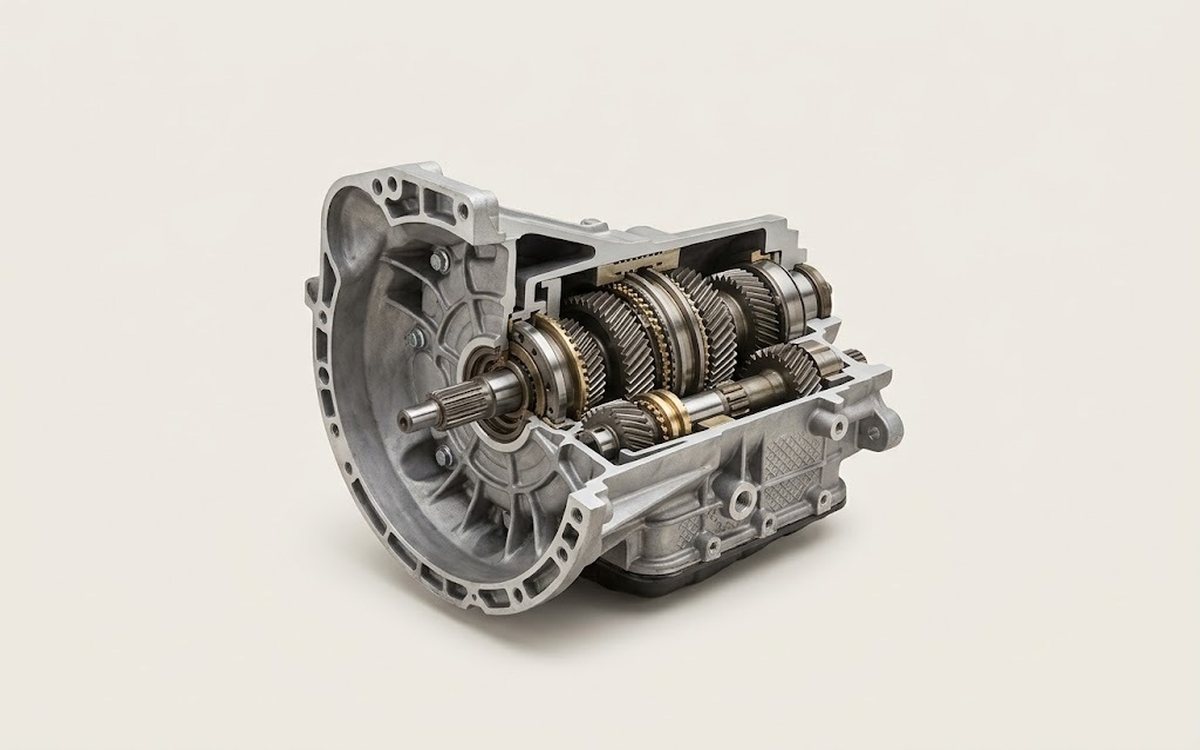 How it works · 3D
How a Manual Transmission Works
How the part you're working on actually works — in plain English, on a 3D model.
Open in 3D →
Spotted a mistake? Tell us →
Our articles
 Brand stories
The History of Nissan
Over the course of 80 years, this Japanese automaker has come a long way and risen to become a leader of the global…
Read →
 Garage
Fuel Quality Indicators: What Octane and Cetane Numbers Mean
What is an octane number? What about a cetane number? Which fuel should you choose for a high-compression engine?…
Read →
 Before you buy
How to Pick Up Your Car from the Dealership the Right Way
If you've decided to buy a car from a dealership, it isn't enough to simply choose a model you like, pay for it, and…
Read →