Autopapyrus · Renault Logan II (2013)
https://autopapyrus.com/catalog/renault/logan/guides/clutch-kit-replacement/
https://autopapyrus.com/catalog/renault/logan/guides/clutch-kit-replacement/
Compiled automatically from service literature and owner experience. Specs are for the typical configuration — check them against your exact car before you start.
Renault Logan II (2013): Clutch Replacement
On the Logan II, the clutch can only be replaced with the transmission removed. On vehicles of this generation, the clutch release system is either cable-operated or hydraulic, so check which one your car has (steps 9 and 38). Replace the clutch as a kit: disc, cover and release bearing. Signs of wear: slipping, a disc that "drags," and vibration and noise when you press the pedal. This is heavy work and requires a lift. This guide covers the manual transmission.
Key figures
- Clutch cover bolt torque23 N·m (17 lb-ft), with a torque wrench, evenly in a crisscross pattern (step 25)
- Transmission-to-engine bolt and nut torque44 N·m (32 lb-ft) (step 30)
- Flywheel housing cover bolt torque44 N·m (32 lb-ft) (step 31)
Check these values against the manufacturer’s specification for your vehicle before you start.
Diagram: where the clutch cover bolts are on the flywheel
Tap to enlarge
- 1Six cover bolts sit on the ears of the cover flange. Loosen them crosswise, one turn at a time; on assembly tighten evenly to 23 Nm.
- 2Clutch cover: a stamped steel housing with the pressure plate inside. It comes off together with the driven disc and is replaced as a kit.
- 3Engine flywheel: the cover is pressed against it. Inspect it: deep scoring, heat discoloration and cracks are not acceptable.
- 4Diaphragm fingers of the cover: the release bearing pushes on them when the pedal is pressed.
- 5Splines of the driven disc hub: the gearbox shaft slides into them. The disc must slide freely; do not apply grease to the hub splines.
Parts
5| № | Part | Alternatives |
|---|---|---|
| 01 | Clutch kit (driven disc, clutch cover with pressure plate, release bearing)disc must match the old one in diameter and spline countFind on Amazon → | AlternativesLuKSachsValeo |
| 02 | Outer driveshaft (differential) seal for transmissionFind on Amazon → | |
| 03 | Manual transmission oilFind on Amazon → | |
| 04 | Power steering fluidfor topping upFind on Amazon → | |
| 05 | DOT 4 brake fluidfor hydraulic clutch actuatorFind on Amazon → |
Amazon links search by the part name; use Amazon's fit check for your car before ordering. We may earn a commission from qualifying purchases.
Tools
11- vehicle lift (or pit with an engine support) Amazon →
- socket set and ratchet Amazon →
- torque wrench Amazon →
- wrenches Amazon →
- transmission jack Amazon →
- engine support bar or holder Amazon →
- flywheel locking tool (or a pry bar) Amazon →
- clutch alignment tool Amazon →
- seal puller/driver Amazon →
- containers for transmission oil and coolant Amazon →
- plugs for the power steering hoses Amazon →
 There's a full repair manual for this car
Every system, wiring diagrams and torque specs — not just this job. Haynes AutoFix (online).
See manuals →
Step by step
42 steps · 6 stagesStage 1 of 6 Preparation 5 steps
- Raise the car on a two-post lift (or over a pit with solid supports). Disconnect the battery.
- Remove the engine undercover, both front wheels and the front left fender liner.
- Remove the front bumper, the battery and the air filter housing. Without this you can't reach the upper transmission bolts.
- Drain the transmission oil into a container. Tighten the drain plug back to the specification.
- Release the wiring harnesses from their brackets and move them aside so they aren't damaged when the transmission is lowered.
Stage 2 of 6 Disconnecting the transmission 11 steps
- Remove the shift lever boot and loosen the selector rod bolt. There is a spacer under the bolt, so don't lose it.
- Disconnect the reverse light switch connector and its wiring bracket.
- Remove the harness bracket and the coolant pipe bracket, disconnect the breather hose, and remove the crankshaft position sensor.
- If the clutch is cable-operated, remove the clutch cable from the fork and bracket. If it is hydraulic, unbolt the slave cylinder. Don't disconnect the line unless you need to.
- Move the connecting hose and the ground strap on the transmission aside, and remove the wire from its holder on the transmission.
- Loosen the steering column universal joint bolt. Disconnect the high-pressure and low-pressure power steering hoses and plug them.
- Remove both driveshafts, the lower engine torque rod and the front subframe. When reassembling, tighten the hub nuts and fasteners to the manufacturer's specification.
- Remove the starter.
- Install an engine support. The factory procedure uses the Mot. 1453 bar with a screw bracket. Remove the left engine mount and carefully lower the engine on the screw support.
- Loosen the upper transmission bolts, the lower bolt and the flywheel housing bolts, then remove the flywheel housing cover.
- Place a transmission jack under the transmission, remove the nuts and bolts securing it to the engine, pull the transmission back until the shaft clears the disc hub, and lower it. Don't let the transmission hang on the input shaft.
Stage 3 of 6 Removing the clutch 5 steps
- Remove the release bearing and the release fork from the transmission. Pull out the outer differential driveshaft seal.
- If you will reuse the clutch cover (not recommended), mark the cover and the flywheel with paint.
- Lock the flywheel with a screwdriver or a locking tool. Loosen the six cover bolts in a crisscross pattern, one turn at a time, evenly.
- Remove the cover and the driven disc, supporting the disc by hand.
- Inspect the flywheel. Deep scoring, heat discoloration and cracks are not acceptable, and in that case the flywheel must be resurfaced or replaced. Check the crankshaft seal and the transmission input shaft seal: oil traces on the old disc mean there is a leak.
Stage 4 of 6 Installing the new clutch 5 steps
- Wipe the working surfaces of the flywheel and pressure plate to remove the protective coating, then degrease them.
- Check that the new disc slides freely on the splines of the transmission input shaft. According to factory instructions, the shaft splines should not be greased, and you shouldn't apply grease to the disc hub splines. If you use spline grease on the clutch kit manufacturer's recommendation, apply only the thinnest layer.
- Place the disc on the alignment tool. The protruding side of the hub faces the clutch cover (pressure plate). Follow the marking on the disc.
- Fit the cover onto the dowel pins and tighten the six bolts evenly, one turn at a time, in a crisscross pattern. The factory manual specifies 23 N·m (17 lb-ft) for the cover bolts. Some sources for early Logans give a lower value (about 12 N·m (9 lb-ft)), so go by the markings and the requirements of the kit manufacturer.
- Remove the alignment tool.
Stage 5 of 6 Installing the transmission 10 steps
- Make sure the locating dowels on the engine block and in the transmission housing are in place.
- Install the new release bearing and fork on the transmission and fit the new outer differential driveshaft seal. Don't grease the input shaft.
- Raise the transmission with the jack, align the input shaft with the disc hub (without force; if needed, turn the shaft slightly with a gear engaged) and bring it up to the engine.
- Tighten the bolts and nuts securing the transmission to the engine to 44 N·m (32 lb-ft).
- Install the flywheel housing cover and tighten its bolts to 44 N·m (32 lb-ft). Tighten the ground strap bolt to 44 N·m (32 lb-ft).
- Install the left engine mount and remove the engine support.
- Install the starter, subframe, lower torque rod and driveshafts. Tighten the subframe, mounts, hub nuts and wheel bolts to the manufacturer's specification for your trim.
- Reconnect the steering column universal joint, the power steering hoses, the connectors and wires (reverse light, crankshaft sensor), the brackets and the hoses.
- Install the selector rod with the spacer, and the boot.
- Install the clutch cable on the fork (or the slave cylinder, if hydraulic). On a cable-operated clutch, adjust the length of the threaded part of the cable so the pedal has a small amount of free play and the clutch disengages and engages fully.
Stage 6 of 6 Finishing and testing 6 steps
- Install the air filter, battery, bumper, fender liner, engine undercover and wheels. Tighten the wheel bolts with a torque wrench to the manufacturer's specification.
- Fill the transmission with oil. With a hydraulic clutch, bleed the clutch the same way as brakes until there is no air in the system.
- Top up and bleed the power steering circuit, and check the coolant level.
- Start the engine, press the clutch several times while stationary and engage all the gears. Shifting should be crisp, with no noise or grinding.
- Take a test drive. Check that the clutch doesn't slip in a high gear under load and that there is no vibration when pulling away. Inspect the connections for oil and power steering fluid leaks.
- For the first 500-1000 km, go easy on the new clutch: don't spin the wheels or pull away at high rpm.
Common mistakes and warnings
- This work is difficult and dangerous
- The transmission is heavy and the engine is lowered on a support, so use a lift in good condition and proper safety supports
- Disconnect the battery before starting
- Don't rely on a jack alone, and never stand under a suspended engine or transmission
- The driveshafts, steering and subframe are safety-critical, so if you lack experience, leave the job to a repair shop
- Don't apply too much grease to the splines of the input shaft and the disc hub, and keep oil off the disc linings
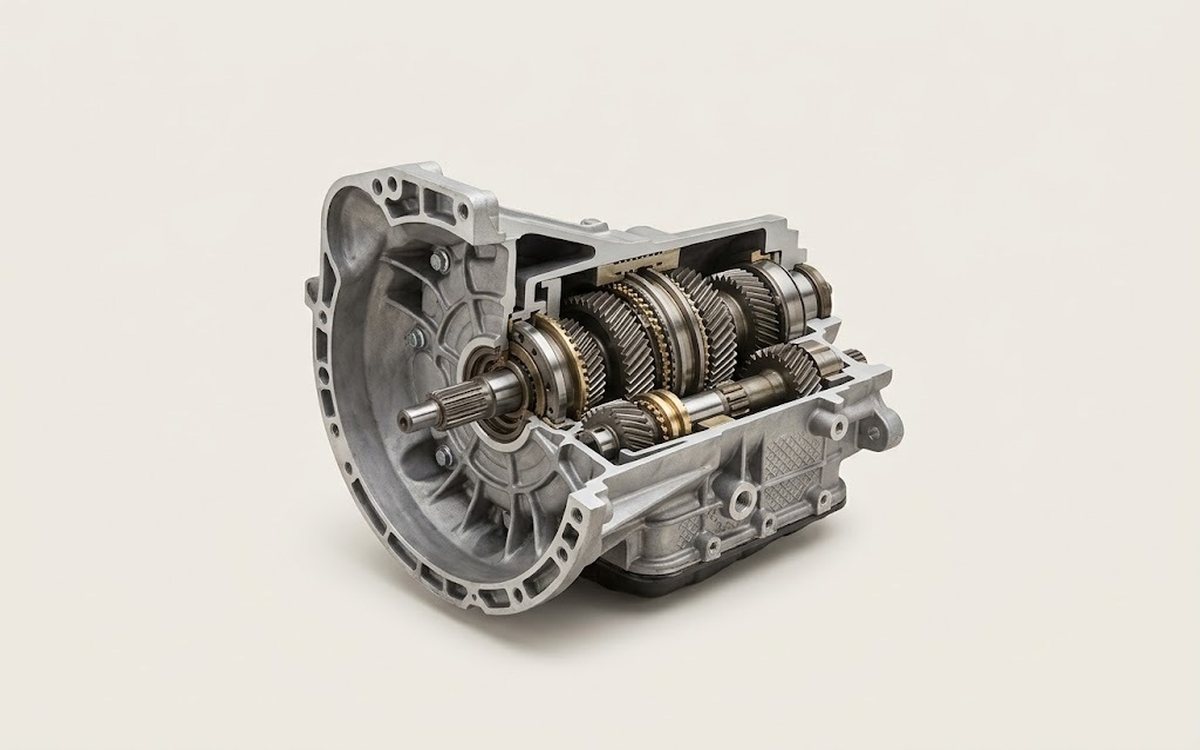 How it works · 3D
How a Manual Transmission Works
How the part you're working on actually works — in plain English, on a 3D model.
Open in 3D →
Spotted a mistake? Tell us →
Our articles
 Brand stories
The History of Renault
Louis Renault (1877–1944) was interested in electricity and mechanics from an early age, and he was destined to become…
Read →
 Garage
Fuel Quality Indicators: What Octane and Cetane Numbers Mean
What is an octane number? What about a cetane number? Which fuel should you choose for a high-compression engine?…
Read →
 Before you buy
How to Pick Up Your Car from the Dealership the Right Way
If you've decided to buy a car from a dealership, it isn't enough to simply choose a model you like, pay for it, and…
Read →