https://autopapyrus.com/catalog/ssangyong/actyon/guides/timing-chain-replacement/
SsangYong Actyon 2.0 G20D (2013): Timing Chain Replacement
On the G20D, the timing chain is at the front, under the cover and the front plate, so the job requires removing the oil pan, the pulley and the front cover. According to owner reports, it takes about 10 hours. The weak points of the drive are worn sprockets, tensioner failure and a broken oil pump chain. For this reason, the tensioner, guide shoes and oil pump chain are replaced together with the timing chain. The torque values below are approximate; verify the exact values against the manufacturer's specifications.
Key figures
- Engine oil capacityfill this amount after the chain replacement (step 33)about 5 L (5.3 qt) of 5W-30
Check these values against the manufacturer’s specification for your vehicle before you start.
Diagram: where the oil pump drive chain is after the front cover is removed
- 1Oil pump drive chain: remove it together with the sprocket and shoe. Always replace it together with the timing chain.
- 2Oil pump chain shoe: it lies against the right run of the chain and is held by one bolt. Fit a new one.
- 3Oil pump sprocket: comes off together with the chain. After removal check the pump and the pickup screen.
- 4Crankshaft sprocket: the upper, smaller one. The marks on the new timing chain must line up with the marks on the sprockets.
- 5Crankshaft pulley: lock the crankshaft, undo the bolt and pull the pulley off with a puller. Inspect it where the seal runs.
Parts
11| № | Part | Alternatives |
|---|---|---|
| 01 | G20D timing chain kit (chain, camshaft and crankshaft sprockets, hydraulic tensioner, guide shoe, chain damper)Find on Amazon → | AlternativesCZ |
| 02 | Oil pump drive chain with guide shoeFind on Amazon → | |
| 03 | Front crankshaft sealFind on Amazon → | |
| 04 | Valve cover gasketFind on Amazon → | |
| 05 | Oil pan gasket or sealantFind on Amazon → | |
| 06 | Oil filterFind on Amazon → | |
| 07 | Engine oil 5W-30about 5 L (5.3 qt)Find on Amazon → | |
| 08 | Coolantif neededFind on Amazon → | |
| 09 | Crankshaft pulleyif wornFind on Amazon → | |
| 10 | Automotive assembly sealantFind on Amazon → | |
| 11 | Timing chain hydraulic tensionerKyron tensioner is acceptableFind on Amazon → | AlternativesKyron |
Amazon links search by the part name; use Amazon's fit check for your car before ordering. We may earn a commission from qualifying purchases.
Tools
10- Socket set and ratchet Amazon →
- torque wrench Amazon →
- Torx and hex bit set Amazon →
- crankshaft pulley puller Amazon →
- jack with a wooden block under the engine Amazon →
- flywheel or pulley holding tool Amazon →
- snap ring pliers Amazon →
- scraper for old sealant Amazon →
- brake cleaner/degreaser Amazon →
- oil drain pan Amazon →
 There's a full repair manual for this car
Every system, wiring diagrams and torque specs — not just this job. Haynes AutoFix (online).
See manuals →
Step by step
36 steps · 6 stagesStage 1 of 6 Preparation and diagnosis 6 steps
- Confirm wear: a characteristic diesel-like rattle at idle, camshaft/crankshaft correlation fault codes, and a large tensioner rod extension. If the sprocket teeth are badly worn, replace the whole kit.
- Put the car on a lift or in a pit and disconnect the negative battery terminal.
- Drain the engine oil and remove the oil filter. If you plan to remove the coolant hoses, you can also partially drain the coolant.
- Remove the engine undercover, the air duct and the air filter with its hoses, and if necessary the coolant expansion tank and any hoses in the way.
- Remove the drive belts and move the power steering fluid reservoir aside if it is in the way.
- Remove the ignition coils (mark their positions) and the valve cover. Loosen the valve cover bolts evenly, as they can be brittle.
Stage 2 of 6 Setting tdc and disassembly 8 steps
- Turn the crankshaft by the pulley bolt in the direction of rotation and set the cylinder 1 TDC marks: the mark on the crankshaft pulley lines up with the mark on the cover, and the camshaft marks point up, aligned with the marks on the sprockets and the housing. Photograph the position of all marks before disassembly.
- Lock the crankshaft against turning, remove the pulley bolt, and pull the pulley off with a puller.
- Support the engine with a jack, and remove the right engine mount and bracket to gain access to the upper part of the front cover.
- Remove the oil pan: loosen the bolts from the edges toward the center, and separate the pan from the block by cutting the sealant with a plastic scraper. Remove the oil pickup tube.
- Remove the upper front cover, then the front cover/plate: loosen the bolts of different lengths following the pattern and remember their locations (some bolts are hidden and hard to reach).
- Lock the working chain tensioner with a stopper (if there is one) or unscrew it, and loosen the guide shoes.
- Remove the chain damper and guide shoe, the tensioner, and the timing chain together with the camshaft sprockets. Do not turn the camshafts with the chain removed (if you must, only by a small angle, so the valves and pistons do not collide).
- Remove the oil pump drive chain, sprocket and shoe; inspect the pump and the pickup screen. According to owner reports, the screen can be clogged with sealant residue.
Stage 3 of 6 Inspection and preparation 4 steps
- Clean the mating surfaces of the cover, block, oil pan and cylinder head of old sealant, and degrease them. Do not let sealant get into the oil passages.
- Inspect the front crankshaft seal seat for scratches and the pulley for wear where the seal runs. If it is worn, replace the pulley.
- Check the sprockets and shoes; install new parts as a set (chain, tensioner, shoes, sprockets).
- Press the new crankshaft seal into the cover (lubricate the lip with oil).
Stage 4 of 6 Installing the new chain 7 steps
- Install the oil pump drive chain with its sprocket and the new shoe, and tighten the bolts.
- Check that the crankshaft and camshafts are at TDC according to the marks, as in step 7.
- Fit the new timing chain: the marks on the chain (colored links) must line up with the marks on the crankshaft and camshaft sprockets, and the slack on the drive side must be taken up.
- Install the guide shoe and chain damper and tighten their bolts. Torque: per the manufacturer's specification, approximately 10-25 N·m (7-18 lb-ft) for the shoe bolts.
- Install the new hydraulic tensioner and release its stopper. Torque: per specification, approximately 20-30 N·m (15-22 lb-ft).
- Tighten the camshaft sprocket bolts: approximately 60-100 N·m (44-74 lb-ft), exact value per specification, with thread locker if needed.
- Check the marks: turn the crankshaft by hand 2 full turns in the direction of rotation and make sure the marks line up again. If they do not, repeat the chain installation.
Stage 5 of 6 Reassembly 7 steps
- Apply automotive sealant to the front cover and mating surfaces (per the sealant's instructions: let it set 10-15 minutes before installation). Do not spread it in a thick layer, so it does not get into the oil passages.
- Install the front cover/plate and the upper cover, and tighten the bolts evenly following the pattern. Torque: per specification, approximately 10-25 N·m (7-18 lb-ft) for the cover bolts.
- Install the oil pickup tube and the oil pan with sealant or a new gasket, and tighten the bolts in a crisscross pattern and from the center to the edges, approximately 10-25 N·m (7-18 lb-ft). Install a new drain plug or sealing washer after the sealant has cured.
- Install the crankshaft pulley and tighten the bolt while holding the pulley: torque per specification, approximately 150-250 N·m (111-184 lb-ft) (an additional angle turn may be required).
- Install the right engine mount with its bracket and tighten: approximately 50-80 N·m (37-59 lb-ft). Remove the jack.
- Install the valve cover with a new gasket, apply sealant at the joints, tighten the bolts evenly, approximately 8-12 N·m (6-9 lb-ft). Install the ignition coils.
- Install the drive belts, hoses, air filter and undercover.
Stage 6 of 6 Checking 4 steps
- Let the sealant cure, preferably for a day, then add fresh 5W-30 oil (about 5 L (5.3 qt)) and install a new oil filter.
- Before starting, crank the engine with the starter with the coil or injector power disconnected until the oil pressure light goes out, then install the coils and start the engine.
- Check operation at idle: the engine should run smoothly, without rattling. Read the fault codes for shaft correlation and check for leaks at the front cover, oil pan and valve cover.
- After 500-1,000 km, check the oil level and look for leaks.
Common mistakes and warnings
- This job carries a risk of engine damage: if the marks are set incorrectly, the pistons will hit the valves
- If you lack experience, leave the job to a repair shop
- Sealant must not get into the oil passages or onto the oil pickup tube: according to owner reports, the pickup screen on this engine is often clogged with sealant residue
- Always replace the oil pump drive chain together with the timing chain
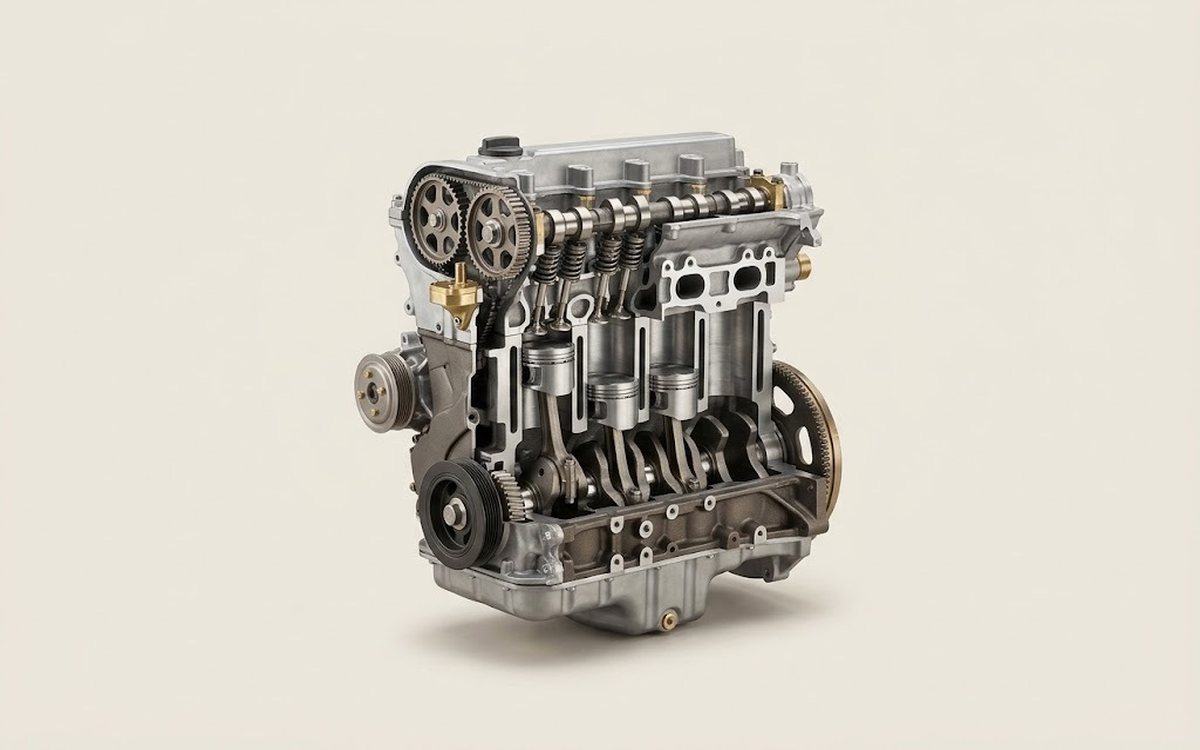 How it works · 3D
How a Car Engine Works
How the part you're working on actually works — in plain English, on a 3D model.
Open in 3D →