Autopapyrus · Kia Picanto (1st generation, SA)
https://autopapyrus.com/guides/kia/picanto/manual-transmission-overhaul-with-bearing-and-synchronizer-replacement/
https://autopapyrus.com/guides/kia/picanto/manual-transmission-overhaul-with-bearing-and-synchronizer-replacement/
Compiled automatically from service literature and owner experience. Specs are for the typical configuration — check them against your exact car before you start.
Kia Picanto (1st generation, SA): Manual Transmission Overhaul with Bearing and Synchronizer Replacement
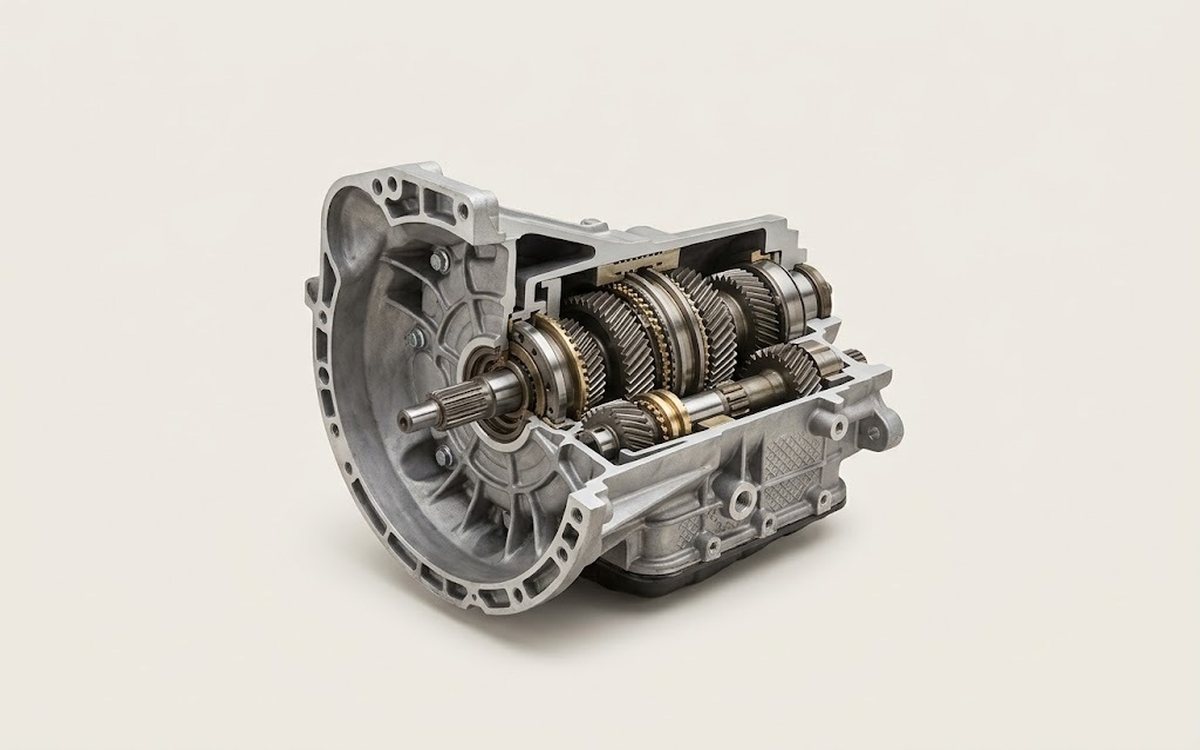
The Picanto 1.1 with the G4HD engine uses a 5-speed manual transmission. A full overhaul involves removing the transmission, disassembling it completely, inspecting it, and replacing worn parts. Exact torque and clearance specifications for this transmission are not documented in publicly available sources. Below is the general work sequence, and you should take the figures from the manufacturer's service manual.
Parts
6| № | Part | Genuine part no. |
|---|---|---|
| 01 | Manual transmission overhaul kit (shaft bearings, seals, snap rings) | 43217-02516 |
| 02 | Synchronizer set (rings and sleeves)based on inspection results | |
| 03 | Axle shaft sealsleft and right | |
| 04 | Release bearing shaft seal | MF401-17155 |
| 05 | Manual transmission fluid API GL-4 | |
| 06 | Clutch kit (disc, pressure plate, release bearing)if worn | 41100-02510 |
| 41300-02510 | ||
| 41421-02000 |
Part numbers are from the manufacturer's original catalogue. Check them against your VIN before ordering.
Tools
13- lift or pit
- transmission jack
- engine support stand or holder
- socket and wrench set
- torque wrench
- bearing pullers
- press
- tweezers
- snap ring pliers
- micrometer and feeler gauges
- plastic drift
- case sealant
- seal puller
 There's a full repair manual for this car
Every system, wiring diagrams and torque specs — not just this job. Haynes AutoFix (online) and 2 more.
See manuals →
Step by step
16 steps- Determine the reason for the repair. Whining in gears points to worn bearings. Grinding and "catching" during shifts point to worn synchronizers. A gear that pops out of mesh points to worn sleeves and forks. If the fluid has already been drained, check it for metal shavings. This shows the extent of the damage.
- Place the vehicle on a lift and disconnect the negative battery terminal. Remove the air filter with its ducts, the battery with its tray, and the starter. Drain the transmission fluid.
- Disconnect the shift cables or linkage, the reverse light switch wire, the speedometer drive if equipped, and the clutch hydraulic line or cylinder.
- Remove the drive axles. Unbolt the ball joints or control arms, pull the inner joints out of the transmission, and hang them out of the way. Plug the openings in the transmission.
- Support the engine from below. Remove the transmission mount and the subframe if necessary, then remove the bolts securing the transmission to the engine. Lower the transmission on a transmission jack, sliding it strictly along the axis of the input shaft so you do not damage the clutch disc.
- Wash the outside of the transmission thoroughly. Disassemble it on a clean bench. Before disassembly, take photos of the position of the forks, rods, and washers. Open the case along the split line, prying at the designated points rather than using a screwdriver on the mating surface.
- Remove the forks and rods, then remove the shafts as a single assembly. Note the order of the gears, washers, and snap rings, and lay them out in the order of removal.
- Perform the inspection. Check bearings for noise, play, and spalling. Synchronizers: replace rings with worn inner threading and worn small teeth, and measure the clearance between the ring and gear with a feeler gauge. Inspect gear and sleeve teeth for chipping and rounding off. Check the bearing seats on the shafts and in the case. Replace worn gears and shafts in pairs or as a set.
- Replace all bearings, seals, and snap rings with new ones. Press bearings in only by the inner or outer race, as appropriate for the seat, and never strike the cage. Lubricate new parts with transmission fluid.
- Reassemble the shafts in reverse order, following your photos. Check that the gears spin freely on the shafts and that the sleeves slide smoothly. Install the shaft assembly in the case, fit the forks and rods, and check that each gear engages by turning the input shaft by hand.
- Clean and degrease the mating surfaces, apply a thin, even layer of sealant, and close the case. Tighten the bolts in a crisscross pattern. The torque for the case bolts and plugs is given in the service manual and typically falls in the range of 15-30 N·m (11-22 lb-ft), depending on bolt diameter.
- Assess the condition of the clutch. If the disc is worn, the flywheel surface is scored, and the release bearing is noisy, replace them all at the same time while the transmission is out. Lightly lubricate the input shaft splines. Do not apply grease to the friction surfaces.
- Install the transmission, inserting the input shaft into the disc splines without tilting and without force. Tighten the transmission-to-engine bolts and the mount with a torque wrench. Check the service manual for their torque values, as well as for the ball joint nuts and wheel bolts (for the wheel, typically 90-110 N·m (66-81 lb-ft)).
- Install the drive axles with new seals, then the starter, battery, and air filter. Connect the shift linkage and the clutch, and bleed the clutch hydraulics if necessary.
- Fill with API GL-4 75W-85 or 75W-90 manual transmission fluid up to the lower edge of the fill hole. The approximate capacity is 1.8-2.2 L (1.9-2.3 qt); check the exact amount by the level at the fill hole.
- Check operation on the lift: with the engine running, engage each gear and check for smooth engagement and no noise. Then take a test drive of 20-30 km (12-19 miles) without hard loads and check for oil leaks.
Common mistakes and warnings
- This is a complex job that requires precise inspection and press equipment
- If you have no experience disassembling transmissions, leave the disassembly and reassembly to a specialist shop, and do the removal and installation yourself if you wish
- Work under a raised vehicle only on secure supports
- If the problem is limited to clutch wear or gears popping out because of the shift cables, a full overhaul may not be needed, so rule out those causes first
 How it works · 3D
How a Manual Transmission Works
How the part you're working on actually works — in plain English, on a 3D model.
Open in 3D →