Autopapyrus · Nissan AD (2nd generation, Y10)
https://autopapyrus.com/guides/nissan/ad/manual-transmission-input-shaft-seal-replacement/
https://autopapyrus.com/guides/nissan/ad/manual-transmission-input-shaft-seal-replacement/
Compiled automatically from service literature and owner experience. Specs are for the typical configuration — check them against your exact car before you start.
Nissan AD (2nd generation, Y10): Manual Transmission Input Shaft Seal Replacement
The input shaft seal sits in the neck of the bellhousing. When it wears, transmission oil gets onto the clutch disc: the clutch slips or grabs, and oil streaks are visible on the bellhousing. To reach the seal, you have to remove the transmission (on the Y10 it is mounted transversely, in one unit with the final drive) and the clutch pressure plate. Don't replace the seal without also replacing the clutch disc and release bearing: since everything is apart anyway, it is easier to replace them at the same time.
Parts
4| № | Part | Genuine part no. |
|---|---|---|
| 01 | Transmission input shaft seal | 32113-M8000 |
| 02 | Manual transmission fluid, GL-4 | |
| 03 | Clutch kitas needed | 30100-Q5210 |
| 30210-53Y05 | ||
| 01121-00772 | ||
| 04 | Clutch release bearingas needed | 30502-53J01 |
| 30502-52A60 |
Part numbers are from the manufacturer's original catalogue. Check them against your VIN before ordering.
Tools
9- Socket and wrench set 10-19 mm
- torque wrench
- jack and reliable jack stands (or a lift)
- engine support bar or stand
- seal puller or hook
- seal installation driver
- splined clutch alignment tool
- oil pump or syringe for filling transmission fluid
- drain pan
Step by step
17 steps- Park the vehicle on level ground, set the parking brake, and chock the rear wheels. Disconnect the negative battery terminal.
- Remove the battery with its tray, the air filter with its ducts, and anything else that blocks access to the transmission from above. Label and disconnect the connectors for the speed sensor and the reverse light switch, and the ground wires on the transmission.
- Lift the front of the vehicle, remove the front wheels and the skid plate. Drain the oil from the transmission through the lower drain plug and reinstall the plug.
- Disconnect the shift cables or linkage and the clutch cable or hydraulic line. If the clutch is hydraulic, first remove the slave cylinder without disconnecting the line.
- Pull the drive axles out of the transmission: disconnect the lower ball joints or the stabilizer links and the tie rod ends as needed. Pull the inner joints out of the differential. Tie up the axles so they don't hang on the joints, and plug the openings to keep dirt out.
- Support the engine from below or hang it from above. Remove the left engine mount (on the transmission side), the starter, and the bolts that hold the bellhousing to the engine block. Write down which bolt came from where: the lengths differ.
- Pull the transmission away from the engine strictly along the axis of the input shaft, without loading the shaft in the clutch disc, and lower it down. It is best to work with a helper or use a transmission jack: the unit is heavy.
- Remove the release fork and the release bearing. Loosen the pressure plate bolts in a crisscross pattern, in 2-3 passes, and remove the disc.
- Pull the old seal out of its seat with a hook or puller, taking care not to damage the seat or the shaft splines. Clean the seat and inspect the shaft: if there is a worn groove at the seal contact point, nothing will "fix" it and the seal will leak again.
- Lubricate the working lip of the new seal with clean transmission fluid or seal grease. Press the seal in evenly, without tilting, using a driver on the outer diameter, until it is seated in its bore. The working lip with the spring must face the transmission.
- Check the flywheel surface: if there are deep scoring, oil stains or heat discoloration, resurface or replace it. Degrease the flywheel and the pressure plate.
- Install the clutch disc on the alignment tool, fit the pressure plate, and tighten the bolts in a crisscross pattern in 2-3 passes with a torque wrench (usually in the range of 20-30 N·m (15-22 lb-ft), exact value per spec). Apply a very thin layer of high-temperature grease to the input shaft splines, the fork and the release bearing shaft. Any excess grease on the disc is unacceptable.
- Install a new release bearing and the fork. Align the transmission with the engine and make sure the shaft slides into the disc splines without force (do not pull the transmission in with the bolts if it doesn't seat on its own). Tighten the bellhousing bolts to a torque in the range of 40-60 N·m (30-44 lb-ft) (exact values for bolts of different lengths per spec).
- Install the starter, engine mount, drive axles, ball joints, tie rod ends and the clutch linkage. Tighten all critical suspension and steering fasteners to the manufacturer's torque specifications.
- Reconnect the connectors and linkage. Fill with new transmission fluid up to the lower edge of the fill hole, and install the plug. Bleed the hydraulic clutch if you opened it.
- Install the wheels and tighten the lug nuts in a crisscross pattern to 80-100 N·m (59-74 lb-ft). Lower the vehicle and reconnect the battery.
- Check clutch operation with the pedal pressed and shift through all gears with the vehicle stationary. Take a test drive, then check for leaks around the bellhousing and drive axles, and check the fluid level.
Common mistakes and warnings
- This job involves a lifted vehicle and a heavy drivetrain assembly: use only reliable stands (not a jack), and always secure the engine
- Work on the steering and suspension affects safety: if you lack experience, it is better to have the assembly done by a repair shop
- If the vehicle has an automatic transmission, it has no input shaft seal of this type: there you would replace the torque converter seal, and the procedure is different
- Also check the rear main seal of the crankshaft: it leaks in the same area, and once the transmission is removed, replacing it adds little labor
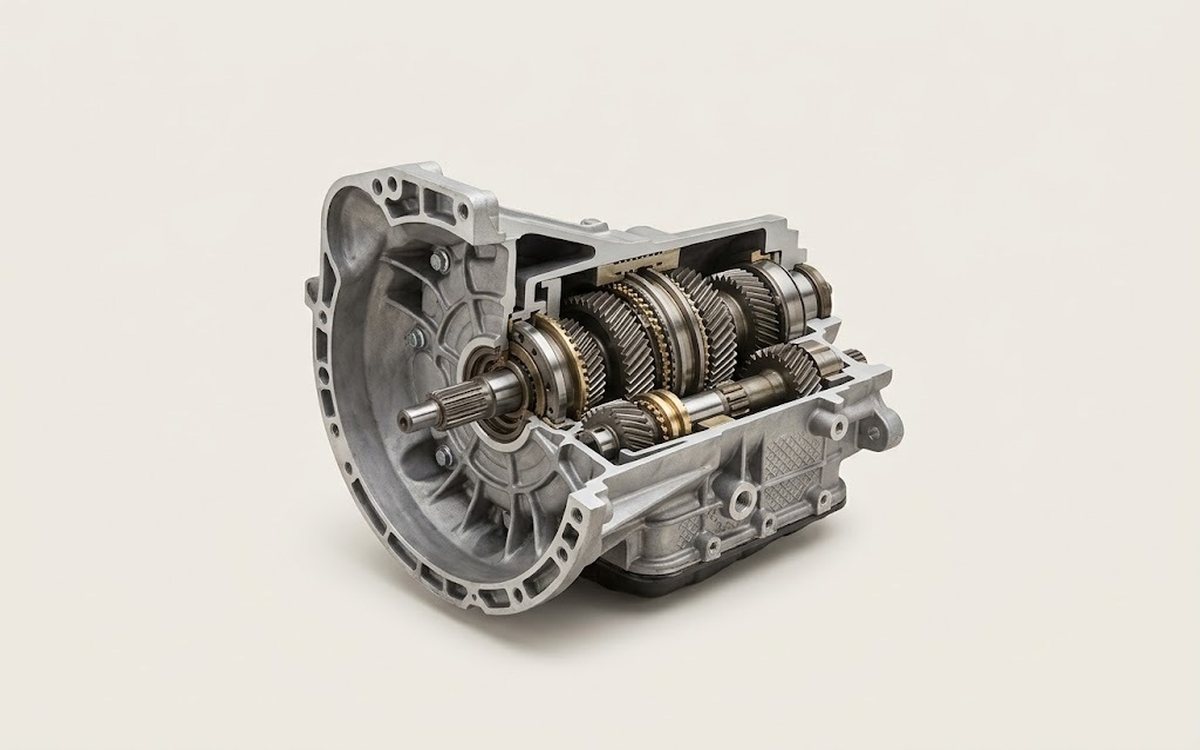 How it works · 3D
How a Manual Transmission Works
How the part you're working on actually works — in plain English, on a 3D model.
Open in 3D →