Autopapyrus · Peugeot Boxer 2.0 BlueHDi DW10FUE (2018)
https://autopapyrus.com/guides/peugeot/boxer/engine-overhaul/
https://autopapyrus.com/guides/peugeot/boxer/engine-overhaul/
Compiled automatically from service literature and owner experience. Specs are for the typical configuration — check them against your exact car before you start.
Peugeot Boxer 2.0 BlueHDi DW10FUE (2018): Engine Overhaul
The DW10FUE is an inline 4-cylinder 2.0 L diesel with a cast iron block, 85 mm bore, 88 mm stroke and a timing belt drive. An overhaul includes removing the engine, full disassembly, inspection of the block, crankshaft and cylinder head, boring and honing the cylinders for oversize pistons, replacing the bearings, rings, pistons and valve stem seals, and then reassembling with new single-use fasteners. Check exact tolerances and oversize dimensions against the piston set manufacturer's data and the engine specifications.
Parts
16| № | Part | Genuine part no. |
|---|---|---|
| 01 | Piston and ring set (nominal bore 85 mm)standard or oversize for boring | |
| 02 | Main bearing shellsstandard or undersize for journal grinding | |
| 03 | Connecting rod bearing shellsstandard or undersize for journal grinding | |
| 04 | Crankshaft thrust washers | 9676150280 |
| 05 | Valve stem seals | |
| 06 | Engine gasket set (head gasket, valve cover gasket, oil pan gasket)head gasket of the correct thickness class | |
| 07 | Cylinder head boltsnew, single-use | 9677538580 |
| 08 | Connecting rod boltsnew, single-use | |
| 09 | Timing belt kit (belt, rollers, water pump) | 1609944880 |
| 1607216280 | ||
| 10 | Accessory drive belt with roller | |
| 11 | Oil pumpas needed based on condition | |
| 12 | Engine oil | |
| 13 | Oil filter | |
| 14 | Coolant | |
| 15 | Front crankshaft sealnew | |
| 16 | Rear crankshaft sealnew |
Part numbers are from the manufacturer's original catalogue. Check them against your VIN before ordering.
Tools
12- lift or pit
- engine hoist or crane for removing the powertrain
- socket set and ratchet
- torque wrench (5-250 N·m (4-184 lb-ft)) with angle gauge
- timing locking tool set for DW10 engines
- crankshaft pulley puller
- bore gauge
- micrometer
- Plastigage
- piston ring compressor or installation sleeve
- injector puller
- straightedge for checking cylinder head flatness
 There's a full repair manual for this car
Every system, wiring diagrams and torque specs — not just this job. Haynes AutoFix (online) and 1 more.
See manuals →
Step by step
22 steps- Prepare the vehicle: disconnect the negative battery terminal, drain the oil and coolant, and remove the engine undershield. Wash the outside of the engine before disassembly.
- Clear the engine bay: plastic covers, the air intake system with the intercooler and hoses, the radiator, the fan, and the front panel if necessary. Disconnect the wiring harnesses, hoses and fuel lines (the Common Rail fuel system is under high pressure, so wait for the pressure to drop first, and do not open the lines on a running engine or one that was just shut off).
- Remove the exhaust system with the diesel particulate filter or catalytic converter (if fitted), the turbocharger if necessary, the starter, the accessory drive, and the A/C compressor (do not open the refrigerant circuit; move it aside on its hoses).
- Separate the transmission from the engine, then disconnect the engine mounts and remove the powertrain, or remove the engine alone with a crane and secure it on an engine stand.
- Remove the timing drive: set the timing marks, lock the crankshaft, camshaft and high-pressure pump with the locking tools, release the tensioner and remove the belt. Note the position and orientation of the gears.
- Remove the valve cover and the cylinder head. Loosen the cylinder head bolts in sequence from the outside toward the center, evenly, in several passes. The cylinder head bolts are single-use.
- Check the cylinder head flatness with a straightedge and feeler gauge, and have it resurfaced if it is warped. Remove the camshafts, keeping the bearing caps in order, take out the valves, and replace the valve stem seals. Check the valve guides, seats and valve heads, and lap or replace them if worn. Fit each new seal over the valve stem through the protective plastic sleeve so the seal lip is not torn on the valve keeper groove.
- Turn the engine over, remove the oil pan and the oil pickup tube, and remove the balance shaft assembly or the oil pump if one is fitted (depending on the design of your engine). Measure the crankshaft end play before disassembly.
- Mark the connecting rods and caps by cylinder, remove the connecting rod bolts, and push the pistons out through the top. Remove the main bearing caps (also marking their positions) and lift out the crankshaft.
- Block inspection: clean the oil passages and measure the cylinders with a bore gauge in two planes and at three levels, checking for out-of-round and taper. Check the flatness of the block deck. If there is wear, scoring or the tolerance is exceeded, bore and hone the cylinders for oversize pistons (buy the oversize pistons before boring and give them to the machinist so the clearance can be fitted). Bore with the main bearing caps installed and tightened to the specified torque.
- Crankshaft inspection: measure the main and rod journals with a micrometer and check for out-of-round and runout. If worn, have the crankshaft ground for undersize bearing shells. After machining, wash the oil passages and clean them with a brush.
- Bearing selection: check the clearance with Plastigage or by calculation from micrometer and bore gauge measurements. Take the nominal oil clearance for the main and rod journals from the bearing manufacturer's data (usually a few hundredths of a millimeter). The bearing shells and their seats must be clean and dry before lubrication.
- Piston assembly: set the piston ring end gap (check each ring in the cylinder), stagger the ring gaps around the circumference, lubricate the piston and cylinder with engine oil, and install the piston with the ring compressor. The mark on the piston crown faces the timing belt side (confirm against the piston markings).
- Install the crankshaft with new bearing shells and thrust washers, lubricate the journals, and tighten the main bearing caps in several passes with the final angle tightening per the specification (torque and angle per the manufacturer's data; main bolts are usually single-use). Check that the shaft turns by hand without binding. Check the end play.
- Install the connecting rods with new bolts and tighten them with a torque wrench plus the final angle tightening per the specification. Check that the shaft turns freely after each cylinder.
- Install the new crankshaft seals (front and rear), the oil pump, the oil pickup tube and the oil pan with sealant per the manufacturer's instructions. Tighten the fasteners evenly.
- Cylinder head installation: use a new gasket of the correct thickness (the thickness depends on piston protrusion above the block deck; measure the protrusion with a dial indicator and select the gasket from the manufacturer's table; this is mandatory after boring and machining the block surfaces). Tighten the new cylinder head bolts strictly in the specified sequence and in several stages: approximately 20 N·m (15 lb-ft), then 60-70 N·m (44-52 lb-ft), and a final angle of about 220° (confirm the exact values and sequence against the specification for your DW10 variant).
- Install the camshafts, valve cover and injectors with new sealing washers and heat shields, and the manifolds with new gaskets. Tighten the fasteners to the manufacturer's ranges for each thread size.
- Install the timing drive: new belt, tensioner and idler rollers, and water pump. Align the marks and locking tools, set the tensioner per the procedure, turn the crankshaft two full revolutions by hand, and make sure the locking tools slide in freely. Install the accessory drive.
- Install the engine in the vehicle and connect the transmission, mounts, wiring harnesses, hoses, intercooler and exhaust. Fill with oil and coolant. Before the first start, crank the engine with the starter with fuel delivery disabled (or with the fuel system fuse removed) until oil pressure appears.
- First start: let the engine idle for 10-15 minutes without load, and check for leaks, oil pressure and the absence of fault codes. Warm it up to operating temperature and bleed the air from the cooling system.
- Break-in: for the first 1,000-1,500 km (600-900 miles), avoid full load and prolonged high rpm, then change the oil and filter. After 1,000 km (600 miles), check the oil level and the tightness of the accessible fasteners.
Common mistakes and warnings
- This job is difficult and requires precise measurements and machine shop work on the block and crankshaft
- Errors in clearances, cylinder head gasket thickness or the tightening of single-use bolts will lead to another engine failure
- The Common Rail fuel system operates at very high pressure
- Do not open the lines or work on the injectors while there is pressure in the rail
- If you have no experience with diesel engine overhauls, leave disassembly and assembly to a specialist shop
- Before choosing an oversize or undersize, always compare the actual measurements of the block and crankshaft with the manufacturer's tolerances
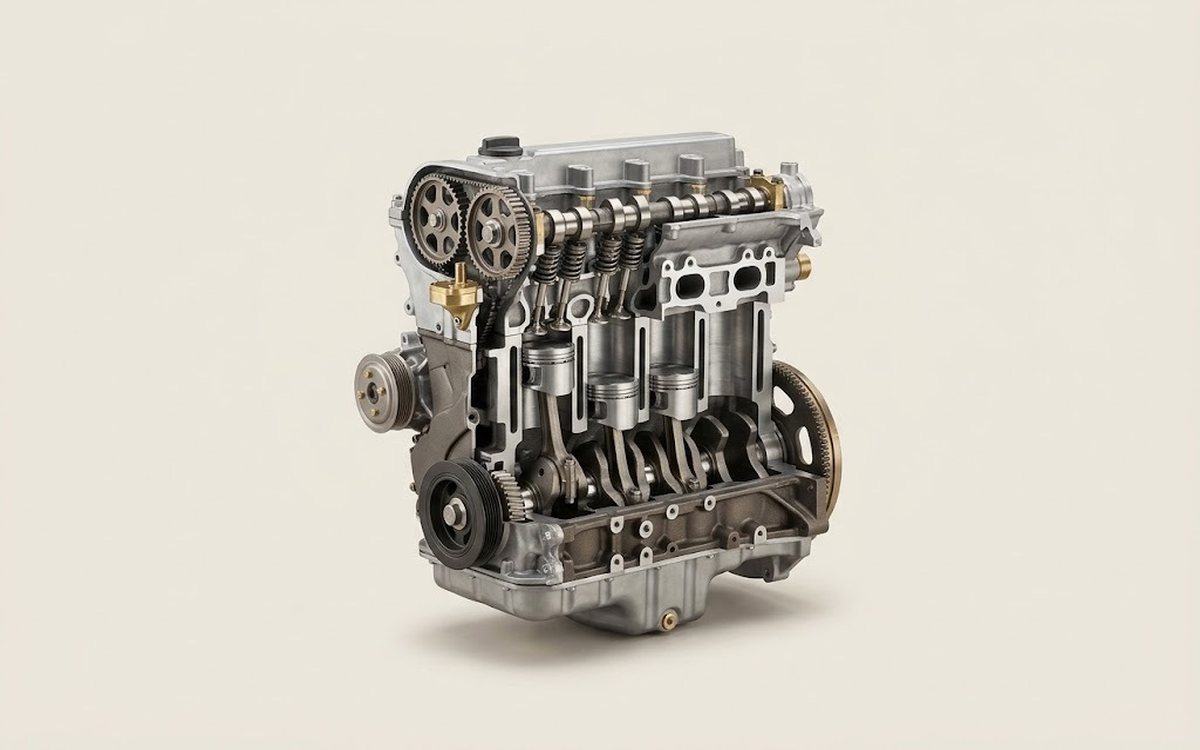 How it works · 3D
How a Car Engine Works
How the part you're working on actually works — in plain English, on a 3D model.
Open in 3D →