Autopapyrus · Porsche Cayenne 3.6 (M55.02) (2015)
https://autopapyrus.com/guides/porsche/cayenne/engine-overhaul-with-piston-group-and-bearing-replacement/
https://autopapyrus.com/guides/porsche/cayenne/engine-overhaul-with-piston-group-and-bearing-replacement/
Compiled automatically from service literature and owner experience. Specs are for the typical configuration — check them against your exact car before you start.
Porsche Cayenne 3.6 (M55.02) (2015): Engine Overhaul with Piston Group and Bearing Replacement
The M55.02 is a 3.6-liter gasoline direct-injection V6 with a timing chain drive. The overhaul includes removing the engine, complete disassembly, inspection of the block and crankshaft, replacement of the piston group and bearings, and reassembly with all single-use parts replaced. Exact clearance and torque values for this engine are not published in detail in open sources, so the procedure and acceptable ranges are given below. Take the final figures from the manufacturer's service manual.
Parts
11| № | Part |
|---|---|
| 01 | Oversize piston and ring set |
| 02 | Main bearings |
| 03 | Rod bearings |
| 04 | Connecting rod boltsif single-use |
| 05 | Engine gasket set |
| 06 | Timing chain kit (chain, tensioners, guides) |
| 07 | Oil pumpdepending on condition |
| 08 | Oil filter |
| 09 | Engine oil Porsche |
| 10 | Porsche coolant |
| 11 | Cylinder head boltssingle-use |
Tools
12- vehicle lift
- engine hoist and lifting bar
- engine stand
- torque wrenches (5-30 N·m (4-22 lb-ft) and 30-200 N·m (22-148 lb-ft) ranges)
- angle gauge for torque-angle tightening
- bore gauge and micrometers
- feeler gauges
- Plastigage
- piston ring expander and ring compressor
- camshaft timing locking tools
- Torx and E-Torx socket set
- A/C service equipment for recovering and recharging refrigerant
 There's a full repair manual for this car
Every system, wiring diagrams and torque specs — not just this job. Haynes AutoFix (online) and 2 more.
See manuals →
Step by step
16 steps- Before disassembly, perform diagnostics: a compression or leak-down test on each cylinder, an oil pressure check, and reading of fault codes. Make sure the overhaul is really needed: oil consumption is often caused by the oil control rings, but sometimes by the crankcase ventilation or by the turbochargers, if fitted. Save the coding and adaptation data.
- Disconnect the battery and drain the oil, coolant and, if necessary, the transmission oil. Remove the underbody shield, air ducts, radiator and fan. Relieve the pressure in the fuel system. Disconnect the A/C system only after the refrigerant has been recovered with a service station.
- Disconnect the wiring, fuel lines, cooling and heating hoses, the drive and the accessories. Label the connectors. Disconnect the exhaust system and the front axle drive shafts if they are in the way. Hang the engine from the lifting bar. Take the procedure for separating it from the transmission and the removal method (down together with the subframe or up) from the service manual, as it depends on the vehicle's equipment. Do not let the engine's weight hang on the transmission.
- Remove the engine and secure it on the stand. Lock the camshafts at TDC with the special locking tools and remove the chain drive. Note the positions of the chains, guides and marks.
- Remove the cylinder head covers, the cylinder heads and the oil pan. Loosen the cylinder head bolts in the reverse of the tightening sequence, in 2-3 stages. Remove the oil pickup tube and the oil pump, and assess its condition.
- Mark the connecting rods and caps by cylinder. Remove the rod bolts, take off the caps and push the pistons up and out. Do not scratch the cylinder walls or the journals. Remove the main bearing caps in order (note their orientation) and lift out the crankshaft.
- Inspection. Clean the block and passages, and blow out the oil galleries. Check the cylinders with a bore gauge for out-of-round and taper, and for scoring and the condition of the coating. If the block is aluminum with a special cylinder wall coating, honing and boring are permitted only according to the manufacturer's procedure. If wear exceeds the tolerance, you will need sleeving or a replacement block assembly. Check the flatness of the cylinder head and block mating surfaces, and check the crankshaft journals for out-of-round and scoring. If the journals are within tolerance, replace the bearings with standard-size ones; if worn, have the crankshaft ground to an undersize. Select pistons and bearings according to the size class markings.
- Piston selection: measure the cylinder and piston diameters, work out the clearance and compare it with the manufacturer's tolerance. Select the rings and check the ring end gap in the cylinder with a feeler gauge. Stagger the ring gaps around the circumference (about 120 degrees apart for three rings).
- Bottom end assembly. Lubricate the bearings with engine oil or assembly lube. Install the main bearings, lay in the crankshaft and check the end play. Tighten the main caps following the service manual sequence, usually with an angle turn. Tightening these fasteners without the angle step is not acceptable. Check that the shaft turns freely after each stage.
- Install the pistons into the cylinders using the ring compressor, with the arrow pointing toward the chain drive (according to the marking on the piston crown). Tighten the rod caps in line with the marks. Use new bolts, and take the torque and angle from the service manual. After tightening, the crankshaft must turn without binding. Check the journal clearance with Plastigage if you are unsure of the bearing classes.
- Install the oil pump and pickup tube, and the oil pan with new sealant or a gasket, as the manufacturer requires. Torques for the small oil pan fasteners are usually in the range of 8-15 N·m (6-11 lb-ft). Take the exact values from the service manual.
- Install the cylinder heads on new gaskets, with dowel sleeves if necessary. Tighten the new cylinder head bolts in 3-4 stages strictly following the sequence, with the final angle turn. Lubricate the threads and under the bolt heads if specified. Install the camshafts, chain and tensioners according to the marks, and lock the timing. Turn the crankshaft by hand through 2 revolutions and check that the marks line up. Then install the covers, spark plugs and ignition coils (spark plugs approximately 25-30 N·m (18-22 lb-ft); confirm in the service manual).
- Replace the crankshaft seals, belts, rollers, thermostat, water pump and filters that were removed or have high mileage. Install a new oil filter. Prepare the engine for installation: check the clutch or torque converter, and do not tighten any fasteners without a torque wrench.
- Install the engine in the reverse order. Tighten the transmission mounting bolts, engine mounts and subframe according to the service manual. Connect the electrical, fuel and cooling systems. Fill with oil meeting Porsche A40 approval and with coolant, bleed the cooling system, and recharge the A/C.
- First start. Before starting, check the oil pressure by cranking the engine with the starter with the fuel pump or injection fuse disconnected. Start the engine and do not raise the revs above idle until the pressure has stabilized. Check for leaks, fault codes, the timing phasing through diagnostics, and fan operation. Warm the engine up to operating temperature, let it cool and check the fluid levels.
- Break-in: for the first 1,000-1,500 km, avoid full loads and hard passing; keep engine speed moderate (up to about 3,500-4,000 rpm) and avoid prolonged driving at a constant speed. Change the oil and filter after 1,000-1,500 km, then follow the normal maintenance schedule. Check the oil level every 500 km.
Common mistakes and warnings
- Overhauling this engine requires exact adherence to torque-angle tightening, single-use bolts and special timing locking tools
- If you have no experience assembling modern direct-injection engines, leave the job to a specialist repair shop
- After assembly, checking the timing phasing and adaptations with diagnostic equipment is mandatory
- The vehicle itself is heavy, so work only on a sound lift and secure the engine when removing it
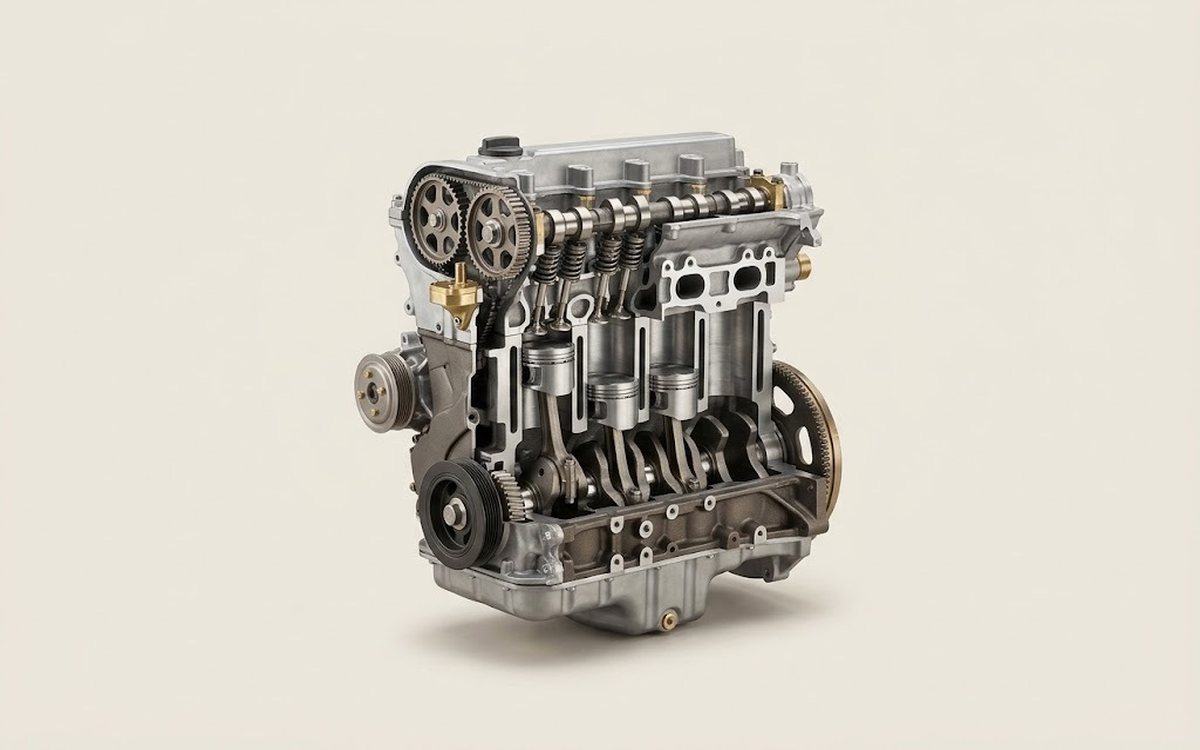 How it works · 3D
How a Car Engine Works
How the part you're working on actually works — in plain English, on a 3D model.
Open in 3D →