Autopapyrus · Toyota Passo 1.0 1KR-FE (2009)
https://autopapyrus.com/guides/toyota/passo/engine-overhaul/
https://autopapyrus.com/guides/toyota/passo/engine-overhaul/
Compiled automatically from service literature and owner experience. Specs are for the typical configuration — check them against your exact car before you start.
Toyota Passo 1.0 1KR-FE (2009): Engine Overhaul
The 1KR-FE is an inline three-cylinder aluminum 996 cc engine with 12 valves, a timing chain drive and VVT-i. Bore is 71 mm and piston stroke is about 84 mm. The block is aluminum with thin cast-iron liners, so before starting, decide whether boring is worthwhile or whether a used or remanufactured replacement engine is the better option. Below is the order for removal, inspection and assembly. Check exact torque specs and clearances against the Toyota service data for the 1KR-FE.
Parts
17| № | Part |
|---|---|
| 01 | Engine gasket set (full, with head gasket) |
| 02 | Main and rod bearings (standard or undersize)size per measurements |
| 03 | Piston ring set |
| 04 | Oversize pistonsif the block is bored |
| 05 | Timing chain kit with guides and tensioner |
| 06 | Front crankshaft seal |
| 07 | Rear crankshaft seal |
| 08 | Valve stem seals |
| 09 | Oil pumpif worn |
| 10 | Water pump |
| 11 | Thermostat |
| 12 | Oil filter |
| 13 | Engine oilviscosity depends on operating conditions |
| 14 | Coolant |
| 15 | Exhaust manifold gasket |
| 16 | Valve cover gasket |
| 17 | Cylinder head bolts (single-use, torque-angle) |
Tools
13- Socket set and ratchet
- 10-200 N·m torque wrench
- angle gauge (torque-angle wrench)
- engine hoist or crane
- transmission support stand
- crankshaft pulley puller
- bore gauge and micrometer
- feeler gauges
- Plastigage
- piston ring compressor
- honing equipment (at the machine shop)
- containers for draining fluids
- marker and bags for labeling parts
Step by step
19 steps- Before disassembly, check compression in each cylinder and oil consumption. This helps you determine whether only the rings and bearings need replacing or whether the block is damaged. Disconnect the battery.
- Drain the engine oil, coolant and, if needed, the transmission fluid. Remove the hood (mark the hinge positions with a marker), the battery, the air intake and air filter, the radiator with fan, and the exhaust with the catalytic converter manifold.
- Disconnect the wiring harnesses, the connectors for the injectors, ignition coils and sensors, the heater hoses, the fuel line (relieve the system pressure first), the throttle cable if fitted, or the electronic throttle body connector, and the A/C drive (do not open the refrigerant circuit; unbolt the compressor and move it aside). Photograph and label every connector.
- Remove the drive belts and the alternator. Remove the powertrain together with the transmission, either downward or upward, depending on the method your shop uses. Hang the engine from the hoist, disconnect the mounts, lift out the assembly, then separate the transmission.
- Mount the engine on a stand. Remove the ancillaries: intake manifold, exhaust manifold, water pump, thermostat, ignition coils, spark plugs, injectors, oil filter, oil pressure sensor, flywheel (or drive plate) and clutch if fitted.
- Remove the valve cover. Set the crankshaft to TDC on cylinder 1 and note the position of the marks. Remove the crankshaft pulley, the oil pan, the oil pickup tube and the timing chain cover. Record the position of the chain and the marks on the sprockets, then remove the tensioner, the guides, the chain and the camshaft sprockets (remove the VVT-i actuator carefully, and do not let dirt get into the oil passages).
- Remove the camshafts: loosen the bearing caps evenly in several passes, working from the ends toward the center, and keep them in order. Take out the lifters/hydraulic lash adjusters, depending on the design, and label them by cylinder.
- Loosen the cylinder head bolts in the reverse of the tightening sequence, in 2-3 passes. Remove the head. Check the head's mating surface for warpage with a straightedge and feeler gauge, and compare it with the tolerance in the service data. Cylinder head work (valve lapping, replacing seals and guides) is done at a machine shop.
- Remove the pistons with the connecting rods: first remove the carbon ridge from the top edge of the cylinders, then undo the nuts/bolts of the rod caps and mark the caps by cylinder. Push the pistons out upward. Remove the main bearing caps in stages and carefully lift out the crankshaft.
- Block inspection: check the cylinders with a bore gauge for taper and out-of-round, and look for scoring. Crankshaft inspection: use a micrometer to check the main and rod journals for wear and out-of-round. If they are out of tolerance, the crankshaft must be ground to an undersize. Check the block deck for flatness. If the cylinder walls are badly worn, the block is bored for oversize pistons and honed at a machine shop. Flush all oil passages and clean the threaded holes.
- Assembly starts with installing the main bearings in the clean block saddles, lubricating them with oil and laying in the crankshaft. Check the oil clearance with Plastigage, then tighten the main caps in the specified order and to the torque given in the Toyota service manual (torque values for the main and rod bolts come from the service data. The range depends on the type of fastener, and some bolts are tightened with an angle turn). Check the crankshaft end play and turn it by hand. It should rotate freely.
- Install the pistons: check the ring end gaps, stagger the ring gaps about 120° apart, lubricate with oil, and install with a ring compressor, with the mark facing forward (the arrow on the piston crown toward the front of the engine). Tighten the rod caps, checking with Plastigage. Torque and angle are per the service manual.
- Install the rear crankshaft seal, the oil pump, the oil pickup tube and the oil pan. Apply sealant to the mating surfaces in a thin, even layer according to the manufacturer's instructions, and do the final tightening after it has set, per the time stated on the package.
- Install the cylinder head with a new gasket. On this engine the head bolts are tightened in several passes, in a pattern from the center outward, with a final angle turn, so be sure to use an angle gauge and new bolts. Final torque and angle values are per the service manual.
- Install the camshafts and tighten the bearing caps evenly (low torque, about 10-15 N·m (7-11 lb-ft), exact value per the service manual). Set the TDC marks, install the chain strictly according to the marks, then the tensioner, the guides, a new front seal and the timing cover, and the crankshaft pulley. Turn the crankshaft by hand through two full revolutions and check the marks again.
- Adjust the valve clearances (if the design uses adjusting shims or lifters, follow the service manual), then install the valve cover with a new gasket, the spark plugs, the coils, the injectors with new O-rings, the manifolds with new gaskets, the water pump and the thermostat.
- Install the flywheel and clutch (or drive plate), attach the transmission, install the powertrain in the vehicle and secure the mounts. Reconnect all harnesses, hoses, the fuel line, the A/C drive and the radiator.
- Fill with new oil and a new filter (total system capacity is about 3 L (3.2 qt), determine the exact amount by the dipstick marks) and coolant. Before starting, crank the engine with the starter without ignition (with the fuel pump fuse removed) until oil pressure appears. Then start the engine and let it idle without load, watching oil pressure, leaks and temperature.
- Warm the engine up until the thermostat opens, bleed air from the cooling system, and check the fluid levels after it cools down. Break-in for the first 1,000-1,500 km: no hard loads, no prolonged high rpm, and change the oil after the first 1,000-2,000 km.
Common mistakes and warnings
- For the 1KR-FE engine, use only new cylinder head bolts and new gaskets
- Reusing torque-angle bolts is not acceptable
- The timing chain and VVT-i marks must be set strictly according to the marks: being off by even one link will cause the pistons to hit the valves
- Block boring, crankshaft grinding and cylinder head work are done on machine shop equipment
- If you have no experience assembling engines or no precision measuring tools, leave the assembly to a specialist
- In the Passo this engine has little margin for oversize machining, so before committing to an overhaul, compare its cost with the cost of a used or remanufactured engine
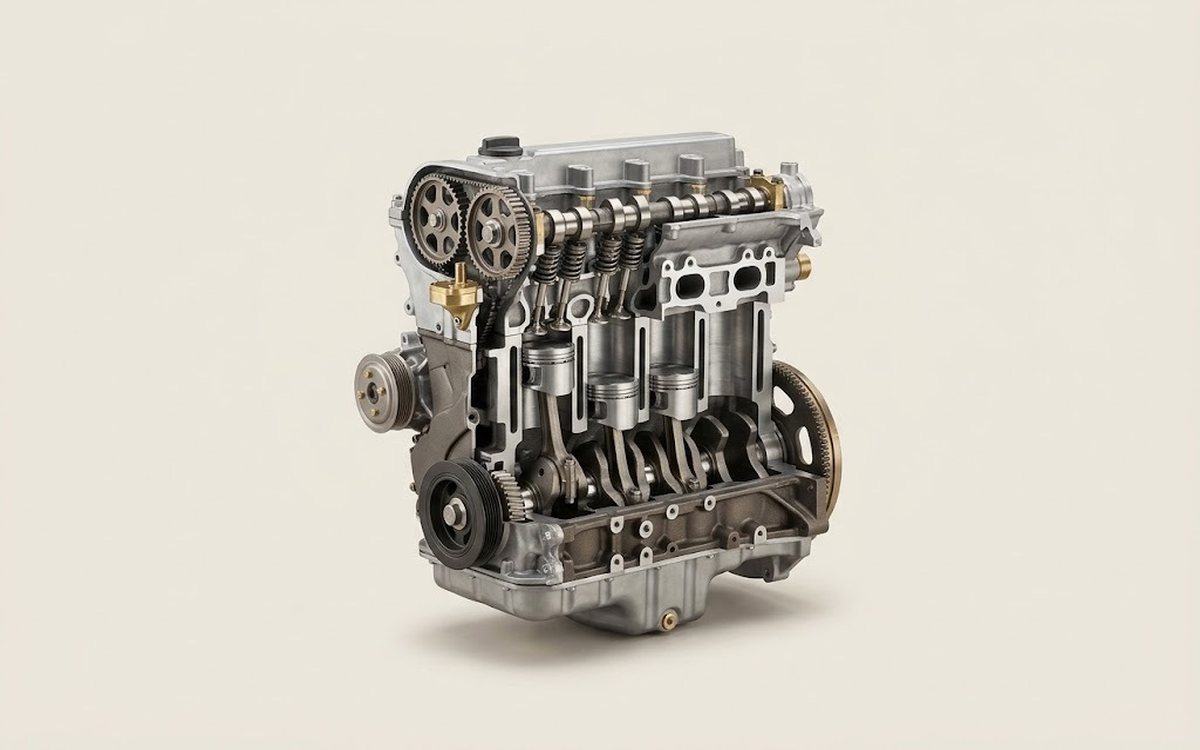 How it works · 3D
How a Car Engine Works
How the part you're working on actually works — in plain English, on a 3D model.
Open in 3D →