Autopapyrus · Lada Kalina 1.6 8V VAZ-11186 (2016)
https://autopapyrus.com/catalog/lada/kalina/guides/timing-belt-replacement/
https://autopapyrus.com/catalog/lada/kalina/guides/timing-belt-replacement/
Compiled automatically from service literature and owner experience. Specs are for the typical configuration — check them against your exact car before you start.
Lada Kalina 1.6 8V VAZ-11186 (2016): Timing Belt Replacement
On the 11186 engine, inspect the timing belt every 15,000 km (9,300 miles) with the engine cold, and replace it at the scheduled interval of every 75,000 km (46,600 miles), or sooner if it shows any damage. If the belt breaks, the pistons can hit the valves (an interference engine), so don't cut corners on the belt and tensioner pulley. The key points: set the timing marks accurately, don't turn the crankshaft or camshaft while the belt is off, and tension the new belt correctly.
Key figures
- Timing belt replacement intervalwhen to replace the belt per schedule (or sooner if there are cracks, missing teeth, or oil traces).75,000 km (46,600 miles)
- Belt inspectioninspect the belt for damage to catch wear in time.every 15,000 km (9,300 miles), on a cold engine
- Crankshaft rotation after belt installationthen check the marks and tension (step 12).2 full turns
- Pulley bolt socketuse this socket with a ratchet to turn the crankshaft (step 5).17 mm
Check these values against the manufacturer’s specification for your vehicle before you start.
Parts
4| № | Part | Alternatives |
|---|---|---|
| 01 | Timing belt for 8-valve engineFind on Amazon → | AlternativesGatesContitechBosch |
| 02 | Timing belt tensioner pulleyreplace together with the beltFind on Amazon → | |
| 03 | Water pump with gasketrecommended to replace at the same timeFind on Amazon → | |
| 04 | Coolantfor topping up if drainedFind on Amazon → |
Amazon links search by the part name; use Amazon's fit check for your car before ordering. We may earn a commission from qualifying purchases.
Tools
6Step by step
14 steps- The engine must be cold, at 15-35 °C (59-95 °F). Disconnect the negative battery terminal. Park the car on level ground and set the parking brake.
- Raise the right front wheel, support the car on a jack stand, and remove the wheel. Remove the right engine compartment splash shield.
- Remove the alternator drive belt. To do this, release its tension and slip the belt off the pulleys.
- Remove the timing belt cover. If it is in the way, disconnect the wires from it and remove the crankshaft position sensor. It must be reinstalled later without damage.
- Turn the crankshaft clockwise (by the pulley bolt with a 17 mm socket, or by the wheel in fifth gear) until the marks line up: the No. 1 cylinder piston must be at top dead center (TDC) on the compression stroke. The marks on the crankshaft pulley and the camshaft gear must line up with the marks on the block and the cover. Check both positions before removing the belt.
- Loosen the tensioner pulley bolt, turn the pulley so the belt tension is released, and slip the belt off the crankshaft and camshaft pulleys. After this, do not turn the crankshaft or camshaft: the pistons can hit the valves.
- Remove the tensioner pulley. Check how it spins. The bearing must turn quietly and smoothly, without binding. We recommend always installing a new pulley together with the belt.
- If you are replacing the water pump, drain the coolant, remove the pump, and clean the mounting surface of old sealant. Install the new pump with a new gasket and sealant. Tighten the pump bolts to the manufacturer's specification. If the removed pump has play or was noisy, replacement is mandatory. Top up the coolant and bleed the cooling system after reassembly.
- Install the tensioner pulley. Do not fully tighten the bolt yet (the cylinder head has two threaded holes for the pulley bolt for different engine versions; use the one that matches your engine).
- Check once more that the crankshaft and camshaft marks are aligned. Fit the new belt onto the crankshaft pulley first, then onto the remaining pulleys and the water pump. The belt must be taut on the drive side without slack, and the teeth must sit exactly in the grooves. If needed, turn the camshaft pulley a small angle so the teeth line up.
- Tension the belt: turn the tensioner pulley counterclockwise by inserting the tool into the slots of the pulley's outer disc, and tighten the pulley bolt (torque to the manufacturer's specification). Do not overtighten: excessive tension ruins the tensioner and water pump bearings, while too little tension leads to tooth skipping and incorrect timing.
- Turn the crankshaft two full turns clockwise. Check the mark alignment and belt tension again. If the marks don't line up, reinstall the belt.
- Install the crankshaft position sensor, the timing cover, the alternator belt with correct tension, the splash shield, and the wheel. Tighten the wheel nuts in a crisscross pattern to the torque given in the vehicle manual (a general guideline for passenger cars is 80-100 N·m (59-74 lb-ft); check the value against the specification).
- Connect the battery, start the engine, and let it warm up. The engine should run smoothly, without shaking or noise. If it misfires or shakes, stop and recheck the marks: the belt may have jumped a tooth.
Common mistakes and warnings
- Do not turn the crankshaft or camshaft with the belt removed
- Do not overtighten or undertighten the new belt
- Oil traces on the belt are a reason to find the cause of the leak (seals) first, and only then install a new belt
- Check the tightening torques for the crankshaft pulley bolt, tensioner pulley, water pump, and camshaft pulley for this engine against the manufacturer's specification: approximate figures are intentionally not given here
- If you lack experience or can't set the marks, it is better to leave the job to a repair shop: incorrect timing can bend the valves
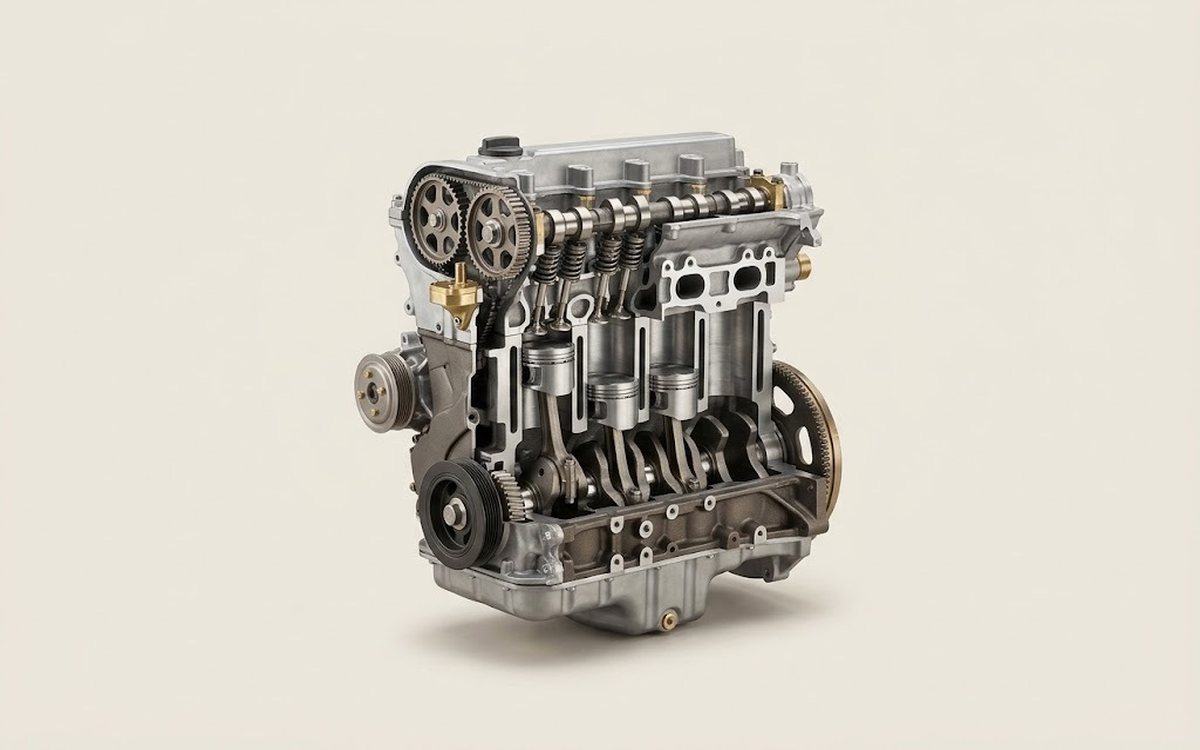 How it works · 3D
How a Car Engine Works
How the part you're working on actually works — in plain English, on a 3D model.
Open in 3D →