Autopapyrus · Lada Niva Travel (2021)
https://autopapyrus.com/catalog/lada/niva-travel/guides/front-wheel-hub-bearing-grease-replacement/
https://autopapyrus.com/catalog/lada/niva-travel/guides/front-wheel-hub-bearing-grease-replacement/
Compiled automatically from service literature and owner experience. Specs are for the typical configuration — check them against your exact car before you start.
Lada Niva Travel (2021): Replacing the Grease in the Front Wheel Hub Bearings
The grease in the tapered bearings of the front wheel hubs is packed during assembly, so to replace it you need to disassemble the steering knuckle and remove the bearings. This guide covers one side; repeat everything the same way on the other side. Tightening torques for fasteners, other than the hub nut, are approximate, so check the exact values against the manufacturer's specifications.
Key figures
- First hub nut tightening19.6 N·m (14.5 lb-ft). Set it on the torque wrench while turning the hub in both directions so the bearings "seat" (step 21)
- Second nut tightening after loosening6.86 N·m (5.1 lb-ft). This torque creates the main preload (step 22)
- Nut back-off angle20-25°. How far to loosen the nut before locking it, about one flat (step 23)
- Allowable play after adjustment0.01-0.07 mm. Checked with a dial indicator on the hub (step 25)
- Grease per bearingabout 40 g of Litol-24. This is how much to pack into the cage of each bearing (step 17)
Check these values against the manufacturer’s specification for your vehicle before you start.
Parts
4| № | Part |
|---|---|
| 01 | Litol-24 greaseabout 40 g per bearingFind on Amazon → |
| 02 | Hub sealsnew, replace during disassemblyFind on Amazon → |
| 03 | Hub adjusting nutreplacement recommended after removalFind on Amazon → |
| 04 | Hub capif deformed during removalFind on Amazon → |
Amazon links search by the part name; use Amazon's fit check for your car before ordering. We may earn a commission from qualifying purchases.
Tools
14- jack and jack stands Amazon →
- lug wrench Amazon →
- sockets and wrenches for the caliper Amazon →
- ball joint Amazon →
- shock absorber and tie rod Amazon →
- socket for the hub nut (about 27 mm) Amazon →
- low-range torque wrench (5-25 N·m (3.7-18 lb-ft)) Amazon →
- puller or drivers for bearing races and seals Amazon →
- kerosene Amazon →
- rags Amazon →
- brush Amazon →
- seal driver Amazon →
- chisel or punch for staking the nut Amazon →
- dial indicator (for checking bearing play) Amazon →
Step by step
31 steps · 7 stagesStage 1 of 7 Preparation 3 steps
- Park the vehicle on level ground, set the parking brake, and loosen the wheel bolts so you don't have to break them loose later while the wheel is in the air.
- Lift the front of the vehicle and place jack stands under the body. Remove the wheel.
- Prepare a clean place for the parts and have kerosene ready. Get marking supplies ready (marker, paint): the bearing races must go back in their original positions.
Stage 2 of 7 Hub removal 5 steps
- Bend back the edges of the brake dust shield. Remove the bolts securing the brake pad guide (caliper bracket) and move the caliper away from the rotor.
- Do not disconnect the brake hoses, so that no air gets into the system. Do not leave the caliper hanging by the hose; tie it up with wire to the spring or the body.
- Carefully remove the hub cap. The factory uses a special driver for this; without it, pry the cap off evenly all the way around without deforming it.
- Unscrew the hub adjusting nut and remove the tapered bushing.
- Remove the hub together with the brake rotor. Do not damage the seal.
Stage 3 of 7 Steering knuckle removal 5 steps
- Place a support under the lower control arm and lower the vehicle slightly to compress the spring.
- Disconnect the lower ball joint from the control arm.
- Disconnect the shock absorber from the lower control arm. Disconnect the side tie rod of the steering linkage from the steering knuckle arm.
- Slide the front wheel drive shaft all the way toward the front axle.
- Swivel the steering knuckle around the upper ball joint and remove it from the stub shaft of the joint housing.
Stage 4 of 7 Bearings and cleaning 3 steps
- Press the inner bearing races, together with the split rings and seals, out of the knuckle cavity. Press the outer races out with a driver.
- Mark the races: each one must go back in its original position.
- Remove the old grease. Wash the inside cavity of the knuckle, the outer and inner cavities of the hub, the stub shaft of the drive joint housing, and the bearings themselves with kerosene. Dry them and inspect them: signs of pitting, heat discoloration, and scoring on the rollers and races mean the bearing must be replaced.
Stage 5 of 7 Greasing and assembly 4 steps
- Pack Litol-24 into the bearing cages, about 40 g per bearing, and apply an even layer of grease in the knuckle cavity between the bearings. Lubricate the splines of the joint housing stub shaft.
- Press in the outer races, install the inner races with the split rings, and press in the new seals.
- Slide the knuckle onto the joint housing stub shaft. Connect the ball joint to the lower control arm, secure the shock absorber, and connect the tie rod. Tighten the fasteners to the manufacturer's specifications (as a rough guide, ball joints and tie rod ends are in the tens of N·m (tens of lb-ft); check the exact values against the specifications).
- Install the hub with the brake rotor onto the stub shaft, then fit the tapered bushing and the new adjusting nut.
Stage 6 of 7 Bearing play adjustment 6 steps
- Tighten the nut to 19.6 N·m (14.5 lb-ft), turning the hub 2-3 times in both directions so the bearing rollers seat properly.
- Loosen the nut and tighten it again to 6.86 N·m (5.1 lb-ft).
- Make a mark on the washer and back the nut off by 20-25° until the first flat lines up with the mark.
- Lock the nut: press the notches on its collar into the grooves on the end of the joint housing stub shaft.
- If possible, check the play with a dial indicator: after adjustment it should be 0.01-0.07 mm. Adjustment is needed if the play is greater than 0.15 mm.
- Install the hub cap back in place (with a driver or by tapping lightly around the edge through a spacer).
Stage 7 of 7 Finishing up and checking 5 steps
- Reinstall the caliper and tighten the guide bolts to the manufacturer's specifications, then bend the edges of the dust shield back into place.
- Install the wheel, lower the vehicle, and tighten the wheel bolts in a crisscross pattern to the manufacturer's specifications.
- Press the brake pedal several times until it feels firm: the pads must move up against the rotor.
- Repeat everything on the other side.
- After 2-3 thousand km of driving, check the hubs for heat and check the play: there must be no play.
Common mistakes and warnings
- This job involves the brakes, suspension, and steering
- If you lack experience and the necessary equipment, leave it to a repair shop
- A nut that is too tight overheats the bearings, while one that is too loose causes play and wheel runout
- After assembly, check the tightness of the steering and suspension connections and take a test drive at low speed, checking the brakes
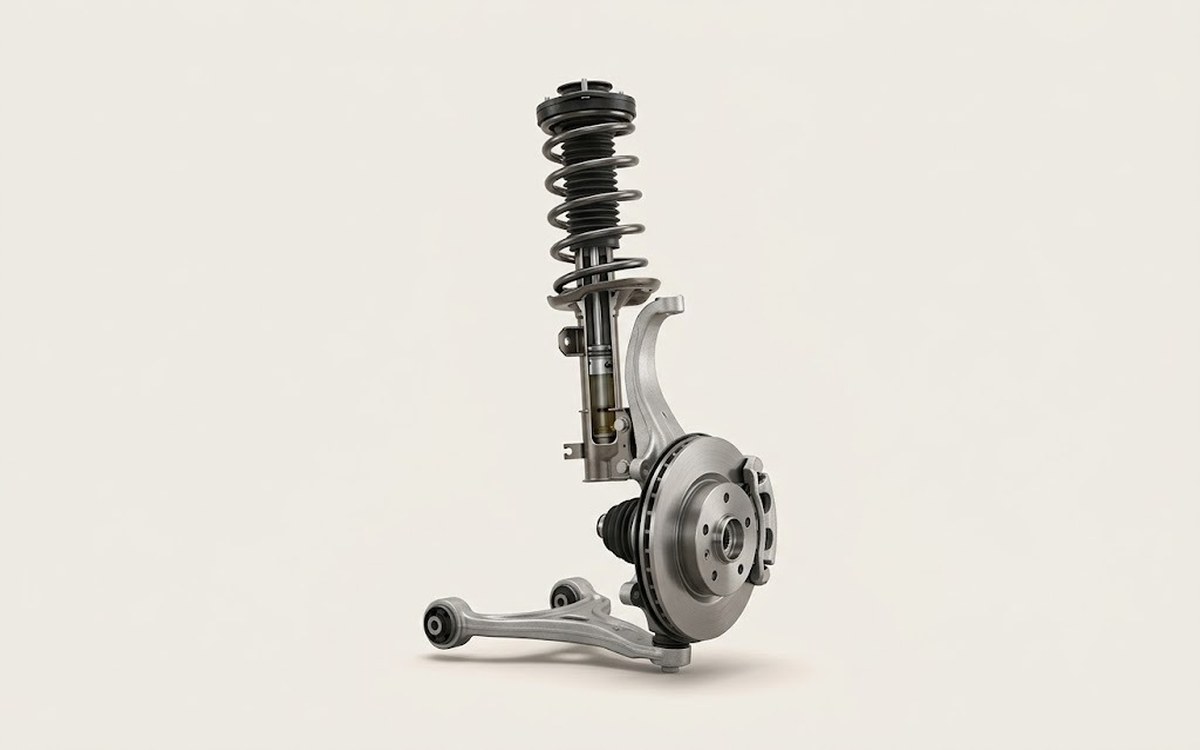 How it works · 3D
How Car Suspension Works
How the part you're working on actually works — in plain English, on a 3D model.
Open in 3D →