Autopapyrus · Great Wall Sailor 2.2 (2008)
https://autopapyrus.com/guides/great-wall/sailor/manual-transmission-overhaul/
https://autopapyrus.com/guides/great-wall/sailor/manual-transmission-overhaul/
Compiled automatically from service literature and owner experience. Specs are for the typical configuration — check them against your exact car before you start.
Great Wall Sailor 2.2 (2008): Manual Transmission Overhaul
The Sailor (sold internationally as the Great Wall Sailor / Safe) is a four-wheel-drive pickup with a five-speed manual transmission and a transfer case. The overhaul involves removing the transmission, fully disassembling it, inspecting the parts, and replacing the bearings, synchro rings and seals. The exact step-by-step procedure and special torque values for this transmission are not documented in publicly available service materials, so below is the general procedure for manual transmissions of this design.
Parts
9| № | Part |
|---|---|
| 01 | Transmission bearing repair kit (input, output, countershaft, gear bearings) |
| 02 | Transmission seal and O-ring set |
| 03 | Synchro rings (bronze or brass), all gearsset for all gears |
| 04 | Synchro sleeves and hubsif teeth are worn |
| 05 | Snap rings and retaining rings |
| 06 | Transmission gears and shaftsas determined by inspection |
| 07 | Clutch release bearingrecommended to replace at the same time |
| 08 | Clutch discrecommended to replace at the same time |
| 09 | Transmission oil API GL-4 |
Tools
14- lift or inspection pit
- transmission jack
- socket and wrench set
- bearing pullers (two- and three-jaw)
- press or drivers
- punches
- caliper
- feeler gauges
- scribe
- snap ring pliers
- Torx sockets
- torque wrench
- case sealant
- clean tray and marker for laying out parts
Step by step
20 steps- Raise the vehicle on a lift and disconnect the negative battery terminal. Drain the oil from the transmission and the transfer case by removing the drain plugs.
- Remove the skid plate (if fitted), the exhaust system in the area of the transmission, and the driveshafts (front and rear), first marking the flanges to preserve balance. Flange bolt torque is per the service specification, usually 40-60 N·m (30-44 lb-ft) for bolts of this size.
- Disconnect the clutch cable or hydraulic line (if hydraulic, do not open the system unless necessary, or you will need to bleed it), the speed sensor, the reverse switch, the wiring and the shift lever (inside the cabin, remove the boot and the knob).
- Remove the transfer case (if it is a separate unit) and the starter. Support the transmission with a transmission jack, then remove the crossmember and mounts.
- Remove the bolts securing the transmission to the engine and slide the transmission straight back until the input shaft clears the clutch disc hub. Do not let the transmission hang on the input shaft.
- Clean the outside of the transmission. Remove the fork and release bearing, and inspect the clutch disc, pressure plate and flywheel. In this situation it makes sense to replace the clutch as a complete kit.
- Mark the position of the parts with a marker. Remove the shift mechanism cover, the interlock balls and springs (carefully, since they can pop out), then the case cover and the case itself along the parting line. Loosen the bolts in a crisscross pattern and keep them sorted by length.
- Lift out the shaft assemblies (input, output, countershaft), noting the order in which the gears, rings, washers and retainers come off. It is best to photograph each stage.
- Disassemble the shafts using pullers and a press: remove the snap rings, gears, synchros and needle bearings. Do not hit the gears with a hammer.
- Inspection. Check the gear teeth and synchro sleeve teeth for chipping, pitting and stepped wear. Check the shaft splines, the bearing journals and the bearing seats in the cases. Replace anything with scoring or play. Check the synchro rings: when fitted on the gear cone, the clearance must be within the manufacturer's specification, and the ring must not spin "dry" on the cone.
- Install new bearings on the shafts by pressing them on through a driver on the inner race (onto the shaft) or on the outer race (into the housing). Heating the bearings in oil to 80-100 °C (176-212 °F) makes installation easier, but do not use an open flame.
- Reassemble the synchros in reverse order, lubricating the parts with clean transmission oil. Watch the position of the retaining rings and the orientation of the sleeves (marks aligned).
- Assemble the shaft assemblies and install them in the case. Check that each gear rotates freely and check the axial clearances. Select shims by measurement if the design provides for adjusting axial play.
- Replace the seals of the input shaft, the shift rod and the output shafts. Lubricate the lip of each new seal with oil and press it in evenly with a driver.
- Apply a thin layer of sealant to the parting surface (after degreasing), join the case halves, and tighten the bolts in a crisscross pattern in 2-3 passes. Case bolt torque is usually 20-35 N·m (15-26 lb-ft) (exact values per the manufacturer's specification).
- Install the shift mechanism and the interlock balls and springs. Check that the gears engage with a crisp feel and that the interlock does not allow two gears to be engaged at once.
- Install the transmission in the vehicle in reverse order. Apply a thin layer of high-temperature grease to the input shaft splines, and do not grease the end of the shaft. Tighten the transmission-to-engine bolts per the specification, usually 40-60 N·m (30-44 lb-ft) for M10-M12 bolts.
- Fill with oil up to the lower edge of the fill hole (the amount is per the specification, usually 2.0-3.0 L (2.1-3.2 qt) for a transmission of this class; check by level). Add oil to the transfer case if needed.
- Bleed the clutch hydraulics (if hydraulic) and check the pedal free play. Start the engine and check that all gears engage with the vehicle stationary and the clutch pedal pressed.
- Test drive 20-30 km (12-19 miles) gently, without heavy loads. After the break-in, check the case for leaks and check the oil level.
Common mistakes and warnings
- This job requires experience and precise measurements: a mistake in selecting shims or seating a bearing will cause noise and rapid failure
- Secure the vehicle firmly on the lift and back it up with stands
- The transmission is heavy (several tens of kilograms) and dangerous if it falls
- If you have no experience assembling transmissions, leave the disassembly and assembly to a specialist, and do the removal and installation yourself
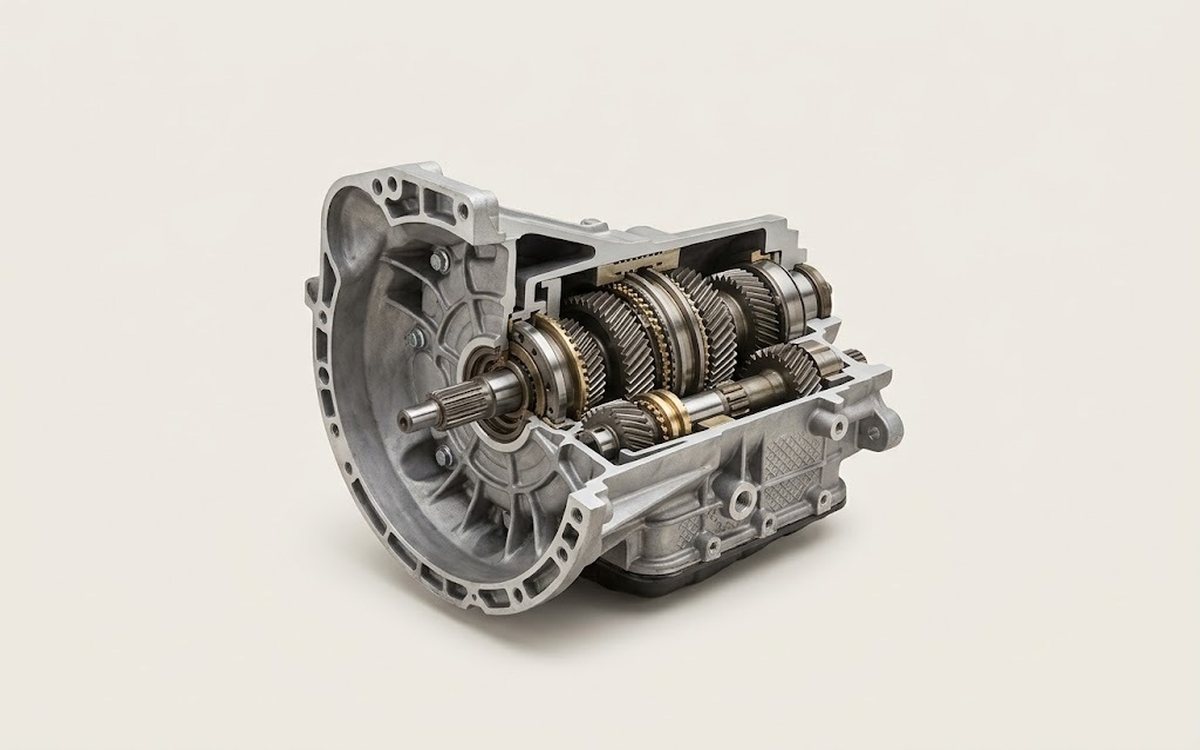 How it works · 3D
How a Manual Transmission Works
How the part you're working on actually works — in plain English, on a 3D model.
Open in 3D →