Autopapyrus · Changan UNI-T 1.5 Turbo 180 hp (2023)
https://autopapyrus.com/catalog/changan/uni-t/guides/engine-overhaul/
https://autopapyrus.com/catalog/changan/uni-t/guides/engine-overhaul/
Compiled automatically from service literature and owner experience. Specs are for the typical configuration — check them against your exact car before you start.
Changan UNI-T 1.5 Turbo 180 hp (2023): Engine Overhaul
The Changan UNI-T 1.5 Turbo (180 hp) uses a chain-driven valvetrain, an aluminum block and a turbocharger. An overhaul means removing the engine, fully disassembling it, inspecting the parts, replacing the pistons, bearing shells and valve stem seals, and then reassembling it while checking clearances. Factory torque specs and clearances for this engine were not found in verified open sources. Below are the order of work and general principles. Check all numeric values against the manufacturer's service manual.
Parts
11| № | Part |
|---|---|
| 01 | Piston set with rings and pins (standard or oversize)Find on Amazon → |
| 02 | Main and connecting rod bearing shells (set)Find on Amazon → |
| 03 | Valve stem seals (set)Find on Amazon → |
| 04 | Full engine gasket set (cylinder head gasket, oil pan gasket, valve cover gasket, crankshaft seals)Find on Amazon → |
| 05 | Cylinder head boltssingle-use, if specifiedFind on Amazon → |
| 06 | Connecting rod boltssingle-use, if specifiedFind on Amazon → |
| 07 | Timing chain with tensioner and guidesFind on Amazon → |
| 08 | Oil pumpif wornFind on Amazon → |
| 09 | Engine oilFind on Amazon → |
| 10 | Oil filterFind on Amazon → |
| 11 | CoolantFind on Amazon → |
Amazon links search by the part name; use Amazon's fit check for your car before ordering. We may earn a commission from qualifying purchases.
Tools
12- torque wrench (up to 200-250 N·m (148-184 lb-ft)) Amazon →
- Torx/E-Torx and XZN sockets and bits Amazon →
- oil filter wrench Amazon →
- camshaft/crankshaft timing locking kit Amazon →
- micrometer and bore gauge Amazon →
- Plastigage Amazon →
- piston ring compressor and piston installation sleeve Amazon →
- feeler gauge Amazon →
- engine stand Amazon →
- engine hoist Amazon →
- block sealant Amazon →
- clean oil-resistant containers for parts Amazon →
Step by step
19 steps- Determine whether an overhaul is needed. Measure compression in each cylinder and check oil consumption. Assess oil pressure and engine noise. If oil is consumed mainly through the valve stem seals (bluish smoke after sitting or after lifting off the throttle), a cylinder head repair is enough. If the piston group is at fault or there is scoring, a full overhaul is needed.
- Disconnect the negative battery terminal. Drain the oil and coolant. Remove the engine undertray, the hood (optional), the air ducts, the intercooler with its pipes, the radiator if necessary, and the exhaust system together with the turbocharger and catalytic converter. Disconnect the high-pressure fuel pump lines and injector lines, the fuel rail, the wiring harnesses, the A/C (without opening the circuit: unbolt the compressor and move it aside) and the drive belts.
- Separate the transmission. For this engine and a DCT-type transmission, the engine is usually removed together with the transmission, either downward or upward. Confirm the exact method based on your lift or hoist setup: support and secure both units. Remove the engine mount fasteners and take the engine out. Get the torque for the mount bolts and the transmission fasteners from the service manual.
- Mount the engine on the stand. Remove the flywheel (note its position; the bolts are usually single-use) and the clutch or damper. Remove the accessories: alternator, water pump, thermostat, oil filter, sensors, spark plugs and ignition coils.
- Remove the valve cover. Set the crankshaft to the position recommended by the manufacturer (timing marks) and lock the camshafts. Photograph and mark the position of the chain relative to the sprockets. Remove the guides, the tensioner and the timing chain.
- Loosen the cylinder head bolts in the reverse of the tightening sequence, evenly, in several passes. Remove the cylinder head and the gasket. Place the head on a clean surface with the supports facing up.
- Turn the engine over. Remove the oil pan and the oil pickup tube, then the oil pump. Mark each connecting rod and cap with its cylinder number. Remove the connecting rod bolts and take out the pistons together with the rods through the top of the block. Then remove the main bearing caps (note their order and orientation), and take out the crankshaft and bearing shells.
- Inspect the block and crankshaft. Clean the block and the oil passages. Measure the cylinders with a bore gauge in two planes and at three heights (out-of-round and taper). Check the flatness of the block deck with a straightedge. Measure the main and rod journals with a micrometer. Compare the results with the tolerances in the service manual. If there is scoring or wear beyond tolerance, regrind the journals to an undersize (if undersize bearing shells are available) or replace the crankshaft.
- Boring the block. Boring is possible only if oversize pistons of the required size are available and the cylinder walls allow material to be removed. On many modern aluminum blocks with thin cast-iron liners or inserts, oversize pistons may not be available. In that case, do a light honing to the standard piston size or replace the block. Have the boring and honing done in a machine shop. Hone with a dummy cylinder head plate installed and exactly to the size of the pistons you bought: the machine shop determines piston clearance from the data sheet supplied with the piston set. After machining, wash the block with hot water and detergent, blow out the passages and oil the cylinders right away.
- Inspect the cylinder head. Pressure-test it or check it for cracks, and measure the head's flatness. Remove the valves (compress the springs with a valve spring compressor) and remove the old valve stem seals. Check the valve guides (valve stem play), the seats and the valve faces, and lap or machine them if needed. Install new valve stem seals with a special installation tool (do not damage the lip; put a protective cap on the valve stem or wrap the keeper grooves). Lubricate the stem with oil. Assemble the valves and make sure the keepers are seated firmly.
- Fit the piston rings. Check the ring end gap: insert the ring into the cylinder, square it with a piston and measure the gap with a feeler gauge (per the service manual). Check the clearance in the piston groove. If the clearance is out of tolerance, do not file the rings unless clearly necessary: check the ring set first.
- Assemble the piston and connecting rod assemblies. Install the rings on the pistons in the correct order and with the correct end gap positions (the TOP marking or mark on the ring faces up, and the end gaps are spaced according to the manufacturer's layout). Lubricate the pistons and cylinders with clean oil. The mark on the piston (arrow or symbol) must face the direction specified in the service manual (usually toward the timing chain side).
- Install the bearing shells and crankshaft. Wipe the bearing seats, insert the main bearing shells (the locating tabs go into the notches) and lubricate them. Lay in the crankshaft and install the caps according to their marks and orientation. Tighten the main bolts in stages according to the manufacturer's sequence and torque (usually several passes with an angle turn; exact values per the service manual). Check that the shaft turns freely by hand and check the crankshaft end play with a feeler gauge.
- Connecting rods. Insert the rod bearing shells and install the pistons with a ring compressor (mark orientation per the service manual). Check the rod bearing clearance with Plastigage. Tighten the connecting rod bolts per the service manual (usually torque plus an angle turn; the bolts are single-use). After tightening, the crankshaft must turn without binding.
- Install the oil pump and oil pickup tube, and the oil pan with new sealant or a gasket. Tighten the bolts evenly, following the sequence. The torque for the small oil pan bolts is usually low; the exact value is in the service manual.
- Install the cylinder head on a new gasket (check the markings and orientation). The cylinder head bolts must be new and lubricated as instructed. Tighten strictly in sequence from the center outward, in several stages with an angle turn (exact torques and angles per the service manual). Install the camshafts, the timing chain and the tensioner according to the marks. Check the timing, turn the crankshaft two full revolutions by hand and check the marks again.
- Install the valve cover with a new gasket, the ignition coils, spark plugs, oil filter, water pump, thermostat, and the intake and exhaust manifolds with new gaskets. Install the flywheel or damper with new bolts.
- Install the engine in the vehicle (in reverse order). Tighten the mounts and transmission fasteners per the service manual, and reconnect the connectors, hoses, fuel system, air ducts, A/C and drive belts. Fill with coolant and fresh oil meeting the manufacturer's specification. Before starting, crank the engine with the starter, with the fuel pump disabled or the ignition coils removed, until oil pressure builds. Then start the engine and let it idle.
- Break-in: for the first 1,000-1,500 km, avoid hard loads, full throttle and extended driving at high rpm. Do not let the engine overheat and avoid prolonged idling. Change the oil and filter after 500-1,000 km, and check for leaks and the tightness of accessible fasteners. During this period, monitor oil pressure and engine temperature.
Common mistakes and warnings
- This job requires professional equipment (a hoist, a boring and honing machine, measuring tools) and experience
- If you lack experience, leave it to a specialized repair shop
- Incorrect tightening of the cylinder head and connecting rod bolts, or incorrect timing chain installation, leads to serious damage and expensive repairs
- Torque specs and tolerances for this engine are not given in this guide; take them from the factory service manual
- Work only on a cold engine with the battery disconnected
- Relieve fuel system pressure before disconnecting any fuel lines
- Dispose of coolant and oil properly
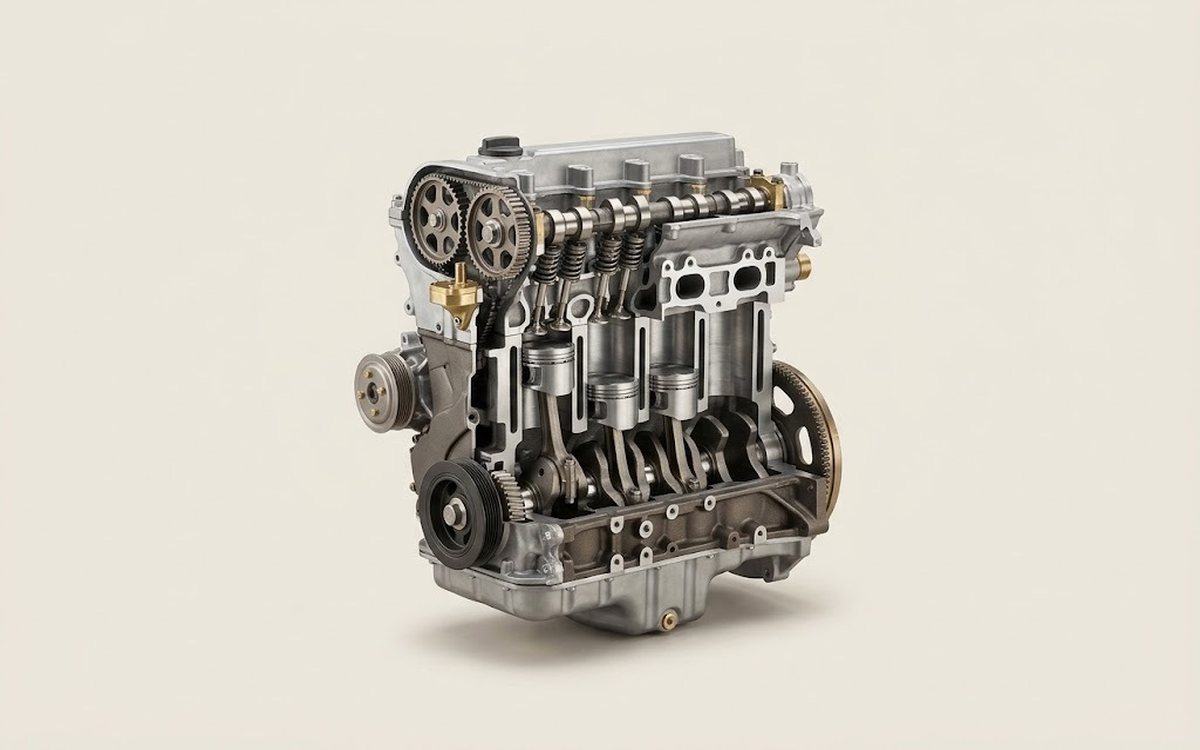 How it works · 3D
How a Car Engine Works
How the part you're working on actually works — in plain English, on a 3D model.
Open in 3D →