Autopapyrus · Suzuki Sx 4
https://autopapyrus.com/guides/suzuki/sx-4/automatic-transmission-at-condition-check/
https://autopapyrus.com/guides/suzuki/sx-4/automatic-transmission-at-condition-check/
Compiled automatically from service literature and owner experience. Specs are for the typical configuration — check them against your exact car before you start.
Automatic Transmission (AT) Condition Check
Checking the automatic transmission on a Suzuki SX4 with the M15A engine involves assessing the fluid level and condition, reading trouble codes, inspecting for leaks, and doing a road test. It is a diagnosis that doesn't require taking the transmission apart. It shows whether you need a fluid and filter change or a deeper repair.
Parts
3| № | Part | Genuine part no. |
|---|---|---|
| 01 | ATF with Suzuki approvalfor 4-speed automatic transmission | |
| 02 | Transmission pan gasket | 24784-79C10 |
| 03 | Transmission filterwhen changing the fluid | 26445-79C10 |
Part numbers are from the manufacturer's original catalogue. Check them against your VIN before ordering.
Tools
6- OBD-II scanner
- lift or inspection pit
- clean white rag or paper towel
- flashlight
- thermometer or a scanner that shows ATF temperature
- socket and wrench set for removing the underbody shield
Step by step
12 steps- Ask the owner or review the service history: when the ATF was last changed, and whether there has been any slipping, jerking, delayed engagement, loss of acceleration, or a transmission or Check Engine light. The fluid in this transmission is often treated as "filled for life," so if it hasn't been changed by 60-80 thousand km, consider it potentially worn out.
- Read the trouble codes with an OBD-II scanner. The diagnostic connector is under the dashboard on the driver's side. Pay attention to codes for speed sensors, solenoids, torque converter lockup, and gear slippage. Write them down before clearing anything.
- Warm up the engine and transmission to operating temperature (drive for 10-15 minutes). Park the car on level ground and set the parking brake. With the engine running, move the selector through all positions (P-R-N-D-2-L), pausing 2-3 seconds in each, then return it to P.
- Check the fluid level with the transmission dipstick (if your trim has one) with the engine running and the selector in P. The HOT/COLD marks on the dipstick correspond to the fluid temperature. If there is no dipstick, the level is checked through the check plug according to the service procedure. This job requires monitoring the fluid temperature and is best done on a lift.
- Assess the fluid condition: wipe the dipstick with a white rag. Normal fluid is red or pinkish and clear, with a neutral smell. Dark burgundy fluid with a burnt smell, or brown or black fluid, indicates overheating and clutch wear. Metallic particles or shavings indicate serious wear. A milky color means coolant has leaked in from the radiator.
- Inspect the car from underneath: the transmission pan and its gasket, the axle seals, the places where the lines connect to the transmission fluid cooler, and the connectors and wiring harnesses. Note any leaks or traces of oil. Also check whether the pan is deformed from impacts.
- Do a road test on a level stretch of road. Start the engine and, with your foot on the brake, shift P-R-D: engagement should be smooth, without a hard bang and without a delay of more than 1-2 seconds. During acceleration, the 1-2-3-4 shifts should be smooth, without jerks, RPM drops, or slipping (a sharp rise in RPM without acceleration). Check the downshifts when you lift off the throttle, torque converter lockup at cruising speed (at steady RPM there should be no vibration or jerking), and kick-down operation when you press the pedal hard.
- Check the response in the manual ranges (2, L): the transmission should hold the selected gear and provide engine braking. Check reverse on an incline and the parking lock (P) on a slight slope.
- Check separately for unusual noises: a whine or hum that changes with RPM points to the pump or bearings, while clicking when pulling away may point to the CV joints and mounts rather than the transmission. Vibration at idle with D engaged is often caused by worn engine and transmission mounts.
- Check the cooling side: the condition of the radiator and the fluid cooler lines, and that the transmission doesn't overheat during the road test (according to the scanner, if the ATF temperature is available).
- Final decision: if the fluid is clean and there are no codes or slipping, a routine fluid and filter change with a new pan gasket is enough. If there are codes, slipping, a burnt smell, or metal shavings, you will need deeper diagnostics with a line pressure test and possibly a transmission repair at a specialized shop. Do not flush an old, worn transmission unless necessary.
- When changing the fluid and filter, tighten the transmission pan bolts with a torque wrench to a low torque, about 5-10 N·m (4-7 lb-ft) (check the exact value against the manufacturer's specification). If there is a drain plug, tighten it to specification. Fill only with fluid of the correct approval, then check the level with the transmission warmed up.
Common mistakes and warnings
- Do not check the fluid level with a cold or overheated transmission or on uneven ground, or the result will be wrong
- Underfilling and overfilling are equally harmful
- Overfilling causes the fluid to foam, and underfilling leads to overheating and wear
- Do not mix fluids with different approvals
- When working under the car, use only secure supports, never a single jack
- If you are not sure about your assessment of the transmission's condition, take it to a shop that specializes in automatic transmissions
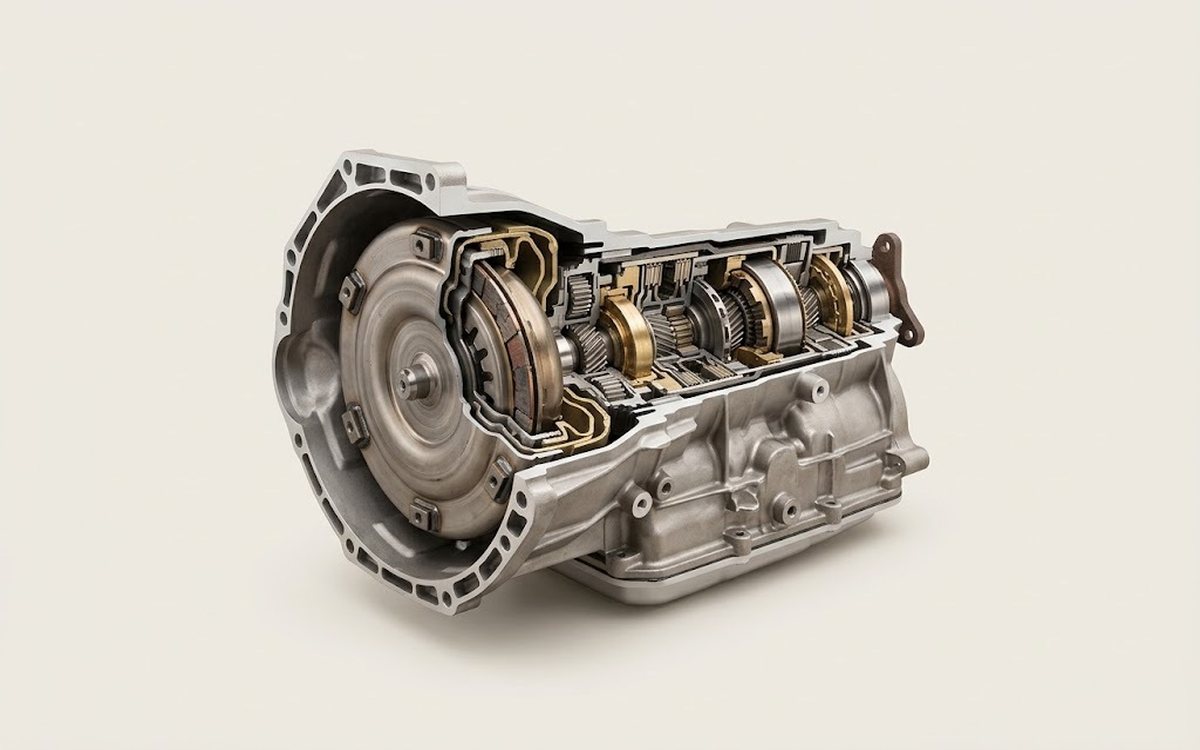 How it works · 3D
How an Automatic Transmission Works
How the part you're working on actually works — in plain English, on a 3D model.
Open in 3D →