Car care & driving
How to Tint Your Car Windows Yourself
Autopapyrus
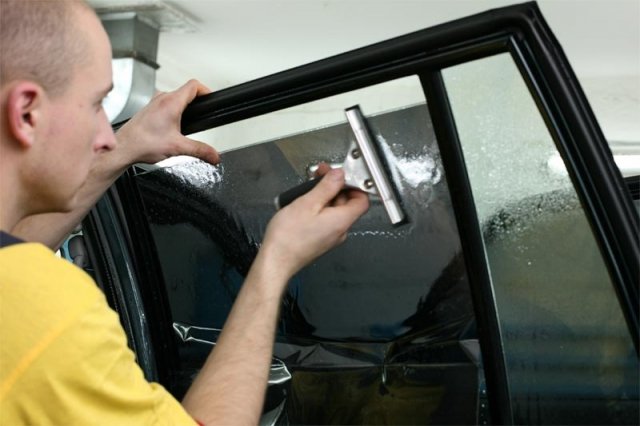
If you want to give your trusty car some personality, you can tint the windows yourself without turning to a professional.
You will need:
- Window tint film with the light transmission level you prefer;
- Utility knife;
- Rubber eraser (or a squeegee);
- Plain, unscented soap;
- Metal ruler;
- Spray bottle (such as a plant mister);
- Heat gun;
Let's look at one method of tinting a window in detail: with the glass removed from the car.
Step 1.
Cover your work surface, where the glass will lie, with a thick, soft cloth.
Step 2.
Drop a small piece of soap into the spray bottle ahead of time so it has time to dissolve in the water.
Step 3.
Carefully remove the door panel to reach the inside of the door, take off the rubber window guides, and loosen the clamp bolts on the bracket that holds the glass. Then take the glass out. Never lay the glass flat. It should only be kept standing upright.
Step 4.
Take the glass, clean it with the soapy water from the spray bottle, and place it on your work surface with the inside face up.
Step 5.
Open the tube with the tint film and set aside the metal knife that comes with it (so you don't damage the film when pulling it out).
Step 6.
Take out the tint film and lay it on your work surface. Measure the size you need and cut it with the utility knife. You'll end up with a rectangular piece. Don't worry, the excess material will be trimmed off later.
Step 7.
Spray the glass on your work surface generously with water from the spray bottle. Use the utility knife to carefully separate the clear liner that covers the adhesive side. Then peel the liner back about 8-10 cm (3-4 in) from the corner of the tint film. Place the exposed adhesive area onto the prepared, wet glass so that the cut piece fully covers the glass with an overhang of 20-30 mm (about 1 in).
Keep in mind that the soapy water between the glass and the film keeps the film from sticking down completely. So, once you've made sure the film covers the entire surface of the glass, use the rubber eraser to push all the water out from under the film. Work from the center toward the edge of the glass. You'll end up with a small triangular corner of film stuck to the glass, while the rest of the film lies loosely on top.
Step 8.
Carefully peel off the clear liner, pulling it with both hands and taking care not to let the adhesive side of the tint film touch the glass. Pull very slowly so you don't stretch the dark film. At the same time, keep spraying the glass generously with the soapy solution.
At this point the tinted window is only partly done. Next, remove the air bubbles and soapy water with the eraser. Do it like this: starting from the corner you stuck down first, push the water out toward the opposite side. Then push the water out perpendicular to the strip you've just bonded. If everything went well, you'll have a smooth, bubble-free surface, and you can trim the edges of the film.
Step 9.
To trim off the excess material in a straight line, use a metal ruler and a utility knife. Cut 2-3 mm (about 1/8 in) in from the edge of the glass.
Repeating steps 3 through 8, tint the remaining side windows.
If the glass is flat (or curved only along the sides), tint it using the procedure above. If the glass is curved along the top as well as the sides, such as a rear window, use the following procedure:
Make sure the glass has no cracks visible to the eye, because the glass can be ruined beyond repair during tinting. Cut a piece of tint film to the size of the glass. Lay the cut piece on the clean glass, wet with water. When the left and right edges curl to follow the contour of the glass, the top part will lift away from it. To fix this, use a heat gun. Set the heat gun to 150-200°C (300-390°F), and once it has heated up, hold it 20-30 cm (8-12 in) from the film and blow hot air evenly over the film, moving from the center of the glass upward. Under the high heat the film will begin to shrink. If you've done everything correctly, the film will end up matching the shape of the glass exactly. Then, using the utility knife, trim the film so it overlaps the ceramic frit (the black dotted border) by half of its width. To finish tinting the rear window, go back to step 7.
If your car has a third brake light on the rear parcel shelf, first cut out an opening matching the size of that light.
Finally, don't forget to put the glass back in. Avoid using the power windows for a day, since this can cause the edge of the tint film to curl. Good luck! Be sure to check your local window tint laws before choosing a tint level.
What next