Autopapyrus · Lada 2107 1.5 (1996)
https://autopapyrus.com/catalog/lada/2107/guides/timing-chain-replacement/
https://autopapyrus.com/catalog/lada/2107/guides/timing-chain-replacement/
Compiled automatically from service literature and owner experience. Specs are for the typical configuration — check them against your exact car before you start.
Lada 2107 1.5 (1996): Timing Chain Replacement (this engine has no timing belt)
The 1.5 L (71 hp) engine in the Lada 2107 is driven by a chain, not a timing belt, so this guide covers chain replacement. The job requires removing the front engine cover and carefully following the timing marks. When replacing the chain, it is recommended to replace the sprockets, damper shoe and tensioner at the same time. The tightening torques below are approximate, so check them against the manufacturer's specifications.
Key figures
- Crankshaft turning wrench38 mm. Used to turn the crankshaft by the pulley when setting the marks and tensioning the chain (steps 7, 27, 36)
- Crankshaft rotation to check the marks2-3 revolutions. Confirms correct assembly before tightening the sprocket bolts (step 27)
- Crankshaft rotation when re-tensioning the chain1.5-2 revolutions clockwise. Turn until maximum resistance, then tighten the tensioner nut (step 36)
- Socket for the auxiliary drive sprocket and shoe bolts17 mm (steps 16-17)
- Wrench for the tensioner cap nut13 mm (steps 29 and 36)
Check these values against the manufacturer’s specification for your vehicle before you start.
Diagram: where the chain, sprockets, shoe and tensioner are and how to turn the crankshaft
Tap to enlarge
- 1Camshaft sprocket: it has a mark that must line up with the tab on the camshaft bearing housing. Its bolt is locked by a tab washer: bend the tab with a chisel, use a new washer on assembly.
- 2Timing drive chain: this engine has no belt. Oil the new chain, fit it on the sprockets by the marks and check the marks after turning the crankshaft 2-3 times.
- 3Crankshaft sprocket: sits on the shaft nose, its A mark and the block A mark line up when pistons 1 and 4 are at TDC. Removed with a puller.
- 4Auxiliary drive sprocket (oil pump and distributor): solid, sits on its shaft. 17 mm bolt; mark it with paint or a punch before removal.
- 5Chain shoe: ribbed plastic part held by a 17 mm bolt and the limit pin. The tensioner plunger presses the shoe, and the shoe presses the chain.
- 6Chain tensioner: a new one is charged (plunger pressed in), fitted, then released. 13 mm cap nut; if the chain rings, loosen it and re-tension the chain.
- 738 mm wrench: goes on the pulley bolt and turns the crankshaft clockwise when setting marks and tensioning the chain.
Parts
12| № | Part | Alternatives |
|---|---|---|
| 01 | Camshaft drive chainFind on Amazon → | AlternativesFenoxPhoenix |
| 02 | Camshaft sprocketFind on Amazon → | AlternativesFenoxPhoenix |
| 03 | Crankshaft sprocketFind on Amazon → | AlternativesFenoxPhoenix |
| 04 | Auxiliary drive sprocket (oil pump and distributor)Find on Amazon → | AlternativesFenoxPhoenix |
| 05 | Chain damper (shoe)Find on Amazon → | |
| 06 | Chain tensionerFind on Amazon → | |
| 07 | Chain limiter pinFind on Amazon → | |
| 08 | Sprocket bolt lock washersFind on Amazon → | |
| 09 | Timing cover gasketFind on Amazon → | |
| 10 | Valve cover gasketFind on Amazon → | |
| 11 | Front crankshaft oil sealFind on Amazon → | |
| 12 | Engine oilFind on Amazon → |
Amazon links search by the part name; use Amazon's fit check for your car before ordering. We may earn a commission from qualifying purchases.
Tools
9Step by step
37 steps · 6 stagesStage 1 of 6 Preparation 5 steps
- Park the car on a level surface, apply the parking brake and let the engine cool. Disconnect the negative battery terminal.
- Drain the coolant and remove the radiator. This noticeably improves access to the front of the engine.
- If the engine is fuel-injected, disconnect the wiring connector of the crankshaft position sensor.
- Remove the alternator drive belt.
- Remove the air filter and anything else that blocks access to the valve cover.
Stage 2 of 6 Setting tdc and removing the covers 7 steps
- Remove the valve cover by undoing the nuts with a 10 mm wrench.
- Turn the crankshaft with a 38 mm wrench on the pulley bolt until the mark on the camshaft sprocket lines up with the protrusion on the camshaft bearing housing. The "A" marks on the crankshaft sprocket and on the block must also line up at the same time (pistons 1 and 4 at TDC).
- Remove the crankshaft pulley (following the front crankshaft oil seal replacement procedure).
- Use a chisel to bend back the tab of the lock washer on the camshaft sprocket bolt, then remove the bolt.
- Using an extension with a 10 mm socket, remove the three bolts that connect the oil pan to the timing cover, and loosen the two adjacent bolts.
- Remove the three nuts and six bolts that secure the timing cover to the block.
- Tap the cover with a plastic mallet to separate it from the gasket, then remove the cover and gasket. Use a knife or scraper to clean the mating surfaces of any remaining gasket material.
Stage 3 of 6 Removing the chain and components 8 steps
- On a carbureted engine, make a mark (with paint or a center punch) on the auxiliary drive sprocket relative to the block. This way you won't have to set the distributor again from scratch.
- Remove the camshaft sprocket together with the chain.
- Remove the chain tensioner.
- Bend back the tab of the lock washer on the auxiliary drive sprocket bolt, remove the bolt with a 17 mm socket, then remove the sprocket and chain.
- Use a 17 mm socket to remove the damper shoe bolt, pull the bolt out of the hole in the block and remove the shoe.
- Unscrew the chain limiter pin with a 10 mm wrench and remove the chain.
- Use a puller to press the sprocket off the crankshaft nose.
- Inspect the parts: there must be no chips, cracks or wear on the chain rollers and sprocket teeth. Replace any worn parts.
Stage 4 of 6 Installing the chain 7 steps
- Fit the new sprocket onto the crankshaft nose. Make sure the marks on it and on the block line up.
- Lubricate the new chain with engine oil and place it over the crankshaft sprocket.
- Install the chain limiter pin.
- Fit the sprocket and chain onto the auxiliary drive shaft, aligning the marks you made earlier and keeping the driving run of the chain taut. While holding the sprocket so it doesn't turn, start the bolt without final tightening.
- Use a wire hook to lift the chain up to the camshaft, place it over the camshaft sprocket, and set the sprocket on the shaft so the marks line up. Start the bolt without tightening it.
- Install the shoe and the new tensioner: "charge" the tensioner (push in and lock the plunger), put it in place, then "release" it so the shoe tensions the chain.
- With the transmission in neutral, turn the crankshaft 2-3 revolutions and check that the marks still line up. If they don't, remove the chain and reposition it.
Stage 5 of 6 Tightening and reassembly 5 steps
- Once the marks line up, engage first gear (so the shaft cannot turn) and tighten the camshaft sprocket and auxiliary drive bolts. Approximate torque is 36-45 N·m (27-33 lb-ft); check the exact value against the specification. Bend over the tabs of the new lock washers.
- Tighten the tensioner cap nut (13 mm wrench). Torque per the manufacturer's specification.
- Fit a new timing cover gasket (with sealant if needed), install the cover and tighten the nuts and bolts evenly in a crisscross pattern, without overtightening. Tighten the oil pan bolts you loosened.
- Install a new front crankshaft oil seal and the pulley, then tighten the pulley bolt. Approximate torque is 90-120 N·m (66-89 lb-ft); check the exact value against the specification. Hold the crankshaft by engaging a gear.
- Install the valve cover with a new gasket, the alternator belt and the radiator, and reconnect the crankshaft sensor connector (on fuel-injected engines).
Stage 6 of 6 Checking 5 steps
- Refill the coolant, top up the oil if necessary, and reconnect the battery.
- On a carbureted engine, check the ignition timing and adjust it if necessary.
- Start the engine, warm it up, and check for leaks at the timing cover and radiator. Listen to the chain: a ringing or rattling sound when the revs drop sharply indicates insufficient tension.
- If you hear chain noise, re-tension the chain: loosen the tensioner cap nut (located under the cooling system hose), turn the crankshaft clockwise 1.5-2 revolutions with a 38 mm wrench until you feel maximum resistance, hold it against turning back, and tighten the nut.
- Check the coolant level after the engine warms up and air pockets have bled out.
Common mistakes and warnings
- The main mistake is misaligned marks during assembly: a chain installed one tooth off throws off the valve timing
- Before final tightening, always check the marks after turning the crankshaft 2-3 revolutions
- Always replace the sprocket bolt lock washers, and tighten the sprockets with the crankshaft locked
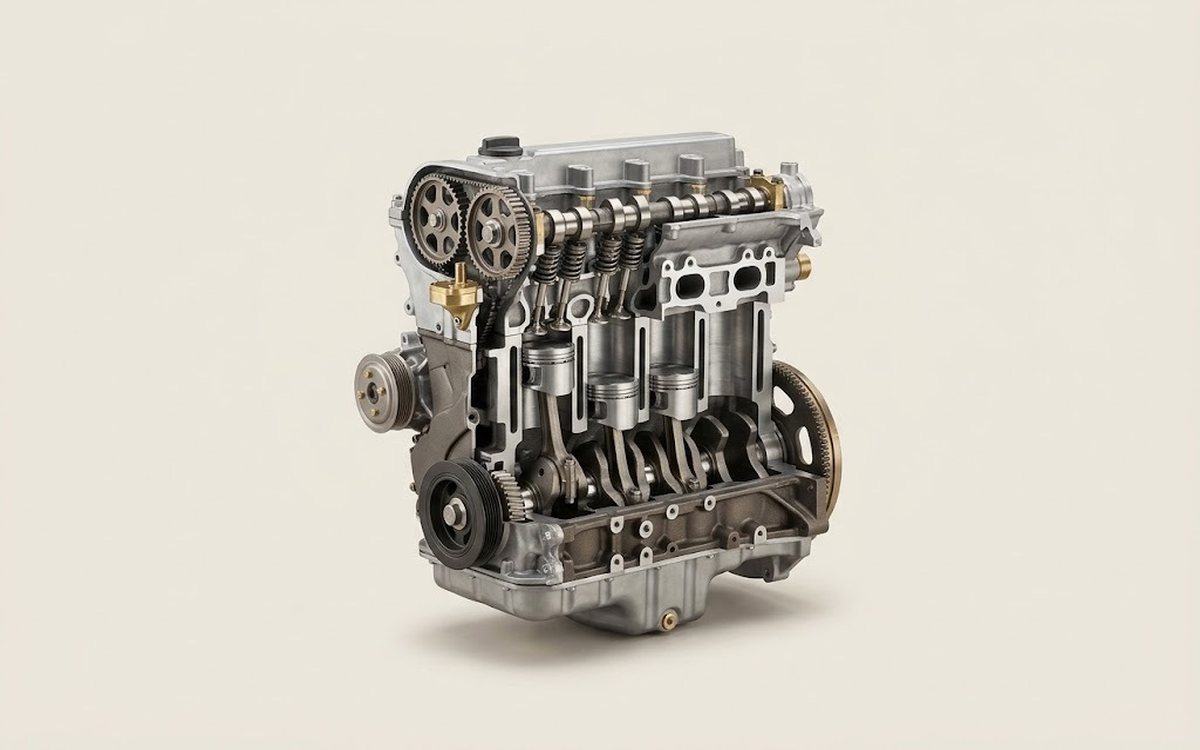 How it works · 3D
How a Car Engine Works
How the part you're working on actually works — in plain English, on a 3D model.
Open in 3D →