Nissan Almera N16 (II generation) (2000–2005) — repair and maintenance
3 repair manuals
All generations
B10 (III generation) · 2006–2011N16 (II generation) · 2000–2005N15 (I generation) · 1995–1999
Nissan Almera N16 (II generation) guides
639Engine131
- Servicing the lubrication system
- Checking the cylinder compression
- Removing and installing the engine
- Diagnosing the engine condition
- Checking the level and replacing the oil
- Setting the piston of cylinder No. 1
- Replacing the cylinder head
- Replacing the engine sealing parts
123 more
- Replacing the valve stem seals
- Replacing the front crankshaft oil seal
- Replacing the oil pan gasket
- Oil pump
- Cleaning the crankcase ventilation system
- Lapping the valves
- Adjusting the valve train clearances
- Repairing the cylinder block
- Engine repair
- Repairing the oil pump
- Assembling and installing the piston and connecting rod assembly
- Spark plugs
- Removing and installing the air filter
- Removing and installing the oil pump
- Removing and installing the oil pan
- Removing the piston and connecting rod assemblies
- Removing, inspecting and installing the flywheel
- Cylinder head/pistons - removing carbon deposits
- Diagnosing lubrication system faults
- Replacing the master cylinder
- Replacing the throttle position sensor
- Replacing the rear crankshaft oil seal
- Replacing the rear powertrain mount
- Replacing the left powertrain mount
- Replacing the engine oil
- Replacing the front powertrain mount
- Replacing the right engine mount
- Replacing the upper cover gasket
- Replacing the intake manifold gasket
- Replacing the slave cylinder
- Replacing the filter element
- Replacing the drive chain
- Valve clearances
- Cylinder head cover - removal and installation
- Pistons and connecting rods - inspection
- Checking the oil pressure
- Checking the drive belt tension
- Disassembling the cylinder head
- Repairing the petrol engine without removing it from the vehicle
- Repairing the diesel engine without removing it from the vehicle
- Removing the engine - methods and precautions
- Engine knocking noises
- Installing the crankshaft
- Piston ring side clearance
- Vacuum pump
- Engine assembly
- Engine diagnostics performed during operation
- Diagnosing petrol engine faults
- Diagnosing diesel engine faults
- Diagnosing injection system faults (all engines)
- Diagnosing engine operation by smoke and emissions
- Diagnosing the turbocharger
- Rear oil seal
- Rear crankshaft oil seal - replacing
- Piston-to-gudgeon pin clearance
- Replacing the connecting rod bushing (in the small end)
- Replacing the hydraulic valve lash adjusters of the rocker arms
- Replacing the crankshaft
- Replacing the valve stem seals
- Replacing the engine oil
- Replacing the valve guide
- Replacing the powertrain mounts
- Replacing the intake manifold gasket
- Replacing the oil pan gasket
- Replacing the oil pan gasket
- Replacing the camshafts
- Replacing the air flow meter
- Replacing the accessory drive belts
- Replacing the drive belt
- Replacing the oil seals
- Replacing the valve seat with an oversize one
- Replacing the turbocharger
- Replacing the intake pipe seal
- Replacing the cylinder head cover gasket
- Replacing the timing chain
- Flywheel and starter ring gear - inspection and repair
- Engine mechanical components
- Engine oil
- Servicing the lubrication circuit
- Cleaning and replacing the air cleaner filter element
- Front oil seal
- Replacing the front crankshaft oil seal
- Piston rings - inspection and assembly recommendations
- Pistons with connecting rods - installation
- Drive belts
- Checking the piston protrusion / selecting the cylinder head gasket
- Checking the radiator cap valve opening pressure
- Checking and adjusting the valve clearances
- Checking and adjusting the accessory drive belt tension
- Checking the crankshaft
- Checking the pistons and connecting rods
- Checking the fuel rail relief valve
- Checking the slave cylinder
- Checking the glow plugs
- Checking the engine fuel system
- Checking the positive crankcase ventilation system
- Checking the turbocharger
- Checking the engine oil level
- Checking the engine oil level
- Checking the idle speed and ignition timing
- Checking, flushing and replacing the hydraulic lash adjusters
- Disassembling and assembling the intake tract
- Disassembling and assembling the engine
- Disassembling and assembling the slave cylinder
- Adjusting the intake flap control mechanism
- Adjusting the valve timing
- Adjusting the idle speed
- Repairing the intake and exhaust system
- Assembling the cylinder head
- Assembling and installing the engine – recommendations
- Glow plugs
- Valve seats
- Removing the engine - general information
- Removing the powertrain protection
- Removing and installing the clutch driven disc, clutch cover and flywheel
- Removing and installing the sump guard
- Removing and installing the valve cover
- Removing and installing the timing chain
- Removing and installing the crankshaft pulley
- Removing the idle speed control valve
- Removing the intake receiver and replacing the gaskets
- Removing, checking and installing the canister purge valve
- Breather hose
Suspension & steering80
- Rear suspension
- Front suspension repair
- Inspecting and checking the steering
- Steering column
- Removing and installing the steering wheel
- Replacing the rear suspension beam
- Replacing the strut upper mount
- Replacing the outer tie rod end
72 more
- Replacing the powertrain mounts
- Replacing the rear hub bearing
- Replacing the front wheel hub bearing
- Replacing the tie rod
- Replacing the tie rods
- Replacing the front suspension arm
- Replacing the ball joint
- Repairing the steering
- Steering gear
- Removing and installing the front suspension crossmember
- Removing and installing the steering knuckle
- Removing and installing the steering column
- Diagnosing and eliminating chassis vibration
- Diagnosing chassis faults
- Diagnosing the condition of the shock absorbers
- Replacing the power steering reservoir
- Replacing the power steering pump
- Replacing the suspension bushings
- Replacing the lateral arm
- Checking the driveshaft protective boots
- Checking the joint protective boots
- Checking and adjusting the wheel alignment angles
- Checking the suspension and the condition of the exhaust system
- Checking the front suspension components
- Bleeding the power steering system
- Adjusting the steering wheel position
- Repairing the shock absorber strut
- Suspension strut - removal and installation
- Front suspension crossmember
- Diagnosing the causes of vehicle pull
- Diagnosing the rack-and-pinion steering gear
- Diagnosing the steering mechanism
- Replacing the shock absorber
- Replacing the control arm bushings
- Replacing the dust boot
- Replacing the power steering system pressure sensor
- Replacing the rear powertrain mount
- Replacing the left powertrain mount
- Replacing the tie rod end
- Replacing the power steering pump
- Replacing the front shock absorber (not all models)
- Replacing the front powertrain mount
- Replacing the subframe
- Replacing the hub bearing
- Replacing the track rod
- Replacing the right powertrain mount
- Replacing the rear suspension spring
- Replacing the power steering fluid
- Replacing the beam arm bushing
- Replacing the front anti-roll bar links
- Replacing the torsion bar
- Replacing the rear hub stub axle
- Replacing the steering gear boot
- Replacing the stabilizer bar components
- Checking the steering rod boots and tie rod ends
- Checking the wheel camber
- Checking the steering wheel free play
- Checking the condition of the steering
- Checking the condition of the running gear
- Checking the wheel toe-in
- Bleeding the power steering system
- Adjusting the steering column, seats and mirrors
- Adjusting the wheel alignment angles
- Repairing the rear suspension shock absorber strut
- Steering wheel
- Removing the shock absorber strut
- Removing and installing the rear suspension strut
- Removing and installing the control lever link
- Removing and installing the power steering pump
- Removing and installing the front suspension crossmember
- Removing and installing the wiper arms
- Removing and installing the stabilizer bar
Electrical121
- Replacing the battery
- Replacing the alternator
- Removing and installing the starter
- Ignition switch (lock)
- Diagnosing the engine management system
- Replacing the side turn signal lamp
- Replacing the high-mounted stop lamp
- Replacing the rear light
113 more
- Replacing and servicing the spark plugs
- Replacing the ignition coils
- Replacing the instrument cluster
- Replacing the interior light lens
- Replacing the license plate lights
- Charging the battery
- Vehicle keys
- Fuse and relay boxes
- Checking the exterior lighting
- Checking and adjusting the headlight aim
- Checking the ignition system
- Checking the electrical equipment
- Replacing the hazard warning switch
- Replacing the knock sensor
- Replacing the camshaft position sensor
- Replacing the vehicle speed sensor
- Replacing the windshield wiper gear motor
- Replacing the individual (spot) lamp assembly
- Replacing the fuses
- Replacing the fog light
- Replacing the electronic control unit
- Battery maintenance
- Lighting, light signaling
- Checking the ignition switch
- Checking and replacing the sensors
- Checking and replacing the spark plugs
- Checking the lighting
- Discharging the air conditioning system
- Repairing the lighting system
- Removing and installing the control unit
- Diagnosing faults and repairing the alternator
- Diagnosing ignition system faults
- Replacing the exterior mirror control unit
- Replacing the front seat heater switches
- Replacing the instrument panel switches
- Replacing the front seat heating switches
- Replacing the switch
- Replacing the front door lock switch
- Replacing the warning lamp switch
- Replacing the rear window heater switch
- Replacing the fog light switch
- Replacing the reverse light switch
- Replacing the crankshaft position sensor
- Replacing the accelerator pedal position sensor
- Replacing the warning indicator sensor
- Replacing the warning lamp sensor
- Replacing the outside air temperature sensor
- Replacing the fuel level sensor
- Replacing the additional resistor
- Replacing the horn
- Replacing and checking the neutral position sensor
- Replacing the immobiliser coil
- Replacing the bulbs in the headlight unit
- Replacing the bulbs of the parking light and the front turn signal light
- Replacing the interior light bulb
- Replacing the fog lamp bulb
- Replacing the headlight bulb (halogen light)
- Replacing the outside handle and switch
- Replacing the other bulbs and lighting components
- Replacing the switches
- Replacing the trunk light lens
- Replacing the headlight levelling adjuster
- Replacing the voltage regulator
- Replacing the clock spring
- Replacing the windshield wiper
- Replacing the rear door window regulator
- Replacing the front door window regulator
- Replacing the tachometer
- Replacing the glove box light
- Replacing the license plate lamp
- Replacing the ignition switch lock cylinder
- Replacing the wiper blades
- Replacing the fan motor
- Instrument panel
- Checking the inertia reel on the vehicle
- Checking the seat belt inertia reel
- Checking the radiator cooling fan relay
- Checking the coiled wire
- Disassembling the alternator
- Adjusting the headlight beam aim (xenon light)
- Adjusting the Park/Neutral (PNP) switch
- Adjusting the headlight aim
- Adjusting the information display brightness
- Repairing the immobilizer
- Repairing the heating element
- Repairing the front seat heating
- Repairing the rear window wiper and washer
- Repairing the ignition system
- Repairing the starting system
- Repairing the rear window heating
- Repairing the power windows
- System with an automatic control unit
- Removing the diagnostic sensor unit
- Removing the heating control unit
- Removing the switches and controls
- Removing the system head unit
- Removing the temperature sensor
- Removing the side airbag sensors
- Removing the oxygen sensors
- Removing the rear lights, replacing the bulbs
- Removing and installing the immobilizer antenna unit
- Removing and installing the on-board computer
- Removing and installing the audio system speakers
- Removing and installing the information display
- Removing and installing the headlight washer
- Removing and installing the cigarette lighter socket
- Removing and installing the wiper linkage
- Removing and installing the radiator electric fan
- Removing the switching unit
- Removing the air conditioning condenser
- Removing the accelerator pedal module
- Reading fault codes
- Storing the battery
Fuel system33
- Repairing the fuel system
- Repairing the fuel vapor recovery system
- Replacing the fuel tank and its filler pipe
- Checking the fuel pressure in the fuel supply system
- Checking the fuel injectors
- Repairing the fuel pump module
- Removing and installing the throttle body
- Removing and installing the fuel pump module
25 more
- Removing and installing the accelerator pedal
- Removing and installing the fuel rail
- Replacing the intake pipe resonance chamber
- Refueling the vehicle
- Checking the fuel lines for leaks
- Removing and installing the charcoal canister
- Removing and installing the pressure reducing valve
- Removing and installing the fuel injectors
- Replacing the fuel pressure sensor
- Replacing the fuel temperature sensor
- Replacing the fuel filter
- Filling with gasoline
- Accelerator pedal
- Checking the fuel pump pressure
- Checking the fuel feed pump
- Checking the air intake system
- Checking the fuel vapor recovery system
- Adjusting and replacing the throttle cable
- Adjusting the windscreen washer nozzle
- Repairing the fuel injection system
- Repairing the fuel supply system
- Relieving the fuel pressure
- Removing the fuel rail and injectors
- Fuel pump
- Bleeding the fuel system
Body & glass53
- Side doors
- Replacing the protective bar
- Replacing the rear-view mirrors
- Repairing the trunk
- Repairing the window regulators
- Tailgate
- Replacing the exterior rear-view mirrors
- Trunk lid
45 more
- Rear bumper
- Replacing the rear door lock inner handle
- Replacing the front door lock inner handle
- Replacing the exterior mirror control joystick
- Replacing the rear door lock *46
- Replacing the front door lock
- Replacing the rear door exterior handle
- Replacing the front door exterior handle
- Replacing the rear door check strap
- Replacing the front door check strap
- Replacing the windshield wiper
- Replacing the rear door window glass
- Replacing the front door window glass
- Door locks
- Front doors
- Front bumper
- Checking the bonnet lock cable
- Checking the level and topping up the washer fluid reservoir
- Adjusting the outside handle rod
- Repairing body damage
- Removing the mud flaps
- Removing the rear bumper
- Removing the hood lock
- Removing the trunk lid lock
- Removing and installing the bumpers
- Removing and installing the washer reservoir and pump
- Removing and installing the side and lower trim panels
- Removing and installing the engine splash guards
- Removing and installing the rear door
- Removing and installing the hood
- Removing and installing the complete bonnet
- Removing and installing the front body components
- Removing and installing the trunk lid assembly
- Removing and installing the washer pumps
- Removing and installing the luggage compartment trim
- Removing and installing the front fender
- Removing and installing the wheel arch liners
- Removing and installing the air intake box grille
- Removing and installing the hood insulation
- Removing the floor tunnel trim
- Removing the windshield washer
- Removing the front bumper
- Removing the glass roof
- Rear door glass
- Installing the roof rack
Wheels & tires21
- Wheels and tires
- Removing and installing the front drive shafts
- Repairing a punctured wheel
- Balancing the wheels on the vehicle
- Wheel runout
- Diagnosing sealed wheel bearing faults
- Diagnosing tyre condition
- Checking the tire pressure
13 more
- Repairing defects in aluminum wheels
- Replacing/rotating the tires
- Replacing a damaged wheel
- Replacing the rear wheel bearing
- Replacing the front wheel hub bearing
- Rotating the wheels
- Checking and adjusting the wheel alignment
- Checking the condition of the wheels and tires
- Checking the condition of the front drive shafts
- Checking the rear wheel alignment angles
- Repairing a tubeless tire
- Removing and installing the wheel arch liners and mud flaps
- Removing the front wheel arch liners
Brakes49
- Replacing the brake fluid
- Brake master cylinder
- Checking the level and topping up the brake fluid
- Adjusting the parking brake
- Removing and installing the brake pedal
- Replacing the brake master cylinder
- Replacing the parking brake actuating lever
- Replacing the brake lines
41 more
- Replacing the parking brake cables
- Checking the parking brake
- Checking the brake system
- Bleeding the clutch hydraulic release system
- Bleeding the brake system
- Brake system repair
- Rear wheel brake assemblies
- Front wheel brake assemblies
- Replacing the brake booster
- Replacing the brake drum
- Replacing the brake disc
- Replacing the brake pads
- Inspecting and replacing hydraulic tubes and hoses
- Brake pedal
- Checking the anti-lock braking system
- Checking the hydraulic actuator for leaks
- Checking the ABS system
- Removing and installing the rear brake pipes and hoses
- Removing and installing the front brake pipes and hoses
- Diagnosing brake system faults
- Replacing the front disc brakes
- Replacing the brake wheel cylinder
- Replacing the working fluid in the clutch release hydraulic drive
- Replacing the rear brake caliper
- Replacing the front brake caliper
- Replacing the hydraulic drive hose and line
- Replacing the brake hose
- Checking and replacing the rear brake pads
- Checking and replacing the front brake pads
- Checking and adjusting the brake pedal
- Checking the operation of the brake vacuum booster
- Checking the condition of the brake system
- Checking the brake system components
- Checking the braking system efficiency
- Slave cylinder
- Disassembling and assembling the brake caliper assembly
- Removing and installing the brake caliper assembly
- Removing, disassembling, assembling and installing the brake master cylinder
- Removing, disassembling, assembling and installing the front brake caliper
- Brake hoses
- Bleeding the brake system
Transmission65
- Replacing the clutch
- Removing and installing the gearbox
- Removing and installing the clutch pedal
- Replacing the front wheel drive shafts
- Replacing the transmission oil seals
- Repairing the transmission
- Clutch master cylinder
- Troubleshooting the clutch
57 more
- Replacing the clutch fork and release bearing
- Replacing the driveshafts
- Clutch pedal
- Checking the automatic transmission operation
- Checking the clutch
- Checking and adjusting automatic transmission components without removing it from the vehicle
- Automatic transmission repair
- Manual transmission repair
- Transmission control lever
- Powertrain
- Removing and installing the selector control link
- Diagnosing manual transmission faults
- Replacing the transmission oil and checking its level
- Replacing the transmission assembly
- Replacing the outer joint
- Replacing the differential bearings of the JC5 gearbox
- Replacing the clutch release slave cylinder
- Replacing the differential oil seal
- Replacing the shift rod oil seal
- Replacing the oil seals (gearbox in the vehicle)
- Replacing the automatic transmission oil seals
- Replacing the manual transmission oil seals
- Replacing the transmission fluid
- Replacing the automatic transmission control cable
- Clutch release mechanism
- Gear shift mechanism
- Adjusting the transmission control
- Front drive shafts
- Drive mechanism
- Checking the reversing light switch of the JC5 gearbox
- Checking the transmission fluid temperature sensor
- Checking and replacing the oil in the gearbox
- Checking and adjusting the clutch pedal
- Checking the automatic transmission positions
- Checking the oil level and replacing the oil in the transmission
- Checking the transmission fluid level
- Checking the JC5 transmission components
- Checking the clutch components
- Bleeding the hydraulic clutch actuator
- Clutch slave cylinder
- Disassembling and assembling the driveshaft
- Disassembling and assembling the clutch slave cylinder
- Disassembling the gearbox
- Adjusting the output shaft axial play of the RS6F51R transmission
- Adjusting the input shaft axial play of the RS6F51R transmission
- Adjusting the automatic transmission positions
- Adjusting the transmission control cable
- Repairing the differential
- Repairing the RS5F3OA and RS5F31A transmissions
- Repairing the clutch of the Nissan Almera
- Assembling the JC5 transmission
- Removing the clutch components
- Removing and installing the RS5F30A and RS5F70A transmissions
- Removing and installing the clutch release mechanism
- Removing and installing the front driveshafts
- Removing and installing the clutch pipe
- Removing the gear shift lever
Cooling system35
- Replacing the coolant
- Servicing the cooling system
- Removing and installing the radiator
- Removing and installing the thermostat
- Replacing the water pump
- Checking the cooling system
- Removing and installing the expansion tank
- Water pump - removal and installation
27 more
- Troubleshooting the air conditioning system
- Diagnosing cooling system faults
- Replacing the air conditioning compressor
- Replacing the hose and pipe
- Replacing the hoses and pipes
- Checking the air conditioner operation
- Checking the hoses and connections
- Expansion tank
- Diagnosing turbocharger faults
- Replacing the cooling system radiator
- Servicing the air conditioning system
- Checking the cooling system for leaks
- Checking the line pressure
- Checking radiator cooling fan motors 1 and 2
- Checking for loose connections in the cooling circuit 356'
- Checking and topping up the coolant level
- Flushing the cooling system
- Disassembling and assembling the radiator fan
- Disassembling, checking and assembling the exhaust manifold and turbocharger
- Adjusting the heater flap control mechanism
- Repairing the aluminium radiator
- Removing the heater fan
- Removing and installing the water distributor
- Removing and installing the radiator grille
- Removing the air conditioning evaporator
- Removing the coolant pump
- Removing the heater core
Exhaust system15
Interior36
- Seat belts
- Instrument cluster
- Rear seat
- Replacing the interior lighting
- Adjusting the front seat position
- Removing and installing the sun visors
- Repairing the main components of the air conditioning system
- Repairing the cabin heating and ventilation
28 more
- Removing and installing the audio system
- Removing and installing the front door trim panel
- Interior storage compartments
- Rear seat
- Rear seats
- Replacing the floor trim
- Servicing the passive safety system
- Heating (air conditioning) and ventilation of the passenger compartment
- Front seats
- Front seats
- Airbags
- Instrument panel and controls
- Repairing the supplementary restraint system
- Repairing the heating and air conditioning system
- Heating system
- Removing and installing the interior rear-view mirror
- Removing and installing the headliner
- Removing and installing the interior equipment
- Removing and installing the front seat
- Removing and installing the front seat assembly
- Removing and installing the head restraints
- Removing and installing the rear seat belts
- Removing the front side airbag module
- Removing the front passenger airbag module
- Removing the rear door trim panel
- Removing the trunk lid trim panel
- Removing the driver's airbag
- Removing the seat backrest assembly
Need a job that isn't listed? A full repair manual for the Nissan Almera N16 (II generation) covers every system: wiring diagrams, torque specs, step-by-step photos.
Find a repair manual →Need a part? Search Amazon for Nissan Almera N16 (II generation) parts: filters, brakes, sensors, belts. Check the fit for your year and engine before you buy.
Find parts on Amazon →Nissan Almera N16 (II generation) repair manuals
3
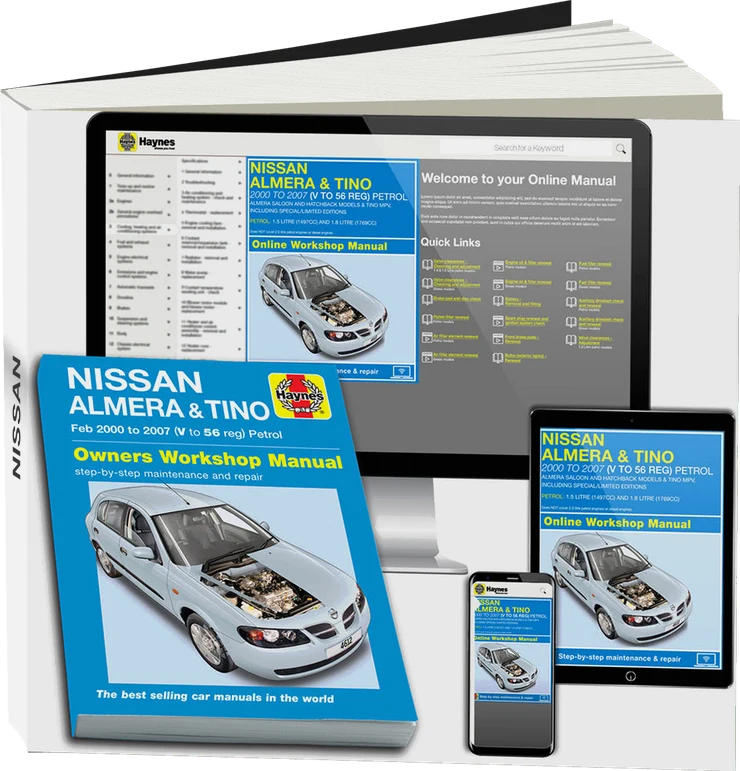

Nissan Almera (N16) 2000 to 2006 Haynes Online Diagnostics & Service Guide
UK edition · online access
£28.79
Manuals are written for specific model years — check that the years match your car. Prices are set by the seller.
How well do you know the Nissan Almera? Ten questions on its history, engines and records, with the answer explained after each pick.
Take the quiz →Our articles
 Brand stories
The History of Nissan
Over the course of 80 years, this Japanese automaker has come a long way and risen to become a leader of the global…
Read →
 Garage
Fuel Quality Indicators: What Octane and Cetane Numbers Mean
What is an octane number? What about a cetane number? Which fuel should you choose for a high-compression engine?…
Read →
 Before you buy
How to Pick Up Your Car from the Dealership the Right Way
If you've decided to buy a car from a dealership, it isn't enough to simply choose a model you like, pay for it, and…
Read →
Owner discussions
all discussions →- Nissan Bluebird - speedometer not working · Nissan Bluebird
- Nissan Terrano 2.4L - High Fuel Consumption · Nissan Terrano
- Nissan Tiida 2007, 1.6 L 16V HR16 misfiring on two or three cylinders · Nissan Tiida
- Nissan Pathfinder R52, CVT jerking · Nissan Pathfinder
- Nissan Primera P12, 2.0l: Engine starts and stalls after 30-50 seconds · Nissan Primera