Autopapyrus · Hyundai Starex 2.5 CRDi (2007) (H-1 / iMax / Grand Starex)
https://autopapyrus.com/guides/hyundai/starex/automatic-transmission-clutch-pack-replacement/
https://autopapyrus.com/guides/hyundai/starex/automatic-transmission-clutch-pack-replacement/
Compiled automatically from service literature and owner experience. Specs are for the typical configuration — check them against your exact car before you start.
Hyundai Starex 2.5 CRDi (2007) (H-1 / iMax / Grand Starex): Automatic Transmission Clutch Pack Replacement
Clutch packs wear out from slipping during shifts, overheating and dirty fluid. Symptoms: slipping under acceleration, delayed shifts, a burnt smell from the ATF, and metal debris in the pan. For the repair, the transmission is removed, disassembled, and the clutch packs are replaced together with the piston seals. Exact clearances and torque values for your transmission are not documented in open sources, so the general procedure is given below.
Part
- 🔩 Automatic transmission rebuild kit (friction discs, steel discs, seals and O-rings) and ATF. About 8-10 liters (8.5-10.5 qt) of ATF is needed. The ATF specification is shown on the filler cap and in the transmission service documentation. Use only fluid that meets this specification
Tools
9- vehicle lift or inspection pit
- transmission jack
- socket and wrench set 10-19 mm
- torque wrench
- clutch pack spring compressor
- feeler gauge
- air gun
- snap-ring pliers and spare snap rings
- ATF drain pan
 There's a full repair manual for this car
Every system, wiring diagrams and torque specs — not just this job. Haynes AutoFix (online).
See manuals →
Step by step
12 steps- Diagnose before removal. Check the ATF level and condition (dark fluid with a burnt smell or metal dust indicates clutch wear) and read the fault codes from the control unit. Slipping with normal oil pressure can also be caused by solenoids or the valve body, so rule those out first.
- Disconnect the negative battery terminal. Raise the vehicle on a lift and remove the engine skid plate (if fitted). Drain the ATF from the pan.
- Remove the driveshaft, the exhaust system in the area of the transmission, the connectors and the selector cable, the transmission cooler lines (mark them and plug them), the axle shafts if they are in the way, and the starter.
- Support the engine and set up the transmission jack. Remove the bell housing bolts and the bolts securing the torque converter to the drive plate (rotate the crankshaft through the access opening). Then remove the transmission mounts to the body and carefully lower the transmission. Make sure the torque converter stays on the transmission shaft.
- Clean the outside of the transmission. Remove the pan and the valve body. Remove all small parts and lay them out in order, and take photos as you go. Do not mix up the length and location of the bolts.
- Disassemble the drums and clutch packs. Remove the snap rings, pistons and springs. Use a spring compressor for the springs. Note the order of the steel and friction discs in each pack, the number of discs, the thickness of the shim (selective) rings and the position of the washers.
- Inspect the parts: drums, pistons, bearings, bushings and gears. Replace the seals and O-rings. Soak the new friction discs in clean ATF for at least 30 minutes before assembly. Replace any steel discs that show burn marks or warping.
- Reassemble the transmission in reverse order. Measure the end play of the packs and the piston travel to the specification for your transmission, and adjust using the thickness of the snap rings or thrust rings. Check that the oil passages are clear by blowing them out with compressed air, and check the pistons by applying air through the passages.
- Flush the torque converter or replace it. If the fluid was heavily contaminated, it will still contain debris. Install a new ATF filter and a new pan gasket.
- Install the transmission in reverse order. Make sure the torque converter is fully seated on the splines and that there is a gap between it and the drive plate. Tighten the torque converter bolts to 40-50 N·m (30-37 lb-ft), the bell housing bolts to 40-65 N·m (30-48 lb-ft) and the pan bolts to 8-12 N·m (71-106 lb-in) (confirm exact values against the manufacturer's specifications for your transmission). Tighten the wheel nuts to 90-110 N·m (66-81 lb-ft).
- Fill with the required amount of ATF, start the engine and cycle through all selector positions with a pause in each. Warm the transmission to operating temperature and bring the level to the mark on the dipstick, with the engine idling and the selector in N or P (as specified for your transmission).
- Take a test drive of 20-30 km (12-19 miles) and check the shifts, any slipping and any leaks. After 500-1000 km (300-600 miles), check the fluid level and the tightness of the fasteners, and top up if necessary.
Common mistakes and warnings
- Rebuilding automatic transmission clutch packs requires cleanliness and precise clearance measurements
- A mistake during assembly will quickly destroy the new discs
- If you have no experience with automatic transmissions, leave the disassembly to a specialist transmission shop, and do the removal and installation yourself
- The transmission weighs about 70-90 kg (155-200 lb), so work only with a transmission jack and secure the vehicle on the lift
- Do not use universal fluid that lacks the proper approval, as it quickly leads to repeat wear
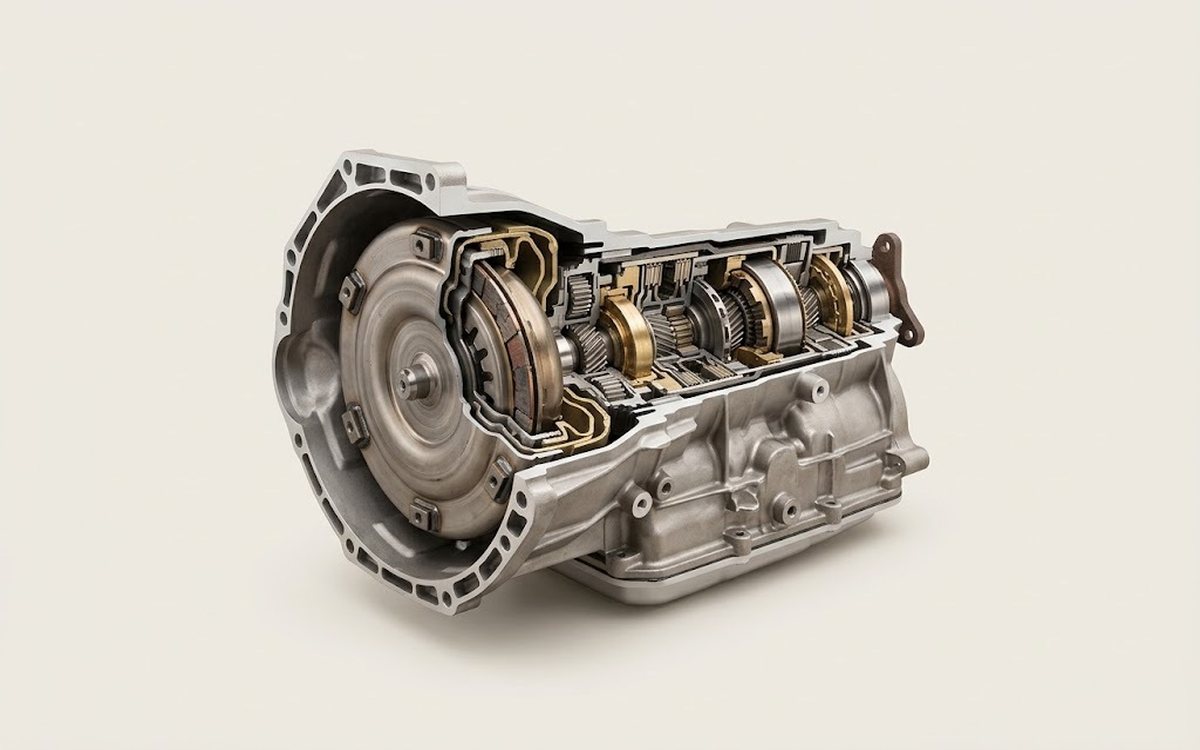 How it works · 3D
How an Automatic Transmission Works
How the part you're working on actually works — in plain English, on a 3D model.
Open in 3D →