Autopapyrus · Toyota Hi-Ace (H100) 2.4 D 2L (1992)
https://autopapyrus.com/guides/toyota/hi-ace/clutch-replacement/
https://autopapyrus.com/guides/toyota/hi-ace/clutch-replacement/
Compiled automatically from service literature and owner experience. Specs are for the typical configuration — check them against your exact car before you start.
Toyota Hi-Ace (H100) 2.4 D 2L (1992): Clutch Replacement
On the Hi-Ace H100, the 2L engine sits under the front seats, so the transmission is removed with access from inside the cabin and from underneath. The clutch is hydraulically operated. The job is labor-intensive: you need to remove the transmission, inspect the flywheel, replace the kit and seals, then bleed the hydraulic system.
Parts
6| № | Part |
|---|---|
| 01 | clutch kit for the 2L (clutch disc, pressure plate, release bearing) - match it by the diameter and spline count of the old disc |
| 02 | clutch slave cylinder and clutch master cylinder (as needed based on condition) |
| 03 | rear crankshaft seal and transmission input shaft seal |
| 04 | high-temperature grease for the splines and release fork |
| 05 | DOT 3 or DOT 4 brake fluid |
| 06 | manual transmission gear oil (if drained). Aftermarket kit brands: Exedy, Aisin, Valeo, Sachs |
Tools
9- pit or vehicle lift
- transmission jack
- jack stands
- socket and wrench set
- torque wrench
- clutch disc alignment tool
- puller or wrench for the release bearing (if needed)
- container for brake fluid
- grease gun or spray for lubricating splines
Step by step
20 steps- Park the vehicle on level ground, set the parking brake, and chock the rear wheels. Disconnect the negative battery terminal. Raise the front of the vehicle on a lift or jack stands.
- Remove the engine cover inside the cabin (under and between the seats) and, if necessary, the front seats. Clear away anything that blocks access to the transmission from above.
- Remove the shift lever or disconnect its linkage from the transmission (depending on the layout). Mark the position of the parts before disassembly.
- Remove the underbody skid plate, if fitted. Drain the transmission oil if you plan to replace the input shaft seal or will be tilting the transmission.
- Disconnect the driveshaft from the transmission flange. Mark the flanges with paint so you can reassemble them in the same position. Cover the shaft or tie it up out of the way.
- Disconnect the wiring for the reverse light switch and the speedometer (cable or sensor, depending on the trim), and also the starter: remove the mounting bolts and move the starter aside.
- Detach the clutch slave cylinder from the bellhousing without opening the hydraulic system (the line stays connected, and the cylinder is hung from a wire). If you did disconnect the line, place a container underneath, because brake fluid is corrosive to paint.
- Support the transmission with a transmission jack. Remove the rear transmission crossmember and unbolt the bellhousing from the engine. Check the torque specs for your specific version; for bellhousing bolts it is typically 35-65 N·m (26-48 lb-ft), depending on bolt diameter.
- Slide the transmission straight back until the input shaft clears the disc hub, without letting the weight of the transmission hang on the shaft. Once it is clear of the splines, lower the transmission and roll it out.
- Loosen the pressure plate bolts evenly in a crisscross pattern, in 2-3 passes, then remove the pressure plate and clutch disc.
- Inspect the flywheel for signs of overheating, deep grooves and runout. Resurface or replace it if necessary. Inspect the rear crankshaft seal: if there are oil leaks, replace it now, because you will not have access later.
- Inspect the release fork, the pivot, the contact points and the release bearing guide sleeve. Replace worn parts. Apply a thin layer of high-temperature grease to the input shaft splines and to the sliding points of the fork. Remove any excess grease so it does not get onto the friction linings.
- Wipe the working surfaces of the flywheel and pressure plate with brake cleaner or degreaser. Install the new disc with the protruding hub side oriented according to the markings (the disc is labeled "flywheel side" or similar). Center the disc with the alignment tool using the pilot bearing (bushing) in the crankshaft.
- Tighten the pressure plate bolts evenly in a crisscross pattern, in several passes. The pressure plate bolt torque is typically 15-25 N·m (11-18 lb-ft); check the exact value against the markings on your pressure plate. Remove the alignment tool.
- Install the new release bearing on the fork and make sure it slides freely on the sleeve. Check the transmission input shaft seal and replace it if necessary.
- Bring the transmission back into position on the jack. If needed, engage a gear and turn the shaft slightly to line up the splines. Do not let the weight of the transmission rest on the disc. Tighten the bellhousing bolts to the specified torque.
- Reinstall the crossmember, starter, driveshaft (flange bolts tightened to spec, typically 25-40 N·m (18-30 lb-ft)), the wiring and sensors, and the shift lever and linkage.
- Install the slave cylinder, top off the fluid in the reservoir to the proper level, and bleed the clutch hydraulic system with a helper (the helper presses the pedal while you open the bleeder). Continue until the bubbles are gone and the pedal feels firm.
- Fill the transmission with oil (if you drained it) up to the lower edge of the fill hole. Reconnect the battery, then reinstall the engine cover and seats.
- Test operation: with the engine off, press the pedal several times and make sure it has full travel. Start the engine, shift through all the gears while stationary with the pedal depressed, and make sure there are no noises or vibrations. Take a test drive, avoiding hard launches for the first 300-500 km (about 200-300 miles) to let the linings bed in.
Common mistakes and warnings
- Working under a raised vehicle is dangerous: use only sturdy jack stands and chocks, and do not rely on a jack alone
- The transmission is heavy, so remove it only with a transmission jack
- Brake fluid damages paint and is harmful to skin
- Do not handle the disc with oily or dirty hands, and do not get grease on the friction linings
- If you have no experience disassembling transmissions, leave the job to a repair shop
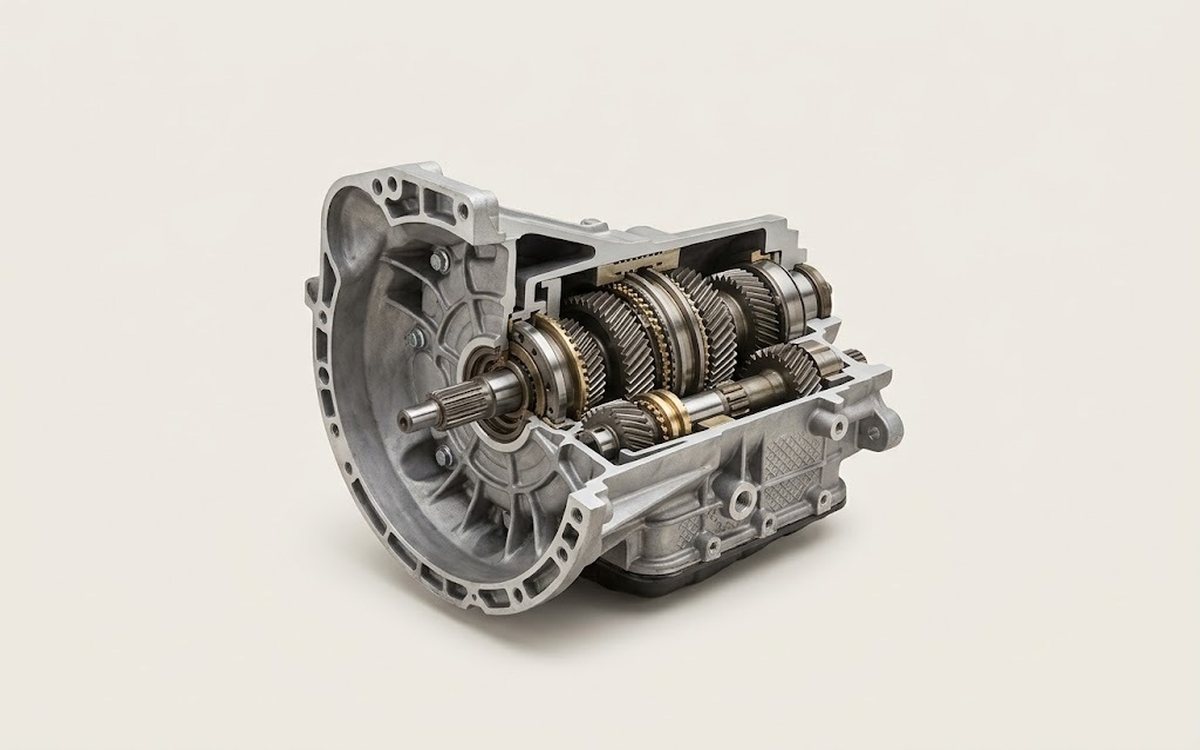 How it works · 3D
How a Manual Transmission Works
How the part you're working on actually works — in plain English, on a 3D model.
Open in 3D →