Autopapyrus · Mercedes-Benz C-Class W203 (2nd generation)
https://autopapyrus.com/guides/mercedes-benz/c-class/front-brake-pad-and-rotor-replacement/
https://autopapyrus.com/guides/mercedes-benz/c-class/front-brake-pad-and-rotor-replacement/
Compiled automatically from service literature and owner experience. Specs are for the typical configuration — check them against your exact car before you start.
Mercedes-Benz C-Class W203 (2nd generation): Front Brake Pad and Rotor Replacement
This is a routine job on the W203 front axle: rotors and pads are replaced together, as a pair on both sides. The OM611 engine does not affect the procedure. A 2006 car belongs to the W203 facelift and may have different rotor sizes, so check the rotor diameter and thickness against the old rotor before buying. The torque values below are taken from a C-Class 2000-2007 list based on UK data, so it is best to verify them against the manufacturer's specifications before reassembly.
Key figures
- Caliper bracket bolt torquesecures the bracket to the steering knuckle; set this on the torque wrench in step 10; under-tightened fasteners are dangerous115 N·m (85 lb-ft)
- Caliper guide bolt torquesecures the caliper itself to the bracket, step 1425 N·m (18 lb-ft)
- Lug bolt torquetighten in a crisscross pattern after lowering the car, step 16110 N·m (81 lb-ft)
- Bracket bolt socket sizerequires a socket with a long breaker bar (step 7)18 mm
Check these values against the manufacturer’s specification for your vehicle before you start.
Parts
4| № | Part | Alternatives |
|---|---|---|
| 01 | Front brake rotors, ventedpair | AlternativesBremboATETRWTextarBosch |
| 02 | Front brake pads (axle set)with wear sensor if the old pads had one | AlternativesBremboATETRWTextarBosch |
| 03 | Caliper guide boltsif needed | |
| 04 | Caliper guide pin repair kitif needed |
Tools
11- jack and jack stands
- lug wrench
- sockets (including 18 mm)
- Torx T30
- torque wrench
- breaker bar or ratchet
- brake caliper piston compression tool (or large C-clamp)
- wire brush
- brake cleaner
- copper grease
- hammer and penetrating oil for a stuck rotor
 There's a full repair manual for this car
Every system, wiring diagrams and torque specs — not just this job. Haynes and 12 more.
See manuals →
Step by step
18 steps- Park the car on level ground. Do not rely on the parking brake; place wheel chocks behind the rear wheels. Loosen the lug bolts on the front wheels, then raise the front of the car and set it on jack stands. Remove the wheel.
- Open the hood and check the brake fluid level in the reservoir. The level will rise when the pistons are pushed back, so if necessary draw off a little fluid with a syringe to keep it from overflowing. Dispose of the old fluid properly; it is corrosive to paint.
- Clean the caliper and bracket fasteners with a wire brush and brake cleaner. If the fasteners are rusty, treat them with penetrating oil.
- If the pad has a wear sensor, disconnect its connector from the pad and free the wire from its clips.
- Remove the caliper guide bolts and lift the caliper off the bracket. Do not let the caliper hang from the brake hose: hang it from a wire or rest it on the suspension arm.
- Remove the old pads from the bracket and note the position of the spring clips and retaining plates.
- Remove the two bolts securing the caliper bracket to the steering knuckle (18 mm socket) and take off the bracket. They are tightened firmly, so use a long breaker bar. Then remove the small rotor retaining screw (Torx T30), if fitted, and take off the rotor. If the rotor is stuck, carefully tap the hub section with a hammer; do not strike the friction surface.
- Thoroughly clean the hub mounting surface of rust with a wire brush and apply a thin layer of copper grease. This is important: otherwise the new rotor will wobble because it sits crooked. Wipe the new rotor with brake cleaner to remove the protective oil coating.
- Install the new rotor on the hub and secure it with the rotor retaining screw, torque about 9-10 N·m (7-7.5 lb-ft).
- Clean the bracket of dirt and rust, install it on the steering knuckle, and tighten the bracket bolts to 115 N·m (85 lb-ft).
- Check the caliper guides: the bushings should slide freely and be lubricated, and the dust boots should be intact. Apply special brake grease to the guide pins; do not apply grease to the working surfaces of the rotor and pads. Lubricate only the contact points between the pad backing plate and the bracket and piston, as needed, with a very thin layer.
- Install the new pads in the bracket, remembering the spring clips and plates. Connect the wear sensor, if there is one.
- Push the caliper piston all the way back with the tool, smoothly, watching the fluid level in the reservoir and the condition of the dust boot.
- Place the caliper over the pads and tighten the guide bolts to 25 N·m (18 lb-ft).
- Repeat the same procedure on the other side of the car. Both sides of the axle must be done.
- Install the wheels and, after lowering the car to the ground, tighten the lug bolts in a crisscross pattern to 110 N·m (81 lb-ft).
- Press the brake pedal firmly several times until it feels firm (the pistons must return to the pads), check the fluid level, and top up to the correct level.
- Check for leaks and unusual noises. Bed in the new pads and rotors over about 200-300 km: avoid hard braking from high speed. Recheck the lug bolt tightness after the first 50-100 km.
Common mistakes and warnings
- Brakes are a safety system
- If you have no experience working on brake systems, leave the job to a repair shop
- Replace pads and rotors on both sides of the axle
- Do not get grease on the working surfaces of the rotors and pads
- Do not press the brake pedal while the caliper is removed, as the piston may pop out
- Do not use rotors thinner than the minimum thickness marked on the rotor
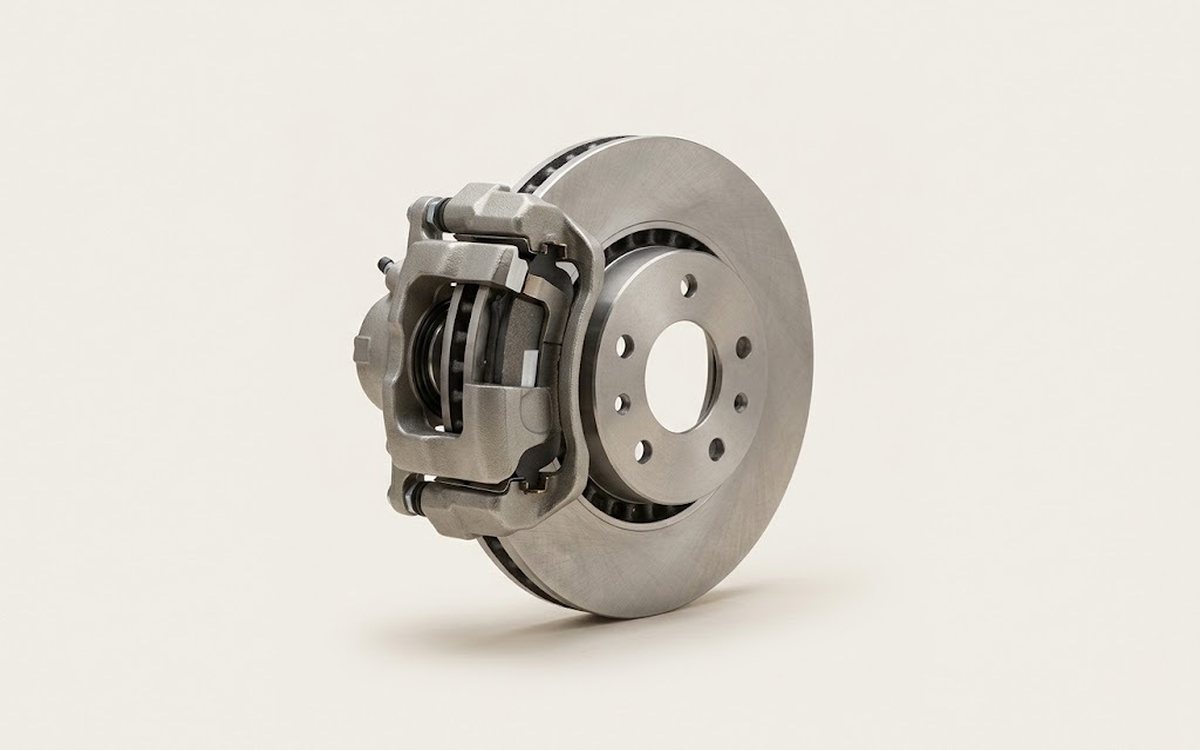 How it works · 3D
How Car Brakes Work
How the part you're working on actually works — in plain English, on a 3D model.
Open in 3D →